• Skip to primary navigation
  • Skip to main content
  • Skip to primary sidebar
  • Skip to footer

DANIELLE AT HOME

  • HOME
    • About
    • Contact
  • LIFESTYLE
    • Favourites
    • Goals
    • Home
      • DIY Projects
      • Organization
    • Holidays
      • Christmas
      • Easter
      • Halloween
      • New Years
      • Thanksgiving
      • Valentine’s Day
      • Gift Guides
  • STYLE
  • WELLNESS
  • FOOD + DRINK
    • Appetizers
    • Breakfast
    • Dessert
    • Drinks
    • Side Dishes
    • Snacks
    • Holiday Recipes
      • Christmas
      • Cinco De Mayo
      • Easter
      • Father’s Day
      • Halloween
      • Mother’s Day
      • New Years
      • St. Patrick’s Day
      • Thanksgiving
      • Valentine’s Day

Chocolate

Healthy Chocolate Peanut Butter Rice Krispie Squares

February 3, 2020 by admin Leave a Comment

I have a major treat for you today! Chocolate Peanut Butter Rice Krispie Squares!! These are so yummy!!! And guess what they don’t contain any sugar! I love to bake with natural sweeteners and this recipe fits the bill perfectly.

Healthy Chocolate Peanut Butter Rice Krispie Squares

I got the idea for this recipe from Ambitious Kitchen, Monique is such an inspiration to me and I’m so glad I adapted this recipe.

These Rice Krispie squares would be great as a healthy Valentine’s Day treat. If you or your partner are anything like me and my husband your still working on your 2020 goals and need to keep things pretty clean this Valentine’s Day. This hits the spot, although I am going to miss having a heart shaped box of chocolates or a couple of yummy linzer cookies!

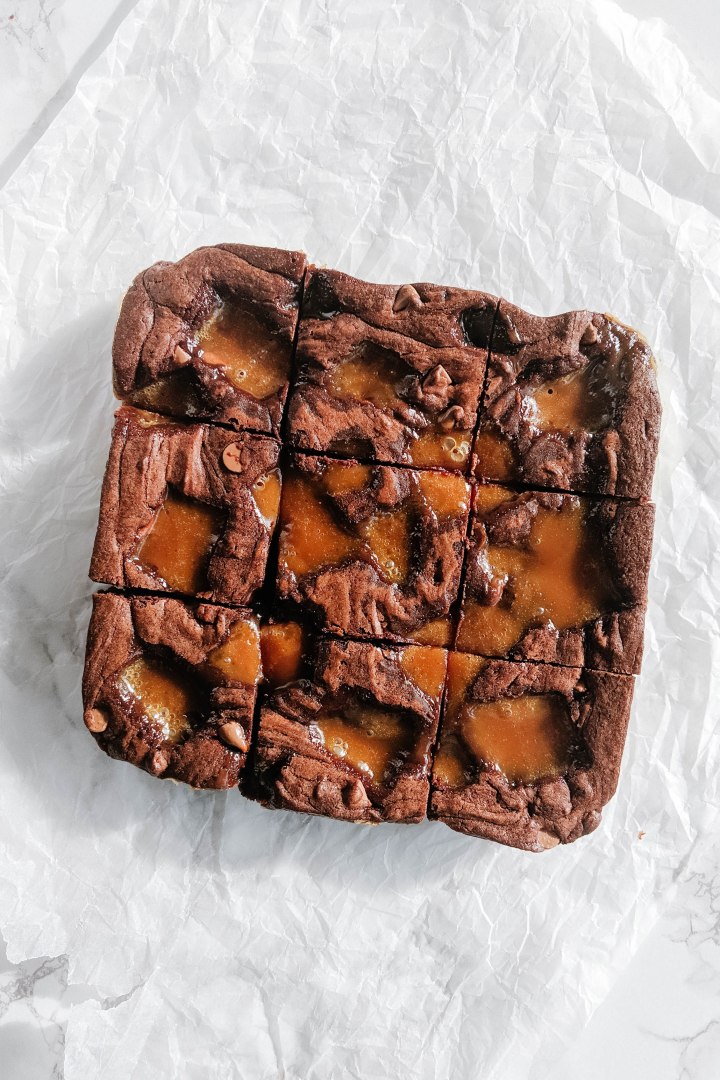
These Rice Krispie squares are rich and satisfying. The peanut butter base is sweetened with maple syrup and flavoured with vanilla (I wish all PB tasted this good!). The top is covered in a this layer of quality dark chocolate and sprinkled with flaky sea salt!

My mouth is watering just thinking about eating these again!

Healthy Chocolate Peanut Butter Rice Krispie Squares

What makes these so YUMMY!

  • Natural Peanut Butter – lets you control the sweetness and packs a punch of PB flavour! The Costco Brand is my fav!
  • Real Maple Syrup – My go to natural sweetener, and it’s vegan!
  • Vanilla – A must is every recipe!
  • Ground Flax Seed – Adds a nice boost of fibre and Omegas!
  • High Quality Dark Chocolate – My favourite brands are Green & Balck’s or Theo. My favourite dairy free brand is Lily’s.
  • Flaky Sea Salt – Creates that salty sweet combo we all love!

Tips For the Perfect Bar

  1. Heat the peanut butter mixture over low heat. If it’s too high the peanut butter will stiffen up and the bars won’t hold there shape.
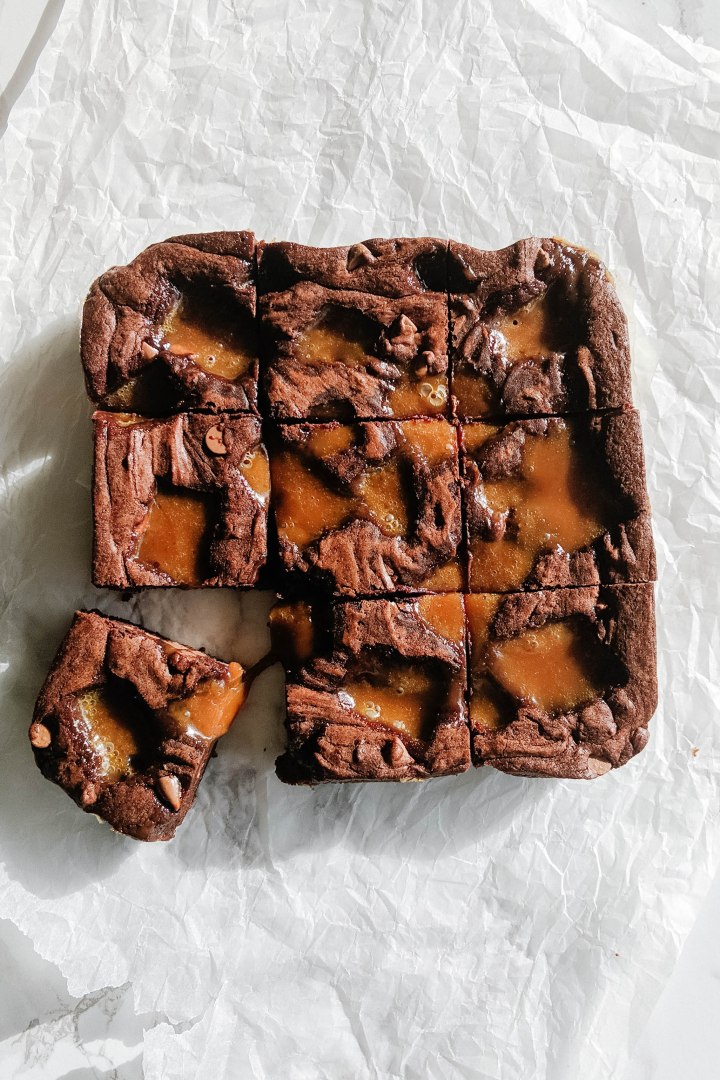
  2. When cutting the bars pull them out of the fridge for at least 10 minutes before you slice them. Bonus points if you use a hot dry knife to get nice clean cuts.
Healthy Chocolate Peanut Butter Rice Krispie Squares

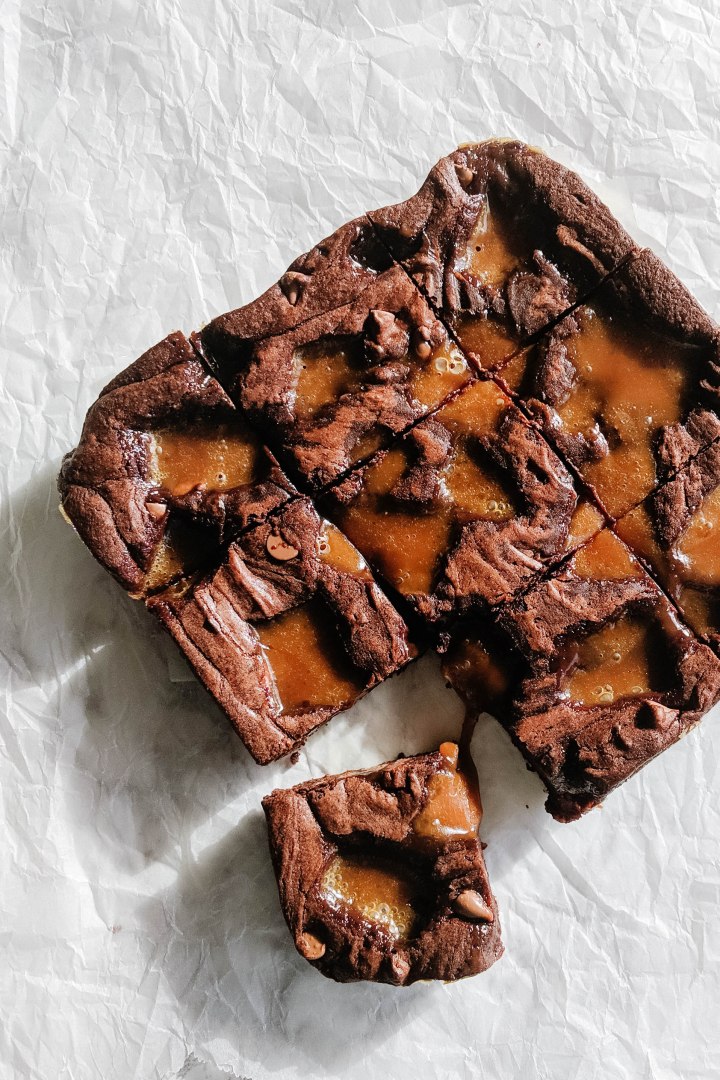
I love how this recipe turned out. I may have to sneak into the deep freeze tonight and grab one. I hope they make you and your sweetheart as happy as they make me!

Danielle xo

Healthy Chocolate Peanut Butter Rice Krispie Squares

Healthy Chocolate Peanut Butter Rice Krispie Squares

Rich and delicious but guilt free. Sweet and delicious peanut butter rice krispie squares coated with dark chocolate ans sprinkled with sea salt!
Print Recipe Pin Recipe
Prep Time 10 minutes mins
Chilling Time 1 hour hr
Total Time 1 hour hr 10 minutes mins
Course Dessert
Cuisine American
Servings 16 bars

Ingredients
  

Base

  • 2 tbsp Coconut Oil
  • 1 cup Natural Peanut Butter
  • 1/3 cup Maple Syrup
  • 1 tsp Vanilla Extract
  • pinch Salt
  • 2 1/2 cup Brown Rice Rice Krispies
  • 2 tbsp Ground Flax

Chocolate Coating

  • 1 100g Dark Chocolate Bar (70% cocoa or higher)
  • 1 tsp Coconut Oil

Instructions
 

  • Line a square baking pan with partchment paper. Grease lightly and set aside.
  • Melt coconut oil over low heat in a medium pot. Add peanut butter, maple syrup, vanilla and salt. Stir over heat until smooth and well combined. Remove From heat.
  • Add rice krispies and flax seeds to peanut butter mixture. Stir to combine.
  • Press rice krispie mixture into prepared pan.
  • Microwave dark chocolate and coconut oil in the microwave. Microwave in 30 second incriments stiring between. Pour over bars and spread evenly.
  • Refridgerate bars for atleast 1 hour before serving.

Notes

Adapted from Ambitious Kitchen
Keyword Healthy Food, Natural Sugar, Peanut Butter

Salted Caramel Brownies

March 22, 2019 by Danielle 1 Comment

Super fudgy brownies with pockets of delicious salted caramel!

IMG_20190224_145434_1-2x3

Brownies are probably one of my favourite desserts, and you already know about my love of salted caramel (here, here and here!). I love brownies because I can whip them up in one bowl. Fast easy and impressive… totally my jam! Now of course salted caramel is a wee bit more involved than a one bowl brownie, but I promise it is worth it! For this recipe we will be using my favourite Homemade Salted Caramel Sauce! It’s straightforward, delicious and there might be leftovers for your ice cream.

IMG_20190224_145727-2x3IMG_20190224_145808-2x3

Before we get into this mouth watering recipe I have a few tips.

  1. Freeze your caramel, this helps prevent over spreading when the brownies bake
  2. Don’t over bake, I life a gooey brownie so stick to the cook time below
  3. If cutting them is a challenge pot them in the fridge
  4. Sprinkle with sea salt at the end

These are seriously delicious and I defiantly need to make another batch very soon!

IMG_20190224_145734_1-2x3

Salted Caramel Brownies

Yields: 9-12 brownies (I recommend cutting these small since they are super rich!)

Ingredients:

  • Homemade Salted Caramel Sauce (we will use 2/3 of the recipe in the brownies the rest can be saved for another use – ps. it freezes great!)
  • 4 oz Unsweetened Chocolate
  • 1/2 cup Butter, melted
  • 1 1/4 cup Sugar
  • 2 Eggs
  • 1 Tsp Vanilla
  • 1 cup All Purpose Flour
  • Pinch of Salt
  • 1/2 cup Chocolate Chips
  • Optional: Flaked Seas Salt for finishing

Directions:

Make my Homemade Salted Caramel Sauce recipe. Pour 2/3 of the recipe into a square baking dish lined with parchment paper. Place in your freezer. Store the rest in an air tight container in your fridge or freezer.

Preheat the over to 350°F. Line an 8×8 inch baking dish with parchment paper, spray with baking spray. Set aside.

In a large microwave safe bowl place butter and chocolate. Microwave in 30 second intervals, stir in between until the chocolate and butter have just melted. Add sugar, eggs, vanilla and salt. Stir well until smooth and combined. Add flour, fold into batter until combined. Once combined stir in chocolate chips.

Pour brownie batter into prepared baking sheet. Remove caramel from the freezer. Break or cut into small squares. Place the caramels on to the brownie batter. Space evenly and press slightly into batter.

Bake the brownies for 20-30 minutes until set. Sprinkle with flakey sea salt if desired. Cool before serving. Enjoy!

Adapted from Pinch of Yum.

Salted Caramel Brownies - Yum!

Cherry and Dark Chocolate Frozen Yogurt

August 2, 2018 by Danielle Leave a Comment

I have been wanting to make frozen yogurt at home for years, but I don’t have an ice cream maker. It took a little work to figure out how to make it work, but I did it.

IMG_3294

This frozen yogurt is flavoured with dark chocolate and sweet cherries. I sweetened the yogurt with honey and vanilla extract.

I used a hand mixer to churn the frozen yogurt, but you could use a spoon or spatula.

This recipe was the perfect sweet treat, but a little but healthier then traditional ice cream.

Have you ever made frozen yogurt?

IMG_3288

Servings: 4

Ingredients:

  • 500 ml 2% Plain Greek Yogurt
  • 1/4 cup Honey (more or less to taste)
  • 1 Tablespoon Vanilla Extract
  • 1/4 cup Dark Chocolate, chopped
  • 1/4 cup Sweet Cherries, chopped

Directions:

Mix yogurt, honey and vanilla extract. Pour into a metal loaf or cake pan, freeze for 20-30 minutes.

Using a hand mixer or spoon churn the semi frozen ice cream, return the mixture to the freezer for 15 minutes. Repeat the process of freezing and churning until the mixture is the consistency of soft serve.

Mix in the chocolate and cherries and freeze for another hour until firm.

You may need to let the frozen yogurt sit on the counter for 10 minutes before scooping.

Chocolate Chunk Cookies

July 19, 2018 by Danielle Leave a Comment

I am cookie obsessed! I really don’t think there is anything better than a warm cookie, well maybe pie… or pasta. Ok I’m just obsessed with food. But seriously a homemade cookie is one of the best comfort foods.

IMG_3192-2

I have tried a lot of chocolate chip cookie recipes. Soft, chewy, cakey etc. I have a few favourites, but I think this one is my favourite, at least right now. These cookies are soft, but not doughy or under baked. They also have slightly crispy edges and a slight caramel flavour.

IMG_3174

These cookies use mostly brown sugar which makes the cookies extra flavourful. I also only use egg yolks in this recipe which is why the cookies stay so soft. As for the chocolate, in my house we use a mix of milk and semi sweet chocolate chunks, but you can use your favourite. This recipe also calls for chilling the dough. Chilling the dough will stop the cookies from spreading too much and keep the cookies soft.

What kind of chocolate do you use in your cookies? Dark, milk or semi sweet?

IMG_3193

Servings: 24

Ingredients:

  • 1 Cup Unsalted Butter
  • 1 Cup Brown Sugar, lightly packed
  • 1/4 Cup White Sugar
  • 4 Egg Yolks
  • 1 Tablespoon Vanilla
  • 1 3/4 Cup All Purpose Flour
  • 1/2 Teaspoon Baking Soda
  • 1/2 Teaspoon Salt
  • 1 Cup Chocolate Chips or Chunks (Dark, milk or semi sweet)

Directions:

Melt butter in the microwave for 30 seconds, or until just starting to melt. Cream butter and sugar together until creamy. Add eggs and vanilla, beat until combined.

Whisk flour, baking soda, and salt together in a medium-sized bowl. Add the dry ingredients to the butter and sugar mixture. Beat on low until just combined. Fold in chocolate chips. Cover with plastic wrap and refrigerate dough for at least 3 hours or overnight.

Preheat the oven to 350°F. Line two baking sheets with parchment paper or silicone baking mats. Using an ice cream scoop or two spoons to scoop out the dough, space the cookies 2 inches apart. Bake cookies for about 13 – 15 minutes until golden on top.

Adapted from Amanda Frederickson

Primary Sidebar

Danielle at Home

Hi, I’m Danielle. I am a twenty something woman working her office job by day and blogging at night! I’m married, a new home owner and I love sharing all my favourite things on this blog. So grab a glass of wine and follow along. I’m so glad you’re here!

SUBSCRIBE & FOLLOW

Pinterest
Instagram
Facebook
Twitter

Footer

Copyright © 2025 Danielle at Home on the Foodie Pro Theme