• Skip to primary navigation
  • Skip to main content
  • Skip to primary sidebar
  • Skip to footer

DANIELLE AT HOME

  • HOME
    • About
    • Contact
  • LIFESTYLE
    • Favourites
    • Goals
    • Home
      • DIY Projects
      • Organization
    • Holidays
      • Christmas
      • Easter
      • Halloween
      • New Years
      • Thanksgiving
      • Valentine’s Day
      • Gift Guides
  • STYLE
  • WELLNESS
  • FOOD + DRINK
    • Appetizers
    • Breakfast
    • Dessert
    • Drinks
    • Side Dishes
    • Snacks
    • Holiday Recipes
      • Christmas
      • Cinco De Mayo
      • Easter
      • Father’s Day
      • Halloween
      • Mother’s Day
      • New Years
      • St. Patrick’s Day
      • Thanksgiving
      • Valentine’s Day

Holiday Recipes

Peppermint Bark

December 18, 2018 by Danielle Leave a Comment

Today marks one week until Christmas….. let that sink in a moment.

Ok how are we all doing? Stressed, excited, organized, overwhelmed? Personally I’m feeling pretty good. I think I have things pretty under control. Since we travel at Christmas I’ve always had to be organized well in advance. And I think this year will be the smoothest… knock on wood. 

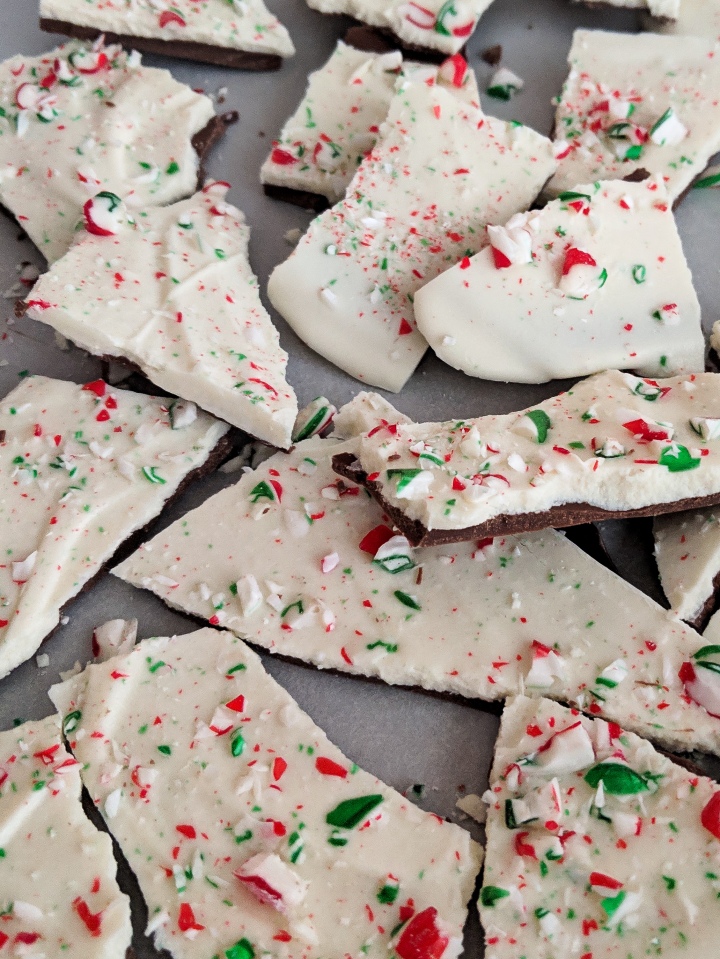
Today I am sharing a recipe I have made since I was a kid. I would make this with my mom and brother every Christmas as a kid and it’s still one of my favourites today. Peppermint Bark is seriously simple to make and so delicious. It looks great on a cookie tray, and it’s also a great hostess gift.

It’s so easy you can even make it in the microwave. Don’t we all need easy at the holidays? So give it a try and let me know what you think.

Peppermint Bark

Yields: 1 sheet pan

Ingredients:

  • 16 ounces White Chocolate
  • 8 ounces Milk or Dark Chocolate
  • 1 1/2 teaspoons Coconut Oil, divided
  • 1/4 teaspoon Peppermint Extract
  • 5 Candy Canes, crushed

Directions:

Line a large baking sheet with parchment paper. Set aside.

In a microwave safe bowl melt 6 ounces of the milk chocolate in 30 second intervals (1-2 mins), string in between. Stir in remaining chocolate and 1/2 teaspoon of coconut oil. Spread the chocolate thinly on the prepared baking sheet. Allow to set in the refrigerator for 20 minutes.

Repeat the same melting process with 12 ounces of the white chocolate. Stir remaining chocolate, remaining coconut oil and peppermint extract into the chocolate. Pour chocolate over the set milk chocolate and spread out to cover. Sprinkle crushed candy canes all over the white chocolate. Return bark to the fridge to set for at least 2 hours or overnight.

Once set break bark into sizes of your choosing. Store in an air tight container in your refrigerator for up to 2 weeks. You can also store in your freezer for a few months.

You may also like…

Sugar Cookie Snowflakes

Peppermint Chocolate Cookies

December 15, 2018 by Danielle Leave a Comment

Week three in my Christmas cookie series has arrived! If you missed the last two weeks find those posts here, and here.

This weeks cookie is so so delicious. These cookies are so delicious and rich, there are the perfect chocolate cookie for your Christmas spread. I actually have to make a few more batches of these since we can’t stop eating them!

I love the combination of a chewy brownie like double chocolate cookie, cooling peppermint and rich white chocolate. It truly is perfection. These are also great warmed up and eaten with a fork like a warm brownie. YUM!

Now when it comes to decorating these cookies with white chocolate the world is your oyster. Light drizzle, heavy drizzle. Half dunk, full dunk. Go ahead and do whatever you love. Just remember to work fast so your crushed candy canes will stick! Also did you know you can buy crushed candy canes? I found that out shortly after making this recipe and am so annoyed I wasn’t informed earlier. Crushing candy canes is such a pain. Oh well I guess I can buy pre crushed for next year!

Make sure to come back next week for the final Christmas cookie in this series…. I can’t believe we’re already there!

Peppermint Chocolate Cookies

Yields: 24 cookies 

Ingredients:

  • 1/2 Cup Unsalted Butter, softened
  • 1/2 Cup White Sugar
  • 1/2 Cup Brown Sugar, packed
  • 1 Egg
  • 1 Teaspoon Vanilla Extract 
  • 1 Teaspoon Peppermint Extract
  • 1 Cup All Purpose Flour
  • 1/2 Cup + 2 Tablespoons Unsweetened Cocoa Powder
  • 1 Teaspoon Baking Soda 
  • 1/8 Teaspoon Salt
  • 1 Cup Mini Chocolate Chips
  • 8 Ounces White Chocolate
  • 3 Candy Canes, crushed

Directions:

Using your stand mixer beat the butter on medium speed until smooth and creamy. Add the sugars and beat on medium high speed until fluffy and combined. Mix in the egg, vanilla and peppermint on high speed. 

In a medium bowl whisk the flour, cocoa powder, baking soda and salt together until combined. On low speed add the dry ingredients to the wet and mix until just combined. Beat in the chocolate chips. Cover and chill for at least 3 hours or overnight. 

Preheat oven to 350°F (177°C). Line two large baking sheets with parchment paper. Scoop out dough and roll into balls. Place on the cookie sheet about 2 inches apart. Bake the cookies for 8-10 minutes.  Allow to cool for 5 minutes on the cookie sheet. Then transfer to cooling rack to cool completely.

Melt the white chocolate in the microwave, string in 30 second intervals. Drizzle or dip each cooled cookie in the white chocolate. Sprinkle with crushed candy canes. Repeat for all the cookies. Place in the refrigerator to set completely.

Adapted from Sally’s Baking Addiction.

You may also like…

Sugar Cookie Snowflakes
Cranberry White Chocolate Oatmeal Cookies

Eggnog French Toast Casserole

December 11, 2018 by Danielle Leave a Comment

I have never made Christmas breakfast, but I have hosted a few pre Christmas brunches for friends and you will always fine some form of a french toast casserole on my brunch table. It’s sweet, delicious and always the first thing to go!

Today I am sharing a recipe for Eggnog French Toast Casserole. Now this recipe is based of a bread pudding and doesn’t have a crumble topping like many french toast casseroles do. I just don’t think it needs it. It is sweet and delicious enough sans topping. See I’m trying to save you a few calories for later in the day…. I’m always looking out for you!

What makes this recipe perfect for Christmas morning is that you can prep in all a day ahead and store in the fridge until you’re ready to bake. Then when everyone wakes up you can pop it in the oven and leave it to bake while everyone opens their gifts.

For this recipe I used french bread, but Challah would also be great. I know it can be difficult to find in a regular grocery store, so if you’re trying to make as few trips to the store this Christmas then stick with the french bread. For the best texture when you get home from the store cube your bread and leave it on the counter covered with a kitchen towel. You can leave it there for a few hours or a few days either way it will dry out a bit and soak the custard up much better.

I like to dust mine with powdered sugar and cinnamon, and then top each serving with a healthy dose of maple syrup!

Eggnog French Toast Casserole

Serves: 8-10

Ingredients:

  • 1 Loaf of Bread, french or challah
  • 6 Eggs
  • 3 Cups Eggnog
  • 1/2 Cup White Sugar
  • 2 Tablespoons Bourbon (can substitute for Vanilla Extract, 2 teaspoons)
  • 1/8 Teaspoon Salt
  • Optional: powdered sugar, ground cinnamon, and maple syrup for topping

Directions:

Cut bread into 1 inch cubes. Place in 9×13 baking pan, cover with a dish towel. Set aside to stale for a minimum of 2 hours or up to 48 hours.

In a large bowl whisk together eggs, eggnog, sugar, bourbon and salt. Pour mixture evenly over cubed bread. Cover and place in the fridge for at least one hour or overnight.

Preheat the oven to 350°F. Bake the casserole uncovered for 45 minutes to an hour. The top should be golden brown and a cake tester should come out clean. Dust the casserole with powdered sugar and cinnamon. Serve with pure maple syrup.

Recipe adapted from The Kitchn.

Primary Sidebar

Danielle at Home

Hi, I’m Danielle. I am a twenty something woman working her office job by day and blogging at night! I’m married, a new home owner and I love sharing all my favourite things on this blog. So grab a glass of wine and follow along. I’m so glad you’re here!

SUBSCRIBE & FOLLOW

Pinterest
Instagram
Facebook
Twitter

Footer

Copyright © 2025 Danielle at Home on the Foodie Pro Theme