• Skip to primary navigation
  • Skip to main content
  • Skip to primary sidebar
  • Skip to footer

DANIELLE AT HOME

  • HOME
    • About
    • Contact
  • LIFESTYLE
    • Favourites
    • Goals
    • Home
      • DIY Projects
      • Organization
    • Holidays
      • Christmas
      • Easter
      • Halloween
      • New Years
      • Thanksgiving
      • Valentine’s Day
      • Gift Guides
  • STYLE
  • WELLNESS
  • FOOD + DRINK
    • Appetizers
    • Breakfast
    • Dessert
    • Drinks
    • Side Dishes
    • Snacks
    • Holiday Recipes
      • Christmas
      • Cinco De Mayo
      • Easter
      • Father’s Day
      • Halloween
      • Mother’s Day
      • New Years
      • St. Patrick’s Day
      • Thanksgiving
      • Valentine’s Day

Snacks

Salted Caramel Chocolate Chip Cookies

November 6, 2018 by Danielle Leave a Comment

IMG_20181026_160103_1.jpg

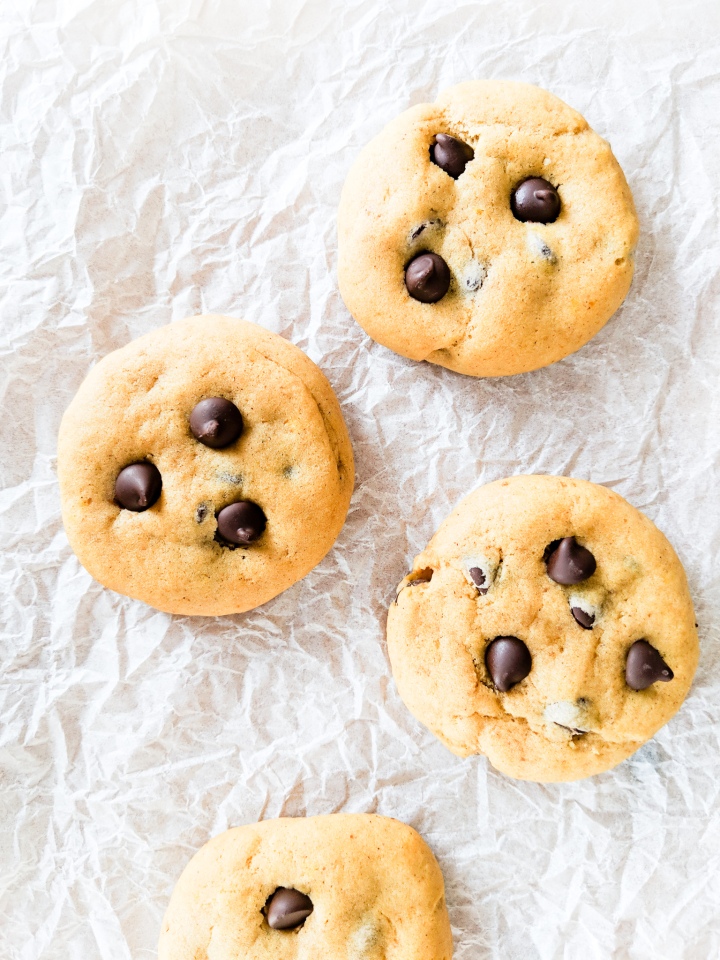
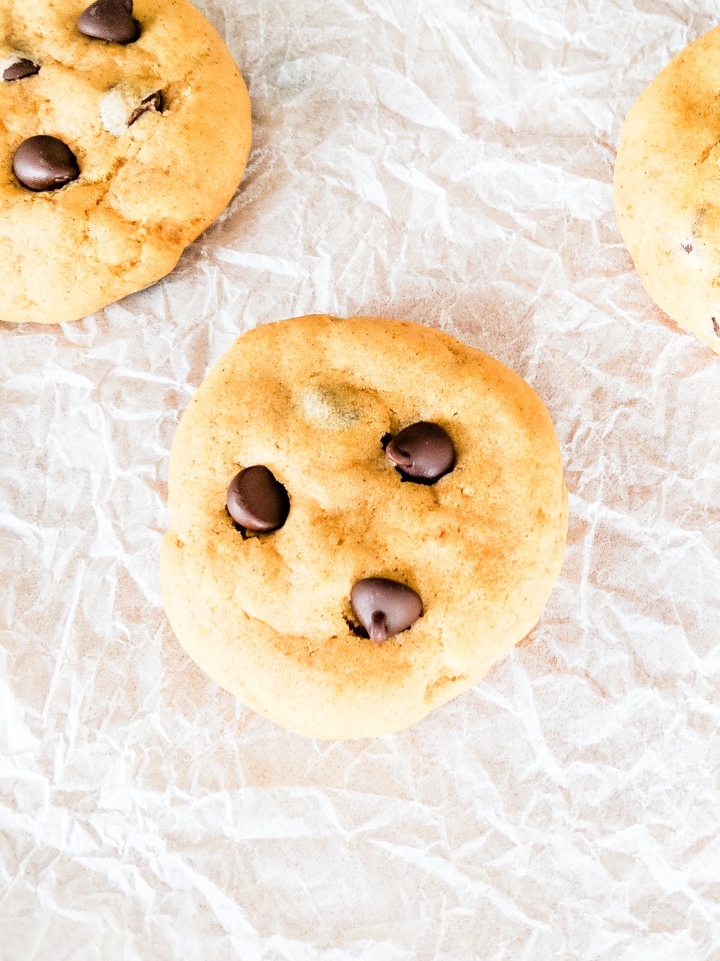
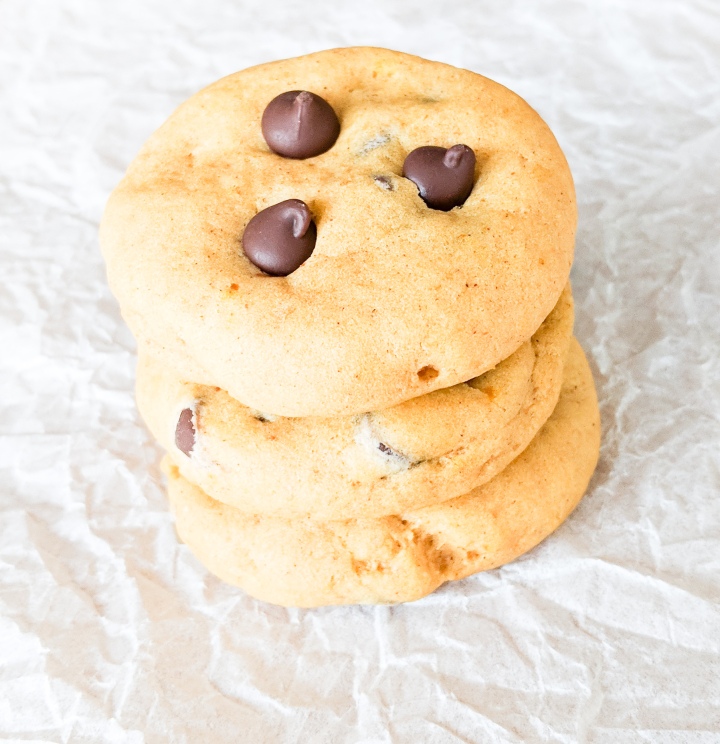
So a few months back I was at the grocery store picking up a few things when I spotted a bag of Salted Caramel Chocolate Chip Cookies. Of course being the cookie obsessed woman that I am I had to buy them. I am slightly embarrassed to say that my husband and I ate the entire bag later that evening. Since then we have vowed to never eat that many cookies in one sitting ever again. That stomach ache was horrible… but probably worth it. Since then I have tried finding these cookies every time I go to the store. It’s been months and I still can’t find them. Isn’t that just the worst? So I’ve been craving these delicious soft, chewy caramely (not a word…just go with it!) cookies for months. Since I couldn’t find them I thought I’d try making them. Why not right?

After the first batch I asked Calvin, my husband and eager tester for his brutally honest opinion. He had a two suggestions… more chocolate and smaller chunks of caramel. He then thought about it for a minute and said actually these are amazing! So of course I still made a few tweaks because I can’t leave well enough alone, but he was right these are amazing! Dare I say better then the store bought version.

IMG_20181026_160151

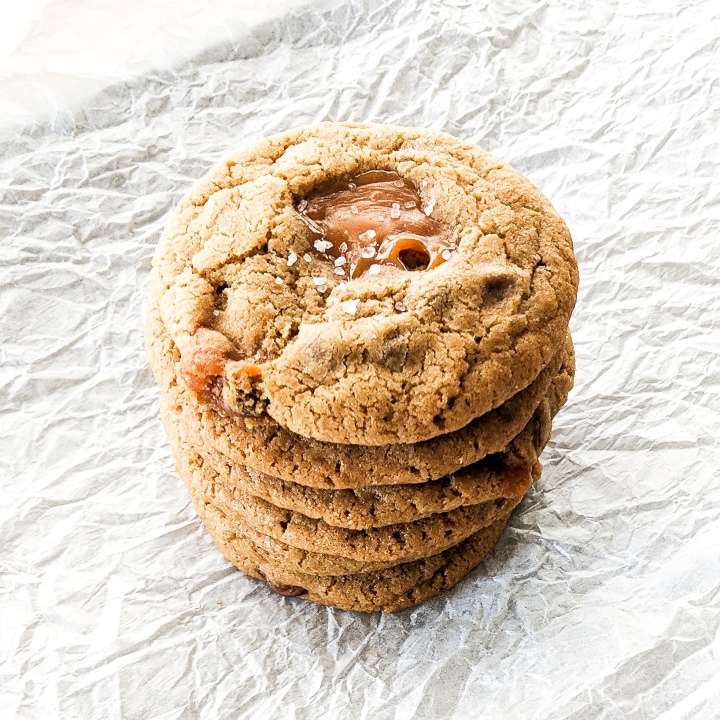
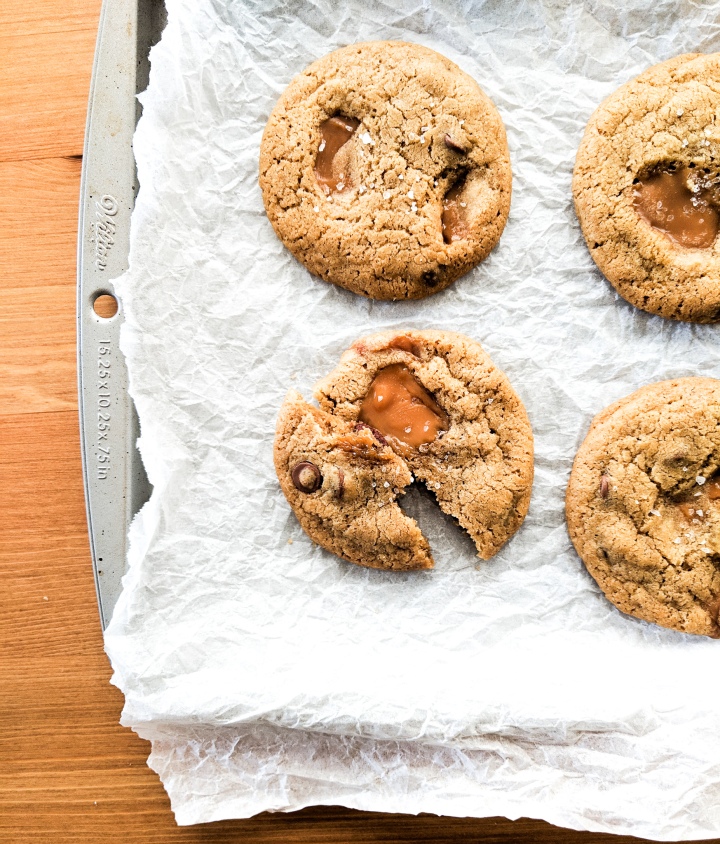
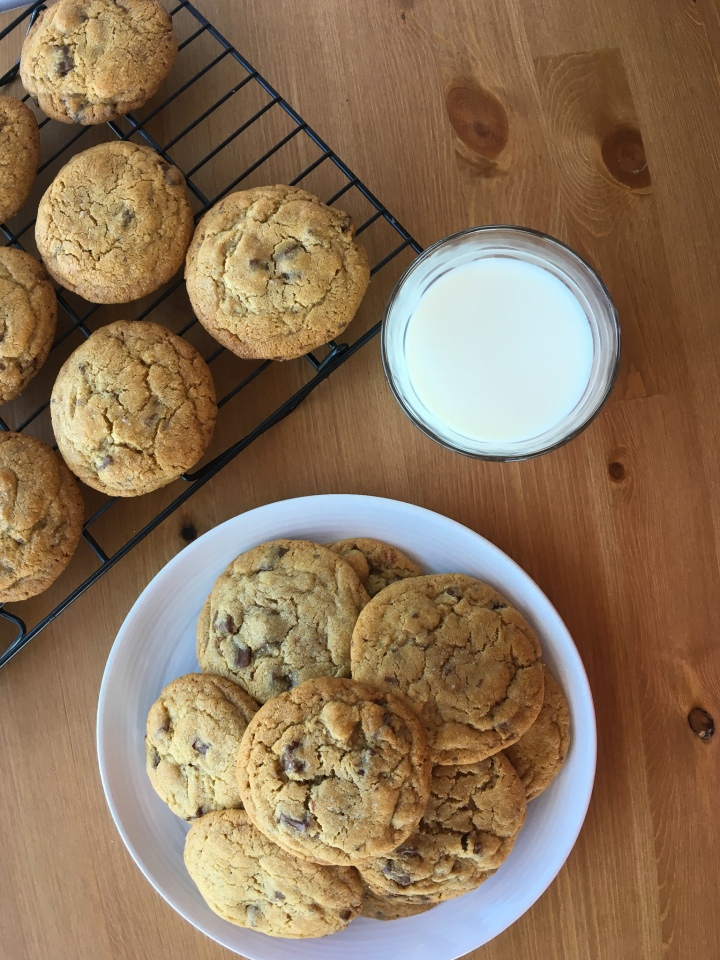
This cookie recipe is an adaptation of my favourite Chocolate Chip Cookie recipe. I love it because it’s super flavourful, rich, soft and chewy without being cakey or doughy. It was the perfect base for these cookies. I also chose to use milk chocolate chips in this cookie because it’s a favourite in my house, but since these are salted I thought the extra sweetness would work well. As for the caramel part of this cookie I first thought I would make homemade caramels and pack these cookies full of them. But really who has time for that? Honestly? As much as I love homemade caramel sauce and we know I love it, here, here and here. I just didn’t this the extra effort was worth it in this case. I used those caramels you get at Halloween that are wrapped in cellophane. Now that I think about it though unwrapping all those caramels was kind of a pain in the ass… possibly more then making homemade caramel. Regardless I used soft caramel candies and chopped them up into halves and quarters to add them to the batter. You need to chop them otherwise you get huge chunks of caramel that are crazy chewy and will remove all your loose fillings!

IMG_20181026_160154

These cookies might actually be the best cookies I’ve ever made, but my Christmas cookies are coming soon so maybe we can top them? If it means more taste testing I’m up for the challenge!

IMG_20181026_155825

Salted Caramel Chocolate Chip Cookies

Yields : 16-18 Cookies

Ingredients:

  • 1 Cup Unsalted Butter
  • 1 Cup Brown Sugar, lightly packed
  • 1/4 Cup White Sugar
  • 4 Egg Yolks
  • 1 Tablespoon Vanilla
  • 1 3/4 Cup All Purpose Flour
  • 1/2 Teaspoon Baking Soda
  • 1/2 Teaspoon Salt
  • 3/4 Cup Chocolate Chips (Dark, milk or semi sweet)
  • 40 Caramel Candies (approx 1/2 cup)
  • Flakey Sea Salt

Directions:

Melt butter in the microwave for 30 seconds, or until just starting to melt. Cream butter on high until whipped and pale white in colour about 2 minutes. Add sugar and beat on high until smooth about 1 minute. Add eggs and vanilla, beat on medium until combined.

Whisk flour, baking soda, and salt together in a medium-sized bowl. Add the dry ingredients to the butter and sugar mixture. Beat on low until just combined. It’s ok if some four is still showing.

Chop un wrapped caramel candies into thirds and quarters. Measure out a half cup of the chopped caramels. Reserve the rest for later. Fold in chocolate chips and caramel pieces. Cover with plastic wrap and refrigerate dough for at least 3 hours or overnight.

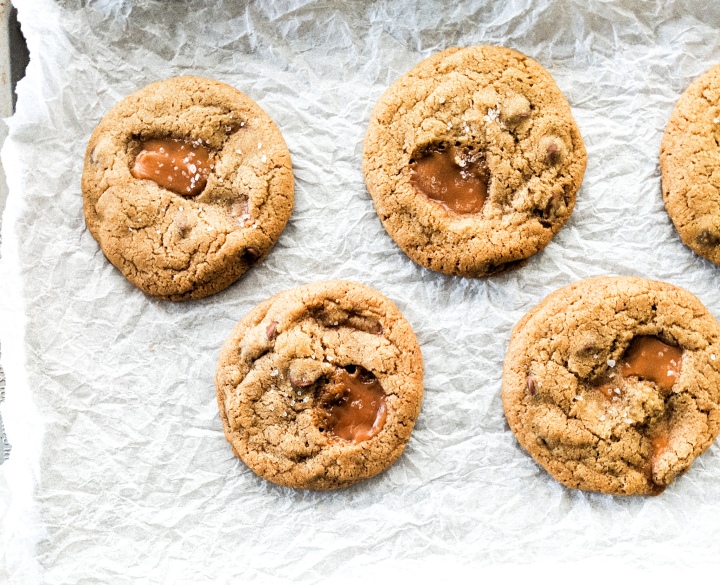
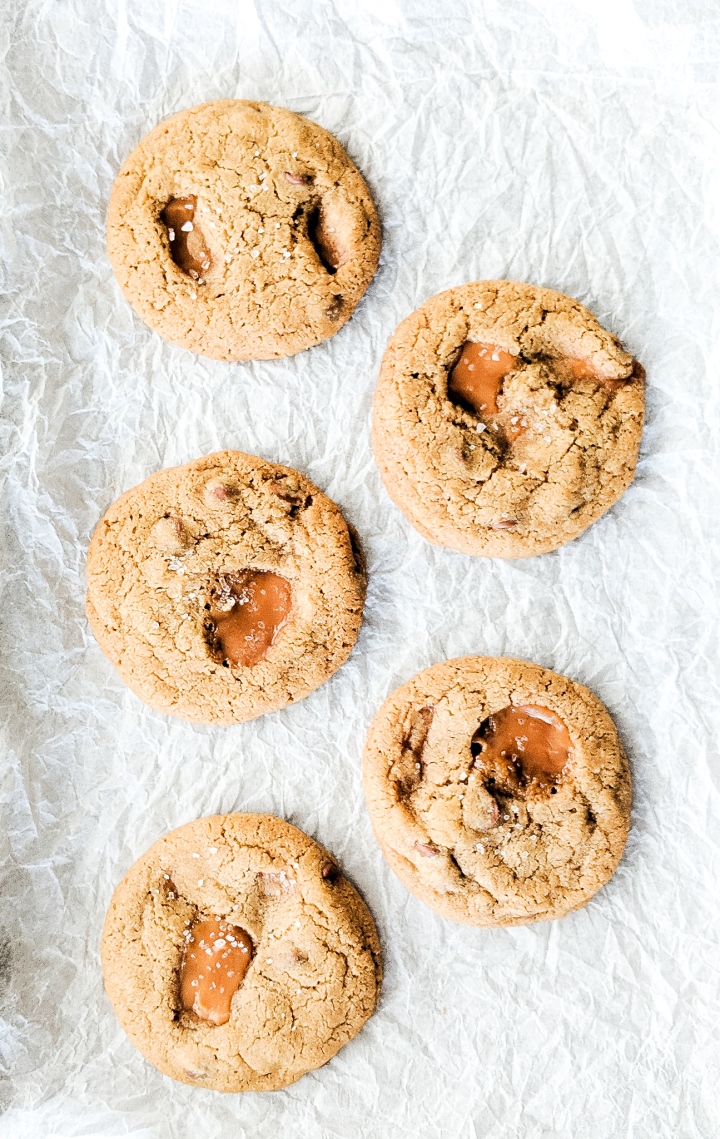
Preheat the oven to 350°F. Line two baking sheets with parchment paper or silicone baking mats. Using an ice cream scoop or two spoons to scoop out the dough. Roll the dough into balls and press on or two of the remaining caramel pieces into the top of each ball of dough. Space the cookies 2 inches apart on the baking sheet.

Bake cookies for about 15 – 17 minutes until the edges are golden brown. Remove from the oven and sprinkle with flaky sea salt immediately. Allow to cool on the baking sheet for 10 minutes before transferring to a cooling rack.

Adapted from Chocolate Chunk Cookies
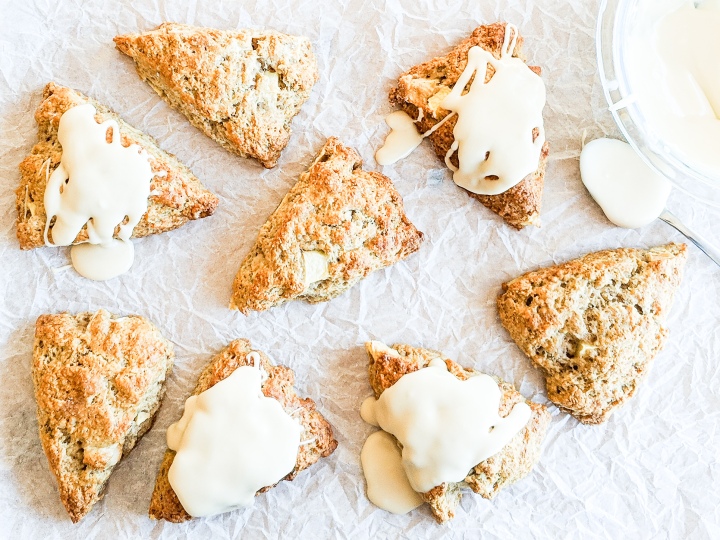
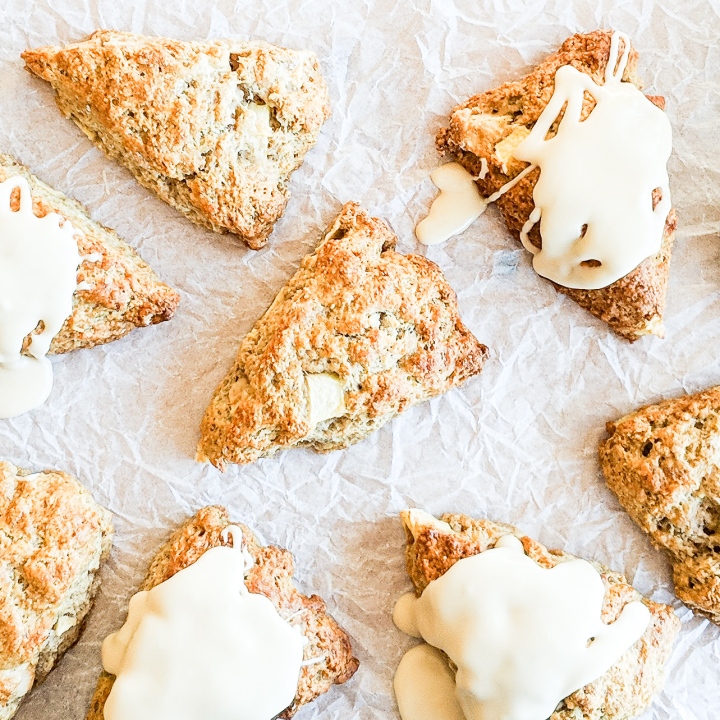
You may also like…

IMG_3192-3

Chocolate Chunk Cookies


IMG_20180929_134835

Pumpkin Chocolate Chip Cookies


Homemade Caramel Corn

October 30, 2018 by Danielle 2 Comments

IMG_20181012_142119

BOO! I have one more Halloween post before the big day tomorrow! I hope you all enjoy the fun and spooky day, and if you have kids I hope they have the best time trick or treating! Like I said in this post, I wish I could go! Anyway I hope you are all doing something festive (I love festive!).

Today I thought I’d share one of my favourite fall recipes that I think is the perfect treat for Halloween night! I think this is a great recipe if you’re staying in watching a scary movie, or if you’re having people over for a Halloween party. I know I get sick of these mini chocolate bar and prefer to have festive fall treats at Halloween parties.

Tomorrow we will be snacking on Caramel Corn, drinking a beer and watching a scary movie. Oh and by scary movie I mean Hocus Pocus….it’s the scariest movie I can handle (Pathetic I know!).

IMG_20181012_142314_1

I always found caramel intimidating, so I never tried making my own caramel corn until recently. Once I did I felt really silly for waiting so long since it is incredibly easy! It’s perfect for halloween or really and day ending in Y! We’re addicted! So please give this a try it’s really easy and really delicious!

IMG_20181012_142115

Homemade Caramel Corn

Yields: 12 Cups

Ingredients:

  •  12 Cups Popped Popcorn (1 cup kernels, approx.)
  •  1 Cup Unsalted Butter
  •  1 1/2 Cup Brown Sugar, packed
  •  1/3 Cup Light Corn Syrup
  •  1/2 Teaspoon Vanilla Extract
  •  1 Teaspoon Salt
  •  1 Teaspoon Baking Soda

Directions:

Preheat oven to 225 degrees F. Line a large baking sheet (you may need two) with parchment paper. Spread popcorn evenly on baking sheet, and set aside.


In a medium saucepan on medium heat add butter, brown sugar and corn syrup. Whisk together until butter has melted and ingredient combine into a smooth sauce. This will take 3-5 minutes. Add vanilla, salt and baking soda to the sauce. Whisk constantly. Sauce will lighten in colour and increase in volume. Continue to cook for 2-4 minutes to thicken, whisking constantly. Remove from the heat.

Pour sauce over the trays of popcorn. Use a spatula (silicone is best) to toss popcorn and coat. This does not need to be perfect.

Bake popcorn for 30 minutes. Check on the popcorn every 10 minutes. Remove the baking sheet from the oven and toss the popcorn again to continue coating and breaking up chunks. Repeat this process 2-3 times over the 30 minute baking time.

Remove baking sheet from the oven set aside and allow to cool for at least an hour. Check on your popcorn after 30 minutes to break up any large clumps that are forming. Once fully cool serve immediately or store in an airtight contained for up to 5 days.


Adapted from Homemade Hooplah, Homemade Caramel Popcorn.

Apple Cinnamon Scones with Maple Glaze

October 18, 2018 by Danielle Leave a Comment

IMG_20180928_123811

I remember when I was a little girl helping my Grandma prepare for her Y’s Menette meeting’s. We would make tea sandwiches and treats together and prep the living room for the meeting. She would let me hang around the meetings for a few minutes to have a snack and then I would go off to help Grandpa in the garden or play some cards. I thought she was so fancy making her afternoon tea.

IMG_20180928_123759

Afternoon tea is never complete without scones. I have been making scones with my Grandma almost as long as I have been making pies. My Grandma used a recipe passed down to her from her mother. My mom uses the same recipe and at my bridal shower my Grandma gave me a copy of the recipe. Now the original recipe has gotten rave reviews from family and friends for years, they really are the best, but I’m not sure if I’m ready to share the family secret just yet.

Today I am sharing a variation of the original recipe, Apple Cinnamon Scones with Maple Glaze. Perfect for fall and I think Grandma would approve. I made these scones with some whole wheat flour because I like the nutty flavour it has which compliments the cinnamon and apple. I also added the glaze to the scones, because everything is better with maple glaze.

IMG_20180928_123759-2

Whole Wheat Apple Cinnamon Scones with Maple Glaze

Yields: 8 Scones

Ingredients:

Scones:

  • 1 1/4 Cup All Purpose Flour
  • 3/4 Cup Whole Wheat Flour
  • 2 Teaspoons Baking Powder
  • 1 Teaspoon Cinnamon
  • 1/4 Teaspoon Salt
  • 1/4 Cup Granulated Sugar
  • 1/3 Cup Unsalted Butter, cold and cubed
  • 1 Apple, diced
  • 1 Large Egg
  • 3/4 Cup Milk ( I use 2%, but any dairy milk will work)

Glaze

  • 2 Cups Confectioner (Icing) Sugar
  • 1/4 Cup Pure Maple Syrup
  • 3 Tablespoons Half and Half

Directions:

Preheat the oven to 400° F. Line a baking sheet with parchment paper, set aside. Sift together flour, baking powder, cinnamon, salt and sugar. Using two forks or a pastry cutter cut butter into flour. Stir in the diced apple.

In a liquid measuring cup whisk together milk and egg. Pour 3/4 of a cup of the mixture into the dry ingredients, set the remaining mixture aside. Using your hands or a wooden spoon gently mix the wet and dry ingredients until just combined (some flour may still show).

Turn the dough onto a floured surface and form into a disk. Flatten the dough with your hands until it is 2 inches tall (do not use a rolling pin). Cut the dough into 8 wedges. Lay the scones on the baking sheet. Brush the scones with the reserved milk and egg mixture. Bake scones for 20-30 minutes until golden brown. Allow to cool completely.

In a small bowl whisk confectioner sugar, maple syrup and half and half together. Glaze should be opaque, thick and pourable.

Drizzle glaze onto cooled scones. Allow glaze to set before serving.

Adapted from, Granny Robinson’s Scones

Pumpkin Chocolate Chip Cookies

October 9, 2018 by Danielle 2 Comments

IMG_20180929_134842.jpg

Happy Belated Canadian Thanksgiving! I spent the whole weekend spending quality time with family, enjoying delicious food and drinks. It was great to disconnect from my phone and just hangout all weekend. Now that I’m back home it’s back into the kitchen, and today I am sharing a recipe for Pumpkin Chocolate Chip Cookies.

These cookies are so easy and get gobbled up (Thanksgiving Joke!) so fast! And they are the perfect way to use up any left over canned pumpkin from making pumpkin pies and breads.

IMG_20180929_134745

These cookies are soft and chewy, slightly spiced, deliciously sweet and chocolatey (is that a word?). I was very sceptical for the pumpkin chocolate combo and resisted it for quite awhile, but now that I know what I’ve been missing I’ll be making these every fall.

These cookies are actually eggless which is great for feeding a crowd since so many people have allergies. You could also sub non dairy butter and dairy free chocolate chips to make these cookies vegan. I love the versatility.

Have I convinced you to add these to your fall baking list yet?

IMG_20180929_134835

Pumpkin Chocolate Chip Cookies

Yields: 18 Cookies

Ingredients:

  • 1/2 Cup Unsalted Butter, partially melted
  • 1/4 Cup Brown Sugar, packed
  • 1/2 Cup White Sugar
  • 1 Tsp Vanilla Extract
  • 6 Tbsp Pumpkin Puree (not pumpkin pie filling)
  • 1 and 1/2 Cups All Purpose Flour
  • 1/4 Tsp Salt
  • 1/4 Tsp Baking Powder
  • 1/4 Tsp Baking Soda
  • 1 Tsp Pumpkin Pie Spice
  • 1/2 Cup Chocolate Chips

Directions:

Microwave the butter for 30-60 seconds until butter is half melted. In a medium bowl, whisk the butter, brown sugar, and granulated sugar until smooth. Whisk in the vanilla and pumpkin until smooth. Set aside.

In a large bowl whisk together the flour, salt, baking powder, baking soda, and pumpkin pie spice. Pour the wet ingredients into the dry ingredients and mix together with a wooden spoon or spatula. Fold in the chocolate chips. Chill the dough for 1 hour.

Preheat oven to 350°F. Roll the dough into balls, place them on a baking sheet and slightly flatten. The cookies will only spread minimally. Bake the cookies for 10 minutes. Press more chocolate chips onto the tops, if desired. Allow the cookies to cool for at least 5 minutes on the cookie sheets before transferring to a cooling rack.

Adapted from Sally’s Baking Addiction.

Healthier Pumpkin Bread

October 2, 2018 by Danielle Leave a Comment

IMG_20180929_140830.jpg

Now that it is officially October I feel it is acceptable to post all things pumpkin. As much as I love pumpkin I just think September is too early. But with Canadian Thanksgiving coming up on Sunday I have pumpkin on the brain.

This recipe is perfect because it has whole wheat flour, coconut oil and maple syrup making it much better for you and more nutritious then a lot of the more indulgent recipes out there. Since this bread is healthier then some of the other pumpkin treats out there you’re free to enjoy all season long.

IMG_20180929_140752.jpg

The texture of this bread is AMAZING! I actually can’t believe how well it turned out, its soft and dense while still being light and airy. The best way to achieve this texture is to hand mix the batter. Gently fold the dry ingredients into the wet until just combined.

This bread would also be great with some mix ins or other toppings. I topped mine with a few handfuls of pumpkin seeds, but you could just leave it plain. You could also mix in nuts or chocolate chips. you could even ice the top with cream cheese frosting and serve it as a dessert.. not so healthy but defiantly delicious. however you make it you won’t be disappointed.

IMG_20180929_141112.jpg

Healthier Pumpkin Bread

Yields: 1 Loaf

Ingredients:

  • 1/3 Cup Coconut Oil, melted
  • 1/2 Cup Maple Syrup
  • 2 Eggs
  • 1 Cup Pumpkin Purée (NOT pumpkin pie filling)
  • 1/4 Cup Milk (I used 2%, but any milk even non dairy will work)
  • 1 Tsp Vanilla Extract
  • 1 1/2 Tsp Pumpkin Pie Spice
  • 1 Tsp Baking Soda
  • 1/2 Tsp Salt
  • 1 Cup All Purpose Flour
  • 3/4 Cup Whole Wheat Flour
  • Optional: 1/4-1/2 Cup mix-ins or toppings, pumpkin seeds, nuts, chocolate chips etc.

Directions:

Preheat oven to 325°F and grease a 9×5-inch loaf pan.

In a large bowl whisk flour, baking soda, salt and pumpkin pie spice. Set aside.

In a medium sized bowl whisk together coconut oil, maple syrup until completely combined.  Add eggs, pumpkin purée, milk and vanilla extract to the wet ingredients and whisk together to combine.

Pour the wet ingredients into the dry and fold the mixture together with a spatula or wooden spoon. Continue to fold until the flour is just combined. Gently fold in any mix-in’s if using.

Pour the batter into the greased loaf pan. Sprinkle the loaf with toppings if desired.

Bake the loaf for 50-60 minutes, or until a tooth pick comes out clean. Allow the bread to cool in the loaf pan for 10 minutes before transferring to a cooling rack.

Adapted from, Cookie and Kate

Skillet Cornbread

September 20, 2018 by Danielle 1 Comment

IMG_20180916_100150

I remember the first time I ever had a piece of cornbread. I was at a random BBQ restaurant by SeaTac airport. Although I’m sure it was one of the wort places to try cornbread I still loved it. It’s my favourite side to soup and chili. It would also be great alongside some BBQ Chicken. I also can’t wait to try using this cornbread as a base for stuffing. I bet it would be amazing!

I like making cornbread in a cast iron skillet because the hot skillet creates a really nice crust. If you don’t have a cast iron skillet any oven safe skillet or baking pan will work for this recipe.

IMG_20180916_094102

This recipe is great plain but it is also great with mix ins. For savoury mix in’s I like fresh corn, cheddar cheese, jalapeños and chives. If you like a sweet cornbread try some dried cranberries, blueberries, or even swirl in raspberry jam. My favourites are Jalapeno and cheddar, or raspberry jam. I recommend adding 1 cup of which ever mix in’s you choose.

IMG_20180916_100225.jpg


Skillet Cornbread

Yields: 8 Servings

Ingredients:

  • 1/2 Cup Unsalted Butter
  • 1/4 Cup Honey
  • 1 Egg
  • 1 Cup Buttermilk
  • 1 Cup Cornmeal1
  • 1 Cup All Purpose Flour
  • 1 Tsp Baking Powder
  • 1/2 Tsp Baking Soda
  • 1/8 Tsp Salt

Directions:

Preheat oven to 400°F. Melt butter in a 12 inch cast iron skillet over low heat stirring occasionally.  Pour melted butter into a medium-sized bowl and allow to cool for 5-10 minutes. In a large bowl whisk together cornmeal, flour, baking powder, baking soda and salt. Set aside. Add honey, egg and butter milk to the melted butter. Whisk to combine. Pour when ingredients into the dry, and whisk until combined.

If adding mix in’s fold them into the batter careful not to over mix.

If your skillet is no longer warm heat it on low for a few minutes to warm up. Once skillet is heated pour in the batter. Bake for 15-20 minutes until the edges are golden brown and a tooth pick comes out clean. Allow to cool before slicing.

Adapted from, Sally’s Baking Addiction


You might also like…

IMG_3554

Ceddar Drop Biscuits

IMG_3592

BBQ-less BBQ Chicken

« Previous Page
Next Page »

Primary Sidebar

Danielle at Home

Hi, I’m Danielle. I am a twenty something woman working her office job by day and blogging at night! I’m married, a new home owner and I love sharing all my favourite things on this blog. So grab a glass of wine and follow along. I’m so glad you’re here!

SUBSCRIBE & FOLLOW

Pinterest
Instagram
Facebook
Twitter

Footer

Copyright © 2025 Danielle at Home on the Foodie Pro Theme