• Skip to primary navigation
  • Skip to main content
  • Skip to primary sidebar
  • Skip to footer

DANIELLE AT HOME

  • HOME
    • About
    • Contact
  • LIFESTYLE
    • Favourites
    • Goals
    • Home
      • DIY Projects
      • Organization
    • Holidays
      • Christmas
      • Easter
      • Halloween
      • New Years
      • Thanksgiving
      • Valentine’s Day
      • Gift Guides
  • STYLE
  • WELLNESS
  • FOOD + DRINK
    • Appetizers
    • Breakfast
    • Dessert
    • Drinks
    • Side Dishes
    • Snacks
    • Holiday Recipes
      • Christmas
      • Cinco De Mayo
      • Easter
      • Father’s Day
      • Halloween
      • Mother’s Day
      • New Years
      • St. Patrick’s Day
      • Thanksgiving
      • Valentine’s Day

Thanksgiving

Kale Caesar Salad

August 28, 2018 by Danielle Leave a Comment

IMG_3573

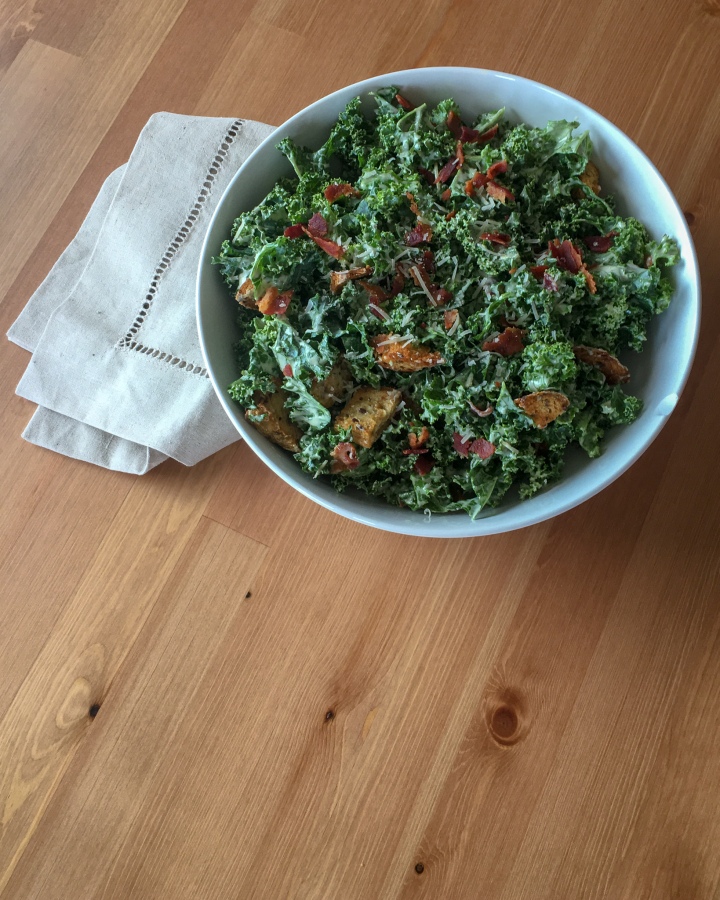
We eat a lot of kale in my house. We sauté it, we put it in smoothies, and it into soups and casseroles. And of course we make salads out of it. When it comes to kale salads I am partial to a creamy dressing since kale can be such a tough green.

For a while I was buying a creamy parmesan dressing from the store for my kale salads. Making a creamy dressing at home seamed fussy and intimidating, but now that I’ve made this recipe I can’t go back to the bottled stuff again.

Now this salad is not a week night salad for me. I can handle making the dressing, but on a weeknight I skip the bacon and use store-bought croutons. It’s still delicious, but if you have the time to make your own it will be so much fresher and tastier!

IMG_3578

I love to serve this salad in the summer with grilled chicken, steak, or my BBQ-less Barbecue Chicken. In the winter I love to serve this along side lasagna, spaghetti or any roasted meat.

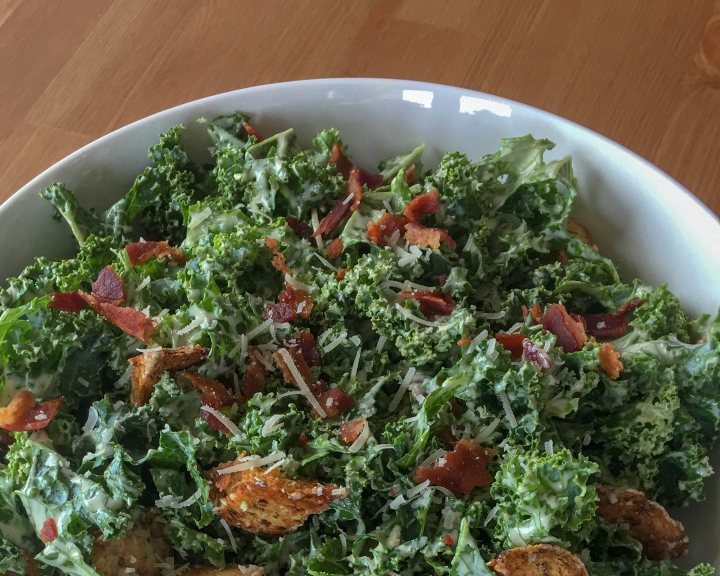
I also love kale because it’s the only salad you can toss in advance. I like to wash and prep my kale, and then toss it in dressing a few hours before serving. Then just before serving I’ll toss in the croutons and bacon. This helps the kale soften and not be as tough.

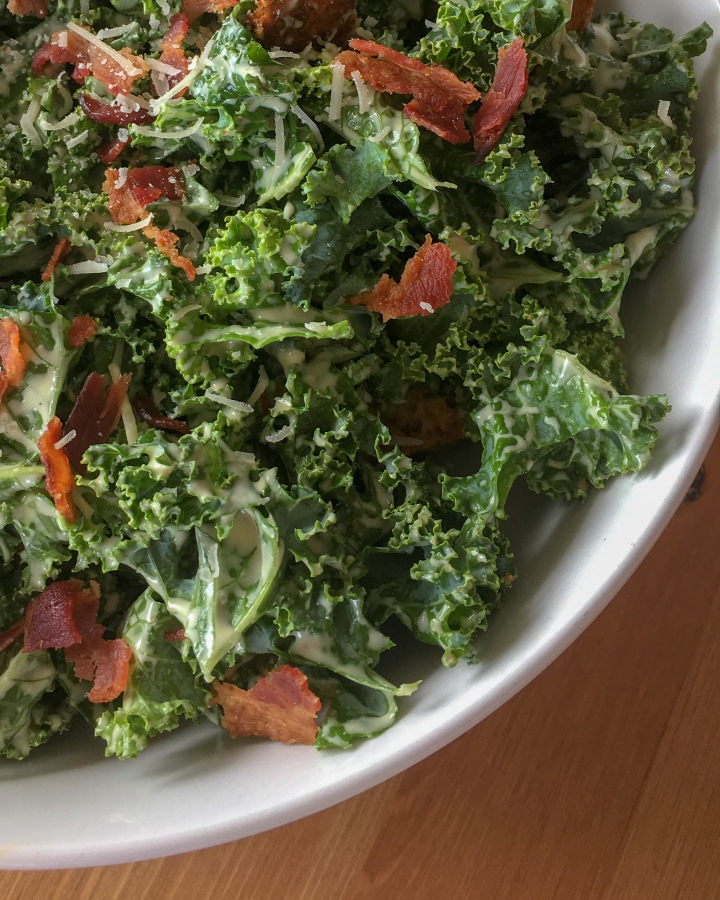
In addition to dressing the salad in advance I like to massage my kale. I know it sounds funny, but it makes your kale more tender. Once you kale has been washed, dried and chopped. Massage the leaves with your hands until they become a bright green colour. Then coat the leaves with dressing, this will make your kale more tender.

IMG_3569

Even if you are not a kale salad lover, you’re going to love this salad!

What’s your favourite salad?

Yields: 6-8 Servings

Ingredients:

For the Salad:

  • 1 Bunch Kale
  • 1/4 Cup Olive Oil
  • 1 Tablespoon White Vinegar
  • 2 Teaspoons Dijon Mustard
  • 1/2 Teaspoon Worcestershire Sauce
  • 2 Gloves of Garlic
  • 1 Teaspoons Capers
  • 4 Tablespoons Mayonnaise
  • 4 Tablespoons Parmesan Cheese, freshly grated
  • 2 Lemons, juiced
  • Salt & pepper, to taste
  • 4 Strips of Bacon
  • Optional: Additional parmesan cheese for topping

For the Croutons:

  • 4 Slices of Seeded Multi Grain Bread
  • 4 Tablespoons Olive Oil
  • 1/2 Teaspoon Garlic Powder
  • 1/4 Teaspoon Salt
  • 1/4 Teaspoon Pepper

Method:

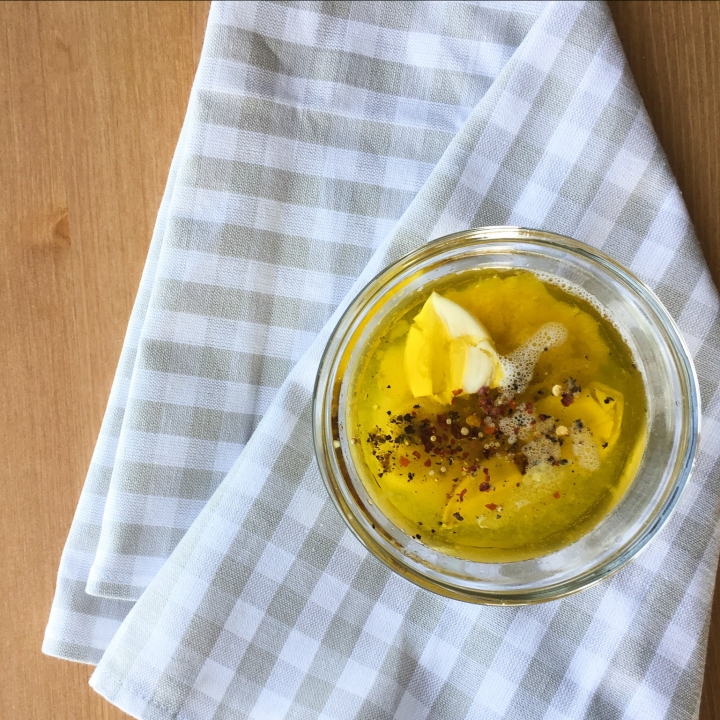
In a blender combine, olive oil, vinegar, dijon mustard, worcestershire sauce, garlic, capers, mayonnaise, parmesan cheese, lemon juice, salt and pepper. Blend until smooth.

Wash, dry and chop the kale. Place in a large salad bowl. Massage the leaves until they are bright green. Toss the kale in the dressing and set aside. If prepping the salad in advance, cover the tossed salad with plastic wrap and store in the fridge.

Cook the bacon using your preferred method until crisp. Blot off excess grease and allow to cool completely. Once cool crumble the bacon, set aside.

Preheat the oven to 375°F. Cut the bread into 1 inch cubes, place the bread on a sheet tray. Drizzle olive oil over the bread and toss to coat. Sprinkle garlic powder, salt and pepper over bread and toss to coat evenly.

Bake the croutons for 15-20 minutes, flipping halfway through. Be careful to brown the croutons and not burn. Allow the croutons to cool fully as they will continue to harden and crisp as they cool.

When ready to serve, add bacon, croutons and parmesan cheese (if using) to the dressed kale. Toss the salad together. Serve immediately.

Adapted from Jillian Harris


You might also like…


IMG_3130

The BEST Chicken Marinade

IMG_3126

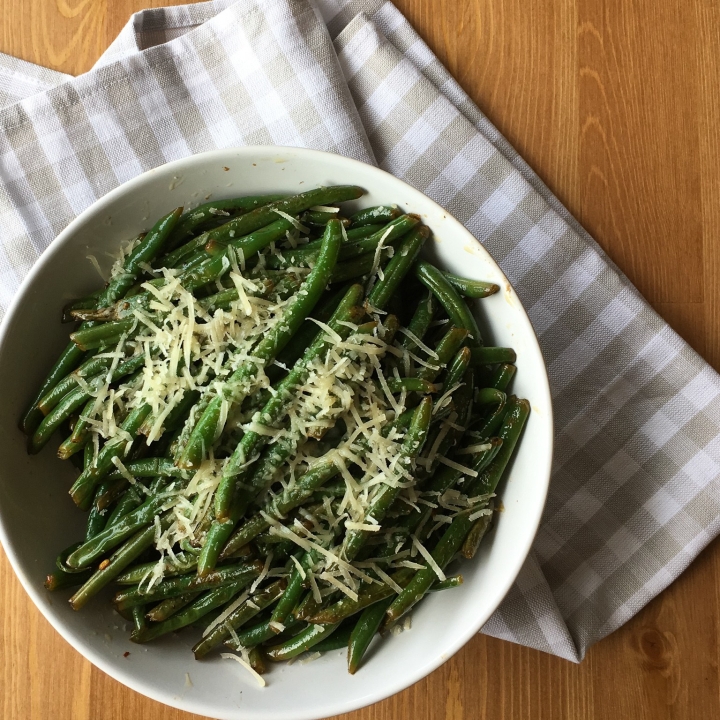
Lemon Parmesan Green Beans

IMG_3592

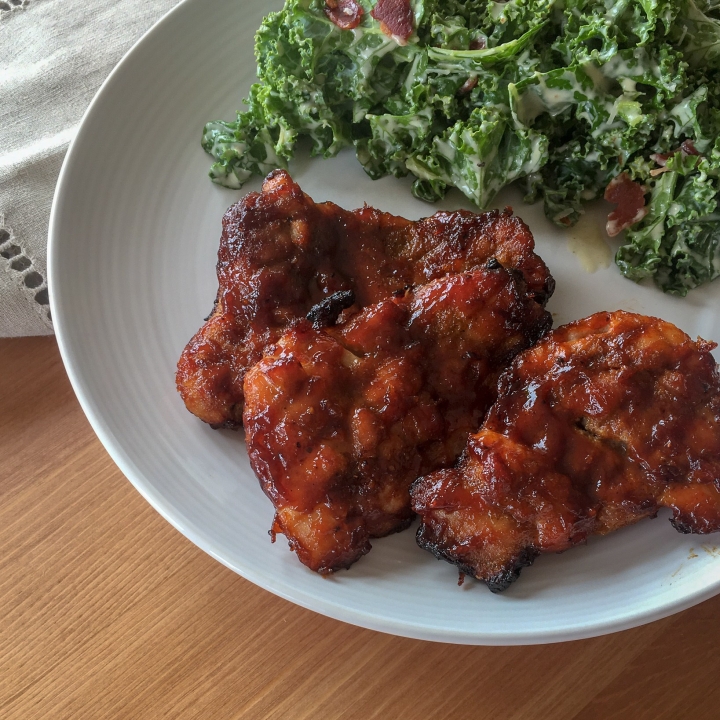
BBQ-less BBQ Chicken

Homemade Salted Caramel Sauce

August 23, 2018 by Danielle 1 Comment

For caramel lovers this recipe is heaven on earth. This recipe has a deep caramel flavour, it’s sweet but balanced and has a finish of salt that rounds out the flavour.

IMG_3757

Now I know making caramel can be intimidating, but with a few tips you can conquer the caramel. Fist things first choose your pot. You want to use a medium or large-sized pot with high sides. This will ensure that your caramel wont boil over. Secondly choose your utensils. I like to use a silicone spatula for melting the sugar and a whisk for mixing in the butter and cream.

IMG_3770

Now the ingredients. Pre measure everything out before starting to cook. With caramel you have to work fast and you will burn your sugar if your other ingredients aren’t ready. I also like to leave my butter and heavy cream out on the counter for an hour or more before I start cooking. This helps bring the ingredients up to room temperature and will make mixing them into the caramel easier.

IMG_3769

This sauce is great on ice cream, brownies, pies, bars, a spoon… seriously addicting.

Have you ever made caramel before?

Yields: 1 cup

Ingredients:

  • 1 Cup White Sugar
  • 6 Tablespoons Salted Butter, room temperature cut into small pieces
  • 1/2 Cup Heavy Cream (30-40% milk fat, sometimes called whipping cream, double cream can also be substituted)
  • 1 Teaspoon Salt

Directions:

In a medium or large sauce pan melt sugar over medium heat, stirring constantly with a silicone spatula or a wooden spoon.

The sugar will start to clump, but will eventually melt and thicken slightly. Once the sugar fully melts and becomes amber in colour you can add the other ingredients.

Add the butter to the pan, the caramel will bubble rapidly, so be very careful. Using a whisk mix the butter into the caramel completely, this can take 2-3 minutes.

Very slowly drizzly in the heavy cream while whisking. Again be extremely careful as the mixture will bubble up again.

Allow to boil for 1 minute, the mixture will bubble up the pan slightly.

Remove the mixture from the heat and whisk in the salt. Pour caramel into a storage container and allow to cool before using.

The salted caramel sauce can be stored in the fridge for up to 2 weeks.

Adapted from Sally’s Baking Addiction

You might also like…

IMG_3193

Chocolate Chunk Cookies


Grandma’s Berry Pie

July 16, 2018 by Danielle Leave a Comment

It feels like just yesterday I was rolling out dough on my grandma’s sea-foam green counter tops. Laughing and making an absolute mess of her kitchen. It’s funny how food and cooking is so tied to memories and emotions. I’ll never forget her passing on all her best tips to me during our many baking sessions.

My grandma was famous for her baking, but nothing was quite as good as her pies. I first started making pies with her when I was six, and now I’ve become the head pie maker in our family.  It seemed only fitting that the first recipe I shared on this blog was the first recipe I ever made.


IMG_3093

I of course have tweaked grandmas recipe slightly over the years to make it my own, but I still follow grandma’s methods. My grandma’s recipe was based on the Crisco’s classic pie dough, it’s the same recipe her mother used. Personally I prefer to use half butter half shortening to give the dough more flavour. I also add a bit of sugar to my dough to sweeten the crust slightly (per my husbands request). After much trial and error this has become my favourite pie dough. I make my dough using an old-fashioned pastry cutter. You can of course use a food processor instead, but be careful not to over work the dough.


IMG_3094

This pie is so delicious I could eat the whole thing myself… I wish I was kidding.

My favourite way to eat this pie is cold straight out of the fridge, but my family likes it served warm with vanilla ice cream. Whats your favourite way to enjoy a slice of pie?

Serves: 8

Ingredients:

Crust:

  • 2 2/3 cups All Purpose Flour
  • 1 teaspoon salt
  • 1 teaspoon white sugar
  • 1/2 cup Vegetable Shortening, cold
  • 1/2 cup Unsalted Butter, cold
  • 8 to 12 tablespoons ice water
  • Egg
  • 2 tablespoons water
  • Sugar for dusting

Filling:

  • 6 cups fresh or frozen blackberries (if using frozen completely defrost and drain excess juices, do not rinse)
  • 1 cup white sugar
  • 1/4 cup Corn Starch
  • Juice of half a lemon

Directions:

In a large bowl mix the flour, salt and sugar together. Add the cold butter and shortening. Cut the butter and shortening into the flour mixture using a pastry cutter or two forks until the chunks of butter and shortening are the size of small peas.

Drizzle in the ice water and stir the mixture to bring the dough together. Continue to add water until the dough starts to clump and form a ball. Form the dough into a ball. Cut dough in half and form each half into discs. Wrap each disc tightly in plastic wrap, and chill in the fridge for at least 1 hour.

Preheat the oven to 400°F (204°C).

Mix together berries, lemon juice, corn starch and sugar. Set aside.

Roll out one of the discs to fit your pie tin. Gently place the dough into the pie tin. Pour the berry mixture into the tin. Discard any extra juice from the filling (it will make the pie watery). Roll out the second disc. Gently place the top crust onto the pie.

Gently fold over and seal the edges of the pie to form a crust. Mix together egg and water. Use a pastry brush to cover the pie in egg wash. Sprinkle sugar over the pie. Using a sharp knife cut vent holes into the crust.

Bake the pie for 45 – 60 minutes until golden brown. Cover the pie with foil partway through cooking if the pie browns too quickly.

Cool for at least 20 minutes before serving.

Adapted from Crisco.


« Previous Page

Primary Sidebar

Danielle at Home

Hi, I’m Danielle. I am a twenty something woman working her office job by day and blogging at night! I’m married, a new home owner and I love sharing all my favourite things on this blog. So grab a glass of wine and follow along. I’m so glad you’re here!

SUBSCRIBE & FOLLOW

Pinterest
Instagram
Facebook
Twitter

Footer

Copyright © 2025 Danielle at Home on the Foodie Pro Theme