• Skip to primary navigation
  • Skip to main content
  • Skip to primary sidebar
  • Skip to footer

DANIELLE AT HOME

  • HOME
    • About
    • Contact
  • LIFESTYLE
    • Favourites
    • Goals
    • Home
      • DIY Projects
      • Organization
    • Holidays
      • Christmas
      • Easter
      • Halloween
      • New Years
      • Thanksgiving
      • Valentine’s Day
      • Gift Guides
  • STYLE
  • WELLNESS
  • FOOD + DRINK
    • Appetizers
    • Breakfast
    • Dessert
    • Drinks
    • Side Dishes
    • Snacks
    • Holiday Recipes
      • Christmas
      • Cinco De Mayo
      • Easter
      • Father’s Day
      • Halloween
      • Mother’s Day
      • New Years
      • St. Patrick’s Day
      • Thanksgiving
      • Valentine’s Day

Thanksgiving

Apple Cinnamon Scones with Maple Glaze

October 18, 2018 by Danielle Leave a Comment

IMG_20180928_123811

I remember when I was a little girl helping my Grandma prepare for her Y’s Menette meeting’s. We would make tea sandwiches and treats together and prep the living room for the meeting. She would let me hang around the meetings for a few minutes to have a snack and then I would go off to help Grandpa in the garden or play some cards. I thought she was so fancy making her afternoon tea.

IMG_20180928_123759

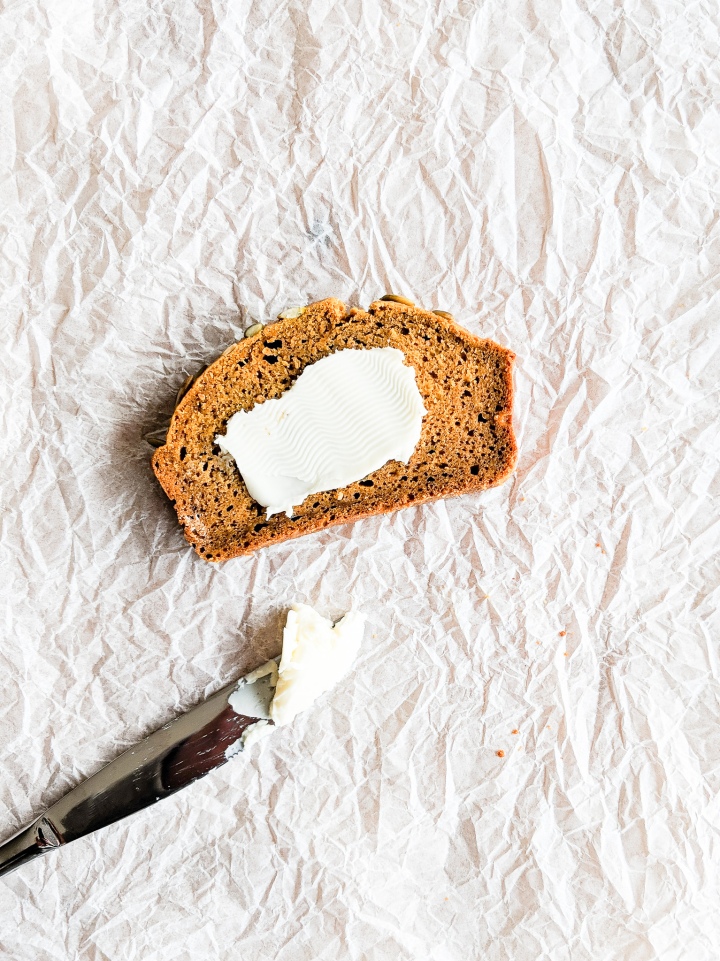
Afternoon tea is never complete without scones. I have been making scones with my Grandma almost as long as I have been making pies. My Grandma used a recipe passed down to her from her mother. My mom uses the same recipe and at my bridal shower my Grandma gave me a copy of the recipe. Now the original recipe has gotten rave reviews from family and friends for years, they really are the best, but I’m not sure if I’m ready to share the family secret just yet.

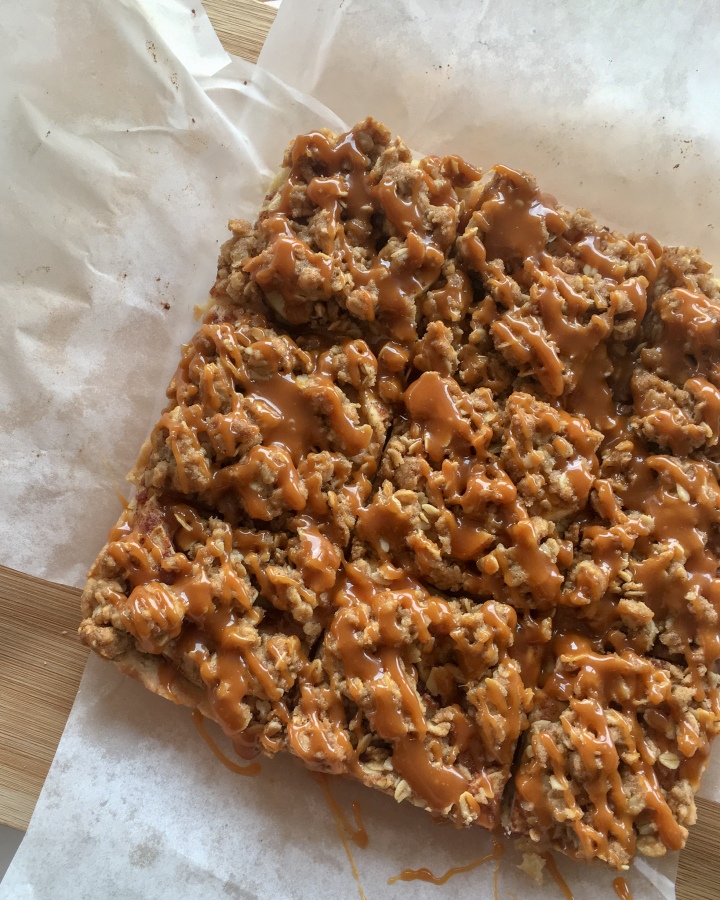
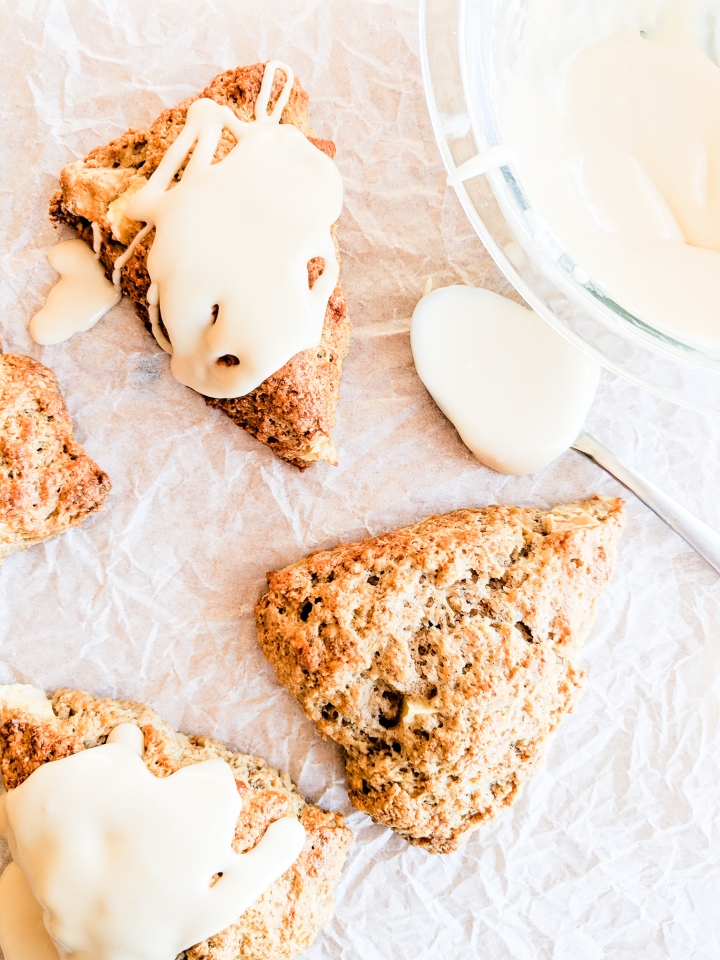
Today I am sharing a variation of the original recipe, Apple Cinnamon Scones with Maple Glaze. Perfect for fall and I think Grandma would approve. I made these scones with some whole wheat flour because I like the nutty flavour it has which compliments the cinnamon and apple. I also added the glaze to the scones, because everything is better with maple glaze.

IMG_20180928_123759-2

Whole Wheat Apple Cinnamon Scones with Maple Glaze

Yields: 8 Scones

Ingredients:

Scones:

  • 1 1/4 Cup All Purpose Flour
  • 3/4 Cup Whole Wheat Flour
  • 2 Teaspoons Baking Powder
  • 1 Teaspoon Cinnamon
  • 1/4 Teaspoon Salt
  • 1/4 Cup Granulated Sugar
  • 1/3 Cup Unsalted Butter, cold and cubed
  • 1 Apple, diced
  • 1 Large Egg
  • 3/4 Cup Milk ( I use 2%, but any dairy milk will work)

Glaze

  • 2 Cups Confectioner (Icing) Sugar
  • 1/4 Cup Pure Maple Syrup
  • 3 Tablespoons Half and Half

Directions:

Preheat the oven to 400° F. Line a baking sheet with parchment paper, set aside. Sift together flour, baking powder, cinnamon, salt and sugar. Using two forks or a pastry cutter cut butter into flour. Stir in the diced apple.

In a liquid measuring cup whisk together milk and egg. Pour 3/4 of a cup of the mixture into the dry ingredients, set the remaining mixture aside. Using your hands or a wooden spoon gently mix the wet and dry ingredients until just combined (some flour may still show).

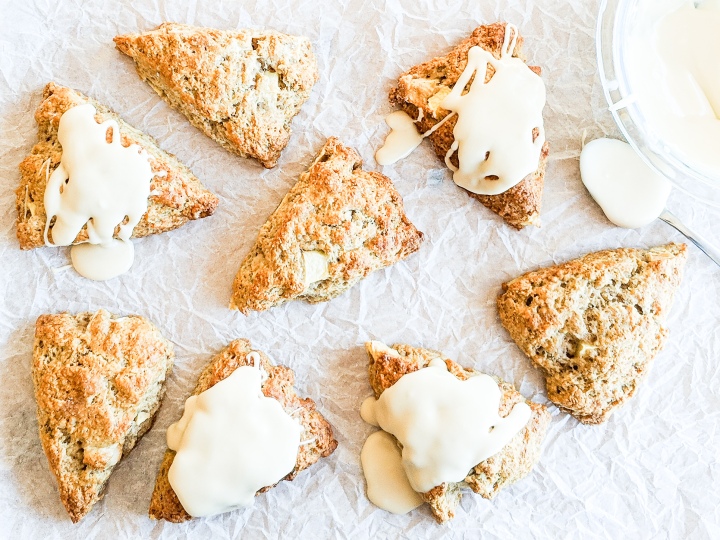
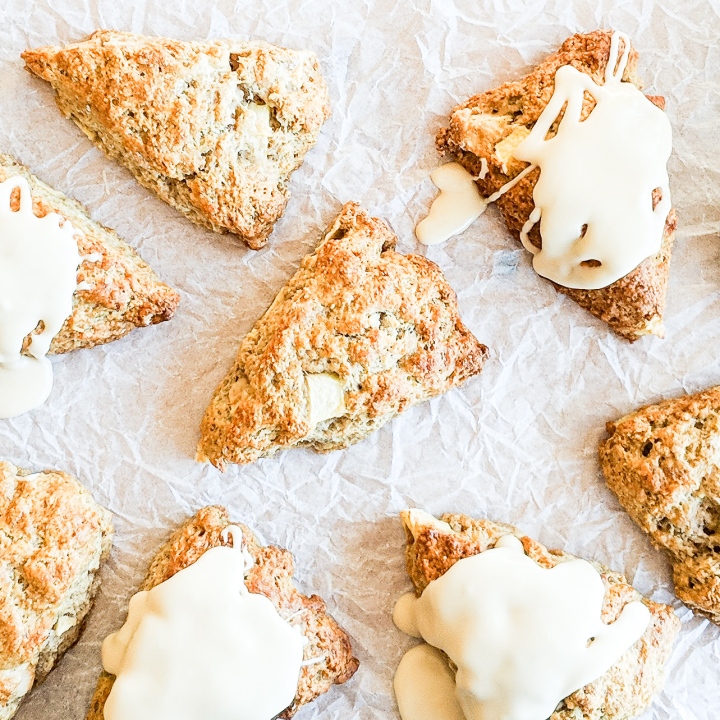
Turn the dough onto a floured surface and form into a disk. Flatten the dough with your hands until it is 2 inches tall (do not use a rolling pin). Cut the dough into 8 wedges. Lay the scones on the baking sheet. Brush the scones with the reserved milk and egg mixture. Bake scones for 20-30 minutes until golden brown. Allow to cool completely.

In a small bowl whisk confectioner sugar, maple syrup and half and half together. Glaze should be opaque, thick and pourable.

Drizzle glaze onto cooled scones. Allow glaze to set before serving.

Adapted from, Granny Robinson’s Scones

Pumpkin Chocolate Chip Cookies

October 9, 2018 by Danielle 2 Comments

IMG_20180929_134842.jpg

Happy Belated Canadian Thanksgiving! I spent the whole weekend spending quality time with family, enjoying delicious food and drinks. It was great to disconnect from my phone and just hangout all weekend. Now that I’m back home it’s back into the kitchen, and today I am sharing a recipe for Pumpkin Chocolate Chip Cookies.

These cookies are so easy and get gobbled up (Thanksgiving Joke!) so fast! And they are the perfect way to use up any left over canned pumpkin from making pumpkin pies and breads.

IMG_20180929_134745

These cookies are soft and chewy, slightly spiced, deliciously sweet and chocolatey (is that a word?). I was very sceptical for the pumpkin chocolate combo and resisted it for quite awhile, but now that I know what I’ve been missing I’ll be making these every fall.

These cookies are actually eggless which is great for feeding a crowd since so many people have allergies. You could also sub non dairy butter and dairy free chocolate chips to make these cookies vegan. I love the versatility.

Have I convinced you to add these to your fall baking list yet?

IMG_20180929_134835

Pumpkin Chocolate Chip Cookies

Yields: 18 Cookies

Ingredients:

  • 1/2 Cup Unsalted Butter, partially melted
  • 1/4 Cup Brown Sugar, packed
  • 1/2 Cup White Sugar
  • 1 Tsp Vanilla Extract
  • 6 Tbsp Pumpkin Puree (not pumpkin pie filling)
  • 1 and 1/2 Cups All Purpose Flour
  • 1/4 Tsp Salt
  • 1/4 Tsp Baking Powder
  • 1/4 Tsp Baking Soda
  • 1 Tsp Pumpkin Pie Spice
  • 1/2 Cup Chocolate Chips

Directions:

Microwave the butter for 30-60 seconds until butter is half melted. In a medium bowl, whisk the butter, brown sugar, and granulated sugar until smooth. Whisk in the vanilla and pumpkin until smooth. Set aside.

In a large bowl whisk together the flour, salt, baking powder, baking soda, and pumpkin pie spice. Pour the wet ingredients into the dry ingredients and mix together with a wooden spoon or spatula. Fold in the chocolate chips. Chill the dough for 1 hour.

Preheat oven to 350°F. Roll the dough into balls, place them on a baking sheet and slightly flatten. The cookies will only spread minimally. Bake the cookies for 10 minutes. Press more chocolate chips onto the tops, if desired. Allow the cookies to cool for at least 5 minutes on the cookie sheets before transferring to a cooling rack.

Adapted from Sally’s Baking Addiction.

Healthier Pumpkin Bread

October 2, 2018 by Danielle Leave a Comment

IMG_20180929_140830.jpg

Now that it is officially October I feel it is acceptable to post all things pumpkin. As much as I love pumpkin I just think September is too early. But with Canadian Thanksgiving coming up on Sunday I have pumpkin on the brain.

This recipe is perfect because it has whole wheat flour, coconut oil and maple syrup making it much better for you and more nutritious then a lot of the more indulgent recipes out there. Since this bread is healthier then some of the other pumpkin treats out there you’re free to enjoy all season long.

IMG_20180929_140752.jpg

The texture of this bread is AMAZING! I actually can’t believe how well it turned out, its soft and dense while still being light and airy. The best way to achieve this texture is to hand mix the batter. Gently fold the dry ingredients into the wet until just combined.

This bread would also be great with some mix ins or other toppings. I topped mine with a few handfuls of pumpkin seeds, but you could just leave it plain. You could also mix in nuts or chocolate chips. you could even ice the top with cream cheese frosting and serve it as a dessert.. not so healthy but defiantly delicious. however you make it you won’t be disappointed.

IMG_20180929_141112.jpg

Healthier Pumpkin Bread

Yields: 1 Loaf

Ingredients:

  • 1/3 Cup Coconut Oil, melted
  • 1/2 Cup Maple Syrup
  • 2 Eggs
  • 1 Cup Pumpkin Purée (NOT pumpkin pie filling)
  • 1/4 Cup Milk (I used 2%, but any milk even non dairy will work)
  • 1 Tsp Vanilla Extract
  • 1 1/2 Tsp Pumpkin Pie Spice
  • 1 Tsp Baking Soda
  • 1/2 Tsp Salt
  • 1 Cup All Purpose Flour
  • 3/4 Cup Whole Wheat Flour
  • Optional: 1/4-1/2 Cup mix-ins or toppings, pumpkin seeds, nuts, chocolate chips etc.

Directions:

Preheat oven to 325°F and grease a 9×5-inch loaf pan.

In a large bowl whisk flour, baking soda, salt and pumpkin pie spice. Set aside.

In a medium sized bowl whisk together coconut oil, maple syrup until completely combined.  Add eggs, pumpkin purée, milk and vanilla extract to the wet ingredients and whisk together to combine.

Pour the wet ingredients into the dry and fold the mixture together with a spatula or wooden spoon. Continue to fold until the flour is just combined. Gently fold in any mix-in’s if using.

Pour the batter into the greased loaf pan. Sprinkle the loaf with toppings if desired.

Bake the loaf for 50-60 minutes, or until a tooth pick comes out clean. Allow the bread to cool in the loaf pan for 10 minutes before transferring to a cooling rack.

Adapted from, Cookie and Kate

Hot Apple Cider

September 18, 2018 by Danielle Leave a Comment

IMG_3955.jpg

Fall has a arrived early here on the coast of BC. Normally September is just as warm as August, and October is crisp with a few rainy days. The constant grey rain clouds don’t normally set in until November. So far September is full of rain and misty days, with a bit of sunshine in between. Normally I wouldn’t give into fall flavours quite this soon, but with this weather I just can’t get enough.

There’s just something about venturing out in the crisp fall air that brings me such joy. On Sunday’s rain or shine we go out for a long trail walk. When we get home we bundle up and make ourselves a hot drink to warm us up. Hot apple cider is my fall go to. I love it because it’s warm and spicy, but not too sweet.  It really has all the flavours of fall in one glass (well except pumpkin).

IMG_3953.jpg

I like to make apple cider on the stove, but if I was having a party I would make this recipe in a slow cooker. You will find both methods below. This recipe is made with unfiltered apple juice instead of actual apples. I just don’t feel that the extra work to make it from apples is really worth it. There are some great unfiltered apple juices on the market, so I’d rather save myself the trouble. You will notice that this recipe has brown sugar as an optional ingredient. Some people like a sweeter cider and some prefer a spicy cider. I don’t like sweet beverages, so I like to leave it out. My husband prefers it a little more sweet. It’s really up to you and your preferences.

This recipe is non-alcoholic, so if I’m serving this at a party I would create a spike-it-yourself station. The best alcohol for adding to cider is bourbon, brandy, or dark rum. This would be perfect for thanksgiving, or a halloween party.

IMG_3964.jpg

Hot Apple Cider

Yields: 16 8oz servings

Ingredients:

  • 4 Litres (gallon) Unfiltered Apple Juice (not apple cider)
  • 1 Orange, sliced
  • 1 Apple, quartered
  • 5 Cinnamon Sticks
  • 1 Whole Nutmeg
  • 1 Tbsp Whole Cloves
  • 2 Tbsp Brown Sugar (optional)

Stove Method:

Add all ingredients to a large pot over medium heat and bring liquid to a simmer. Turn the heat down to low and cook for 20-30 minutes. Keep warm on the stove until ready to serve.

Slow Cooker Method:

Add all ingredients to your slow cooker. Heat on low for 4 hours. Place cider on the keep warm setting until ready to serve.


You might also like….

IMG_3729

Dutch Apple Pie Bars

Apple Cheddar Pecan Salad

September 11, 2018 by Danielle Leave a Comment

IMG_4081

I’m not a huge salad fan. I like restaurant salads, but homemade salads aren’t really my thing. They often taste too earthy and they never seem to have the correct amount of dressing. There are a few exceptions… anything with arugula, Kale Caesar Salad and this Apple Cheddar Pecan Salad. This salad is my go to for the fall, I love the refreshing fresh crunch the apples give. I’ve been making this salad for years and everyone who has tried it loves it.

IMG_4120

The homemade dressing on this salad really ties together the salad and really boosts the fall flavour. It has apple cider and pure maple syrup as two of the ingredients. I love to blend my dressings up in my magic bullet to emulsify the olive oil, but you can of course just use a whisk.

I like to serve this salad on the side of marinated chicken, or add a grilled chicken breast on top and take it to work for lunch. If you give it a try it will soon become your favourite fall salad.

IMG_4085.jpg

Cheddar Apple Pecan Salad

Yields: 6-8 Servings

Ingredients:

Salad:

  • 8 Cups Baby Greens
  • 1 Apple, thinly sliced
  • 1/4 Cup of Pecans
  • 1/4 Cup of Cheddar Cheese, shredded

Dressing:

  • 1/4 Cup Olive Oil
  • 2 Tbsp Apple Cider Vinegar
  • 1 Tbsp Dijon Mustard
  • 2 Tsp Pure Maple Syrup
  • Pinch of Salt & Pepper

Directions:

In a blender, or small dish add olive oil, apple cider vinegar, dijon mustard, maple syrup, salt and pepper. Blend or whisk until the dressing comes together and emulsifies.

Add baby greens, apples, pecans and cheese to a large bowl. Drizzle dressing over salad and toss to coat. Serve immediately.


You might also like…

IMG_3573

Kale Caesar Salad

IMG_3546

Cheddar Drop Biscuits

Dutch Apple Pie Bars with Salted Caramel

August 30, 2018 by Danielle 1 Comment

IMG_3729

We all know I love pie, and dutch apple pie is one of my favourites. What makes apple pie different from dutch apple pie it that instead of a top crust their is a crumble topping. It’s the best of both worlds. Now these bars a essentially a portable dutch apple pie. They are also drizzled with salted caramel, so you know they are good.

IMG_3731

These bars have four layers, shortbread crust, apple filling, crumble topping and caramel drizzle. I know that seems like a lot of work, but the ingredients and simple and so is the method. The tricky part is the caramel sauce. Now I like to make homemade salted caramel, it simple is the best. If you have the time please do yourself a favour and make the sauce from scratch. You wont be disappointed.

If you’re short on time, or just aren’t ready to try your hand at homemade caramel sauce you can use store bought. Buy the best quality caramel sauce you can find. Drizzle that on top of your bars and sprinkle some flaky sea salt on top. They will be almost as good.

IMG_3733

These are perfect to serve at an end of summer barbecue or on a fall dessert buffet. These bars with a cup of tea after your thanksgiving dinner… with a side of pumpkin pie of course.

Yields: 9-16 Bars

Ingredients:

Shortbread Crust:

  • 1/2 Cup Unsalted Butter, melted
  • 1/4 Cup White Sugar
  • 1 Teaspoon Vanilla Extract
  • 1/4 Teaspoon Salt
  • 1 Cup All Purpose Flour

Apple Filling:

  • 2 Apples, peeled and thinly sliced
  • 2 Tablespoons All Purpose Flour
  • 2 Tablespoons White Sugar
  • 1 Teaspoon Cinnamon

Streusel:

  • 1/2 Cup Rolled Oats
  • 1/3 Cup packed Brown Sugar
  • 1/4 Teaspoon Cinnamon
  • 1/4 Cup All Purpose Flour
  • 1/4 Cup Unsalted Butter, cold and cubed

Homemade Salted Caramel Sauce

Directions:

Preheat the oven to 300°F. Line the bottom and sides of an 8-inch square baking pan with parchment paper, leaving enough overhang on all sides. Set aside.

Make the crust: In a small bowl stir together the melted butter, granulated sugar, vanilla, and salt. Add the flour and stir until everything is combined. Press the mixture into the prepared baking pan. Bake for 15 minutes.

Make the apple filling:Combine the sliced apples, flour, granulated sugar and cinnamon together in a large bowl until all of the apples are evenly coated. Set aside.

Make the streusel: Whisk the oats, brown sugar, cinnamon, and flour together in a medium bowl. Cut in the chilled butter with your hands until the mixture resembles coarse crumbs. Set aside.

Remove the crust from the oven, and turn the oven up to 350°F (177°C). Layer the apples on top of the warm crust. Sprinkle the apple layer with streusel and bake for 30–35 minutes or until the streusel is golden brown.

Remove from the oven and allow to cool for at least 20 minutes at room temperature. Lift the bars out of the pan using the tabs of the parchment. Cut the bars into your desired serving size. I normally cut them into 12 squares, but 9 or 16 will also work. Once cut, drizzle the bars with the salted caramel sauce. The bars can be served warm, room temperature or cold.

Adapted from Sally’s Baking Addiction

« Previous Page
Next Page »

Primary Sidebar

Danielle at Home

Hi, I’m Danielle. I am a twenty something woman working her office job by day and blogging at night! I’m married, a new home owner and I love sharing all my favourite things on this blog. So grab a glass of wine and follow along. I’m so glad you’re here!

SUBSCRIBE & FOLLOW

Pinterest
Instagram
Facebook
Twitter

Footer

Copyright © 2025 Danielle at Home on the Foodie Pro Theme