• Skip to primary navigation
  • Skip to main content
  • Skip to primary sidebar
  • Skip to footer

DANIELLE AT HOME

  • HOME
    • About
    • Contact
  • LIFESTYLE
    • Favourites
    • Goals
    • Home
      • DIY Projects
      • Organization
    • Holidays
      • Christmas
      • Easter
      • Halloween
      • New Years
      • Thanksgiving
      • Valentine’s Day
      • Gift Guides
  • STYLE
  • WELLNESS
  • FOOD + DRINK
    • Appetizers
    • Breakfast
    • Dessert
    • Drinks
    • Side Dishes
    • Snacks
    • Holiday Recipes
      • Christmas
      • Cinco De Mayo
      • Easter
      • Father’s Day
      • Halloween
      • Mother’s Day
      • New Years
      • St. Patrick’s Day
      • Thanksgiving
      • Valentine’s Day

Holiday Recipes

Carrot Cake Cupcakes with Cream Cheese Frosting

April 10, 2019 by Danielle 6 Comments

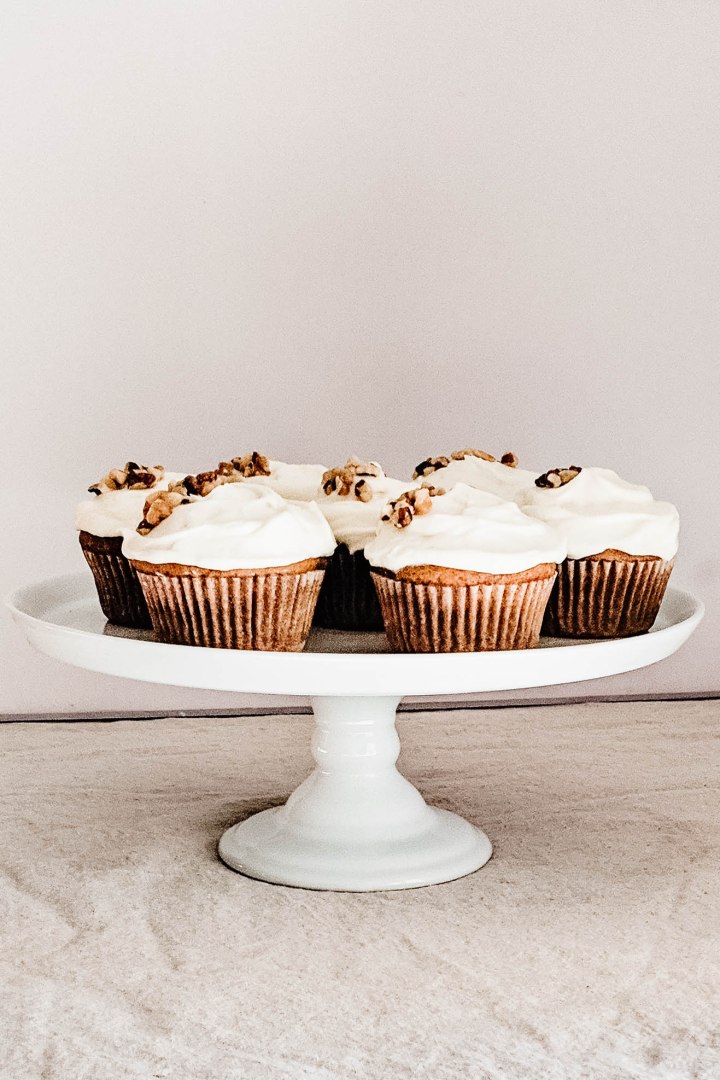
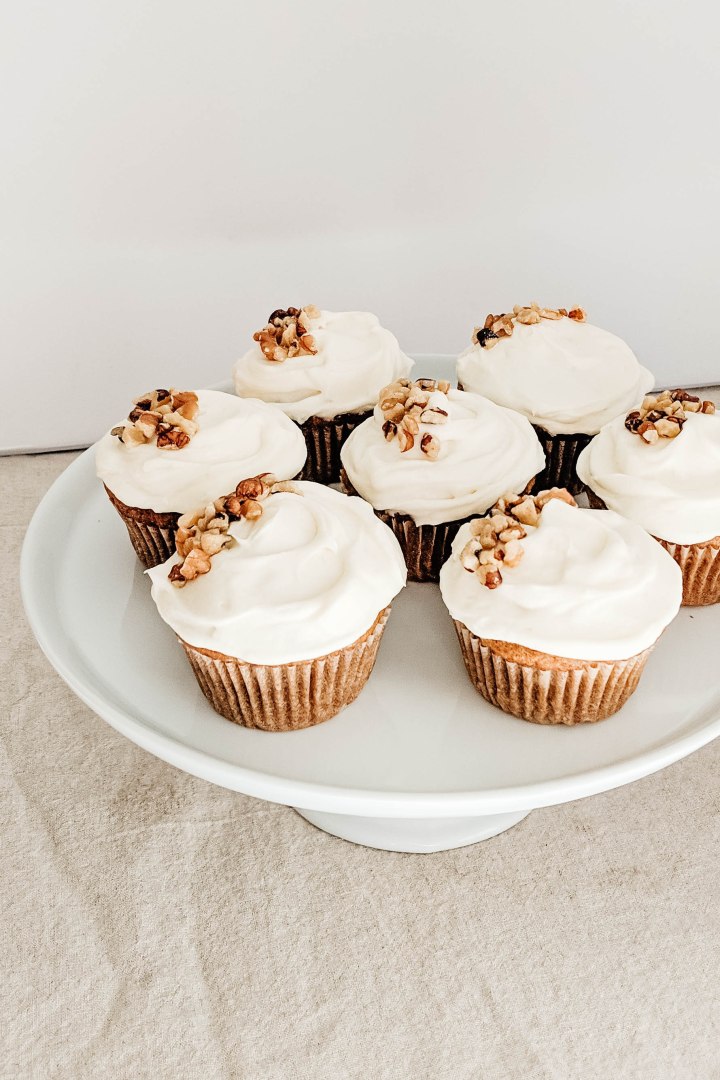
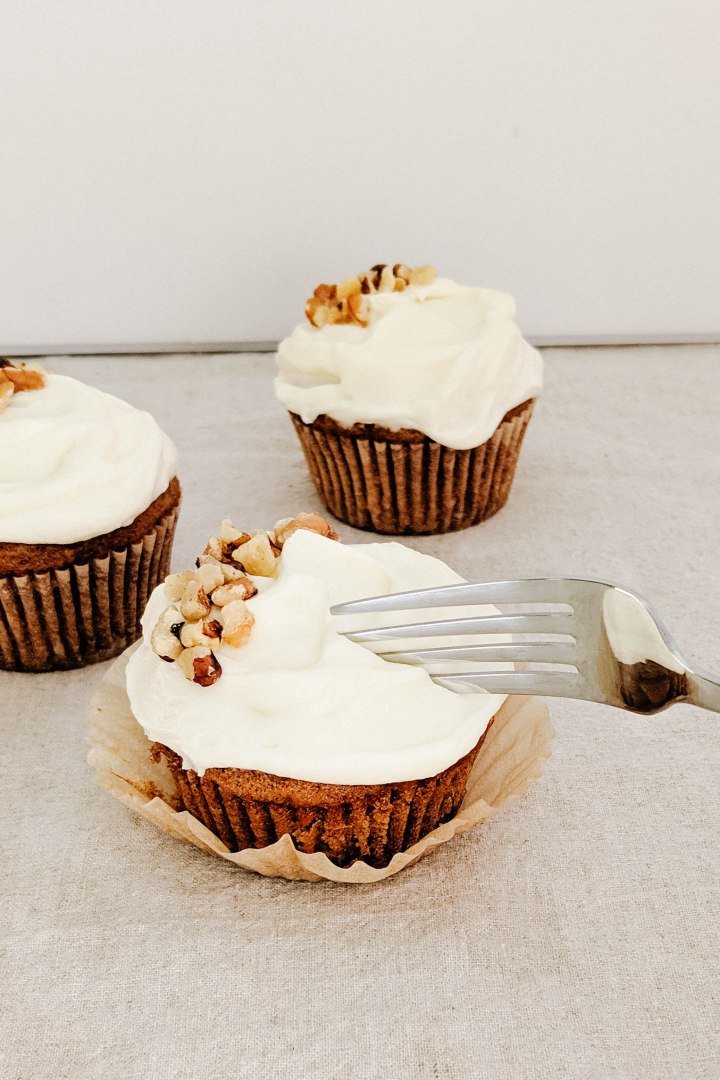
The BEST carrot cake cupcakes with tangy cream cheese frosting!

IMG_20190330_161913

Ok everyone today were taking carrot cake! Any carrot cake fans out there? I’m such a big fan. One of my wedding cake flavours was ever carrot cake. It was insanely delicious!

I make carrot cake every year for Easter which means my Uncle gets a chance to make the same joke every year. “Danielle did you grate the carrots?” Yep the joke is getting old but the cake is not.

I’ve experimented extensively with carrot cake over the years, nuts, no nuts, pineapple, yogurt, coconut etc etc etc. But the recipe I’m sharing today is a classic carrot cake. I like serving it as cupcakes because we tend to do dessert buffets at Easter and I think cupcakes are better for that. Also layered cakes are a ton of work so I tend to save them for birthdays.

IMG_20190330_161959IMG_20190330_161909IMG_20190330_162419

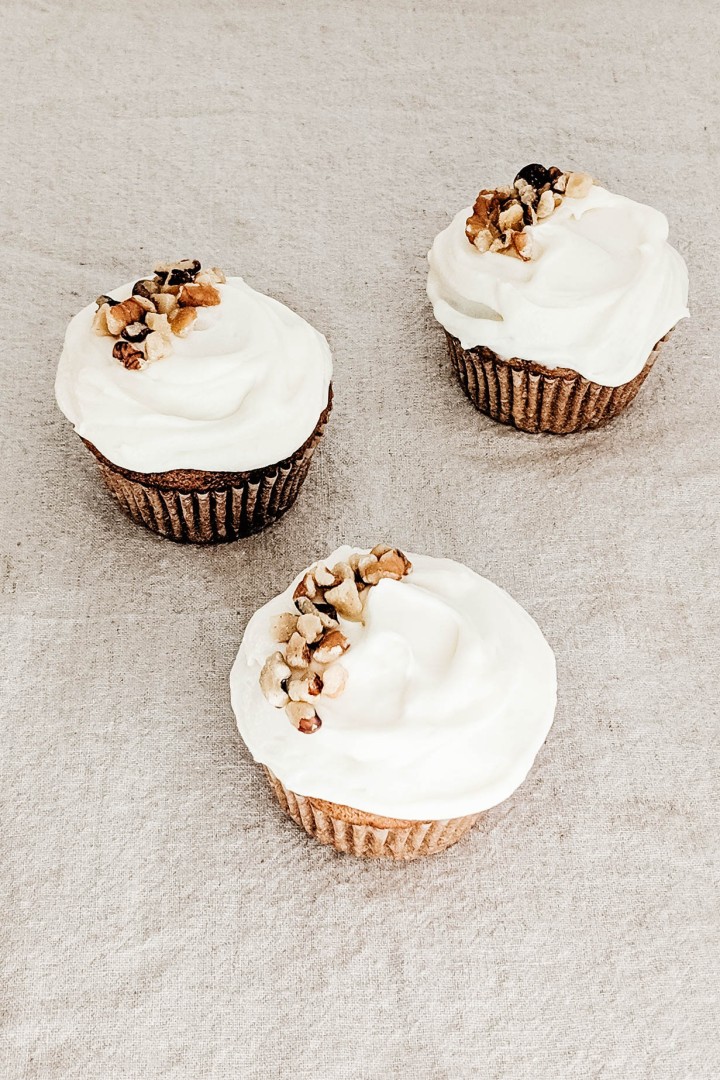
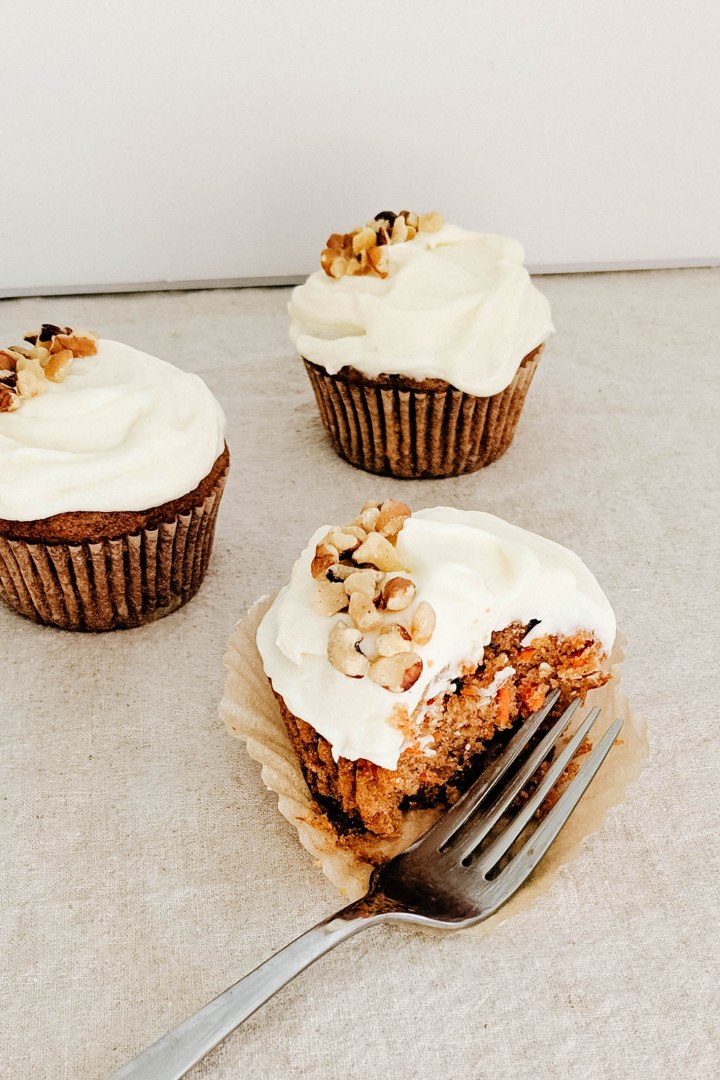
For my carrot cake I got nut free in the base. The cupcakes pictured are topped with nuts but you could skip that if you want. There are nut allergies in my husbands family and mine so we tend to keep our gatherings nut free. Hence why you wont find a tone of desserts containing nuts on my site.

All carrot cake recipes require some sort of moistening ingredient. I’ve used greek yogurt, apple sauce and crushed pineapple. My favourite is sour cream. For a super moist classic carrot cake this is a must.

As for the frosting I always make cream cheese frosting. I follow a 2:1 ratio of cream cheese to butter ratio. From there I add confectioner sugar and vanilla until the flavour and consistency is just right.

Now no more stalling lets get to this recipe! I know you’ll want it on your table at Easter!

IMG_20190330_162201.jpg

Carrot Cake Cupcakes and Cream Cheese Frosting

Yields: 12 cupcakes

Ingredients:

Carrot Cake:

  • 1 1/4 cups All Purpose Flour
  • 1 tsp Baking Powder
  • 1/2 tsp Baking Soda
  • 1/2 tsp Salt
  • 1 tsp Cinnamon
  • 1/2 tsp Ground Ginger
  • 1/4 tsp Nutmeg
  • 1/4 tsp Cloves
  • 1/2 cup Vegetable Oil
  • 1 cup Brown Sugar, lightly packed
  • 2 Eggs
  • 1/3 cup Sour Cream
  • 1 tsp Vanilla Extract
  • 2 Medium Carrots, grated

Cream Cheese Frosting:

  • 8 ounces Cream Cheese, softened
  • 1/2 cup Butter, softened
  • 3 cups Confectioner Sugar (more if needed for texture)
  • 1 tsp Vanilla Extract

Directions:

Preheat oven to 350°F. Line 12 count muffin tin with liners.

In a medium bowl whisk together flour, baking powder, baking soda, salt and spices. Set aside. In the bowl of your stand mixer beat vegetable oil and brown sugar until combined. Add eggs and mix on high until combined. Add sour cream and vanilla, continue to mix until combined.

Add dry ingredients to wet and mix on low until just combined. Add grated carrots and fold into batter. Fill muffin tins 3/4 of the way full.

Bake for 20-25 minutes until a toothpick comes out clean. Allow to cool completely before frosting.

Beat cream cheese and butter on high until fluffy. Add confectioners sugar and vanilla, beat on low until combined and fluffy. Once cupcakes are cool, frost and enjoy!

Adapted from Sally’s Baking Addiction.

Scalloped Potatoes

April 5, 2019 by Danielle Leave a Comment

The perfect Easter side dish.

IMG_20190317_172403

Ok this recipe is a real winner. Scalloped potatoes are so yummy. I didn’t grown up eating scalloped potatoes with Easter dinner. My Grandma hates cheese (crazy right?!) so a potato dish covered in cheese just wasn’t on our table. But in my house we love cheese and potatoes and my hubby loves anything smothered in a creamy sauce. That means this recipe is a serious winner!

Layers of potatoes smothered in a creamy sauce , sautéed onions and more cheese than your diet would ever allow. This is comfort food people. It’s for special occasions not everyday.

IMG_20190317_172243IMG_20190317_172536

I’ve got a few tips for making this recipe and then we can get into making (and eating) this deliciousness!

Ok first things first cut those potatoes thin! As thin as you can. Personally I use a mandolin. They are really great at this job. This is the one I have. I love it because its small but effective. I use setting number two!

Secondly the type of potato. You can use russets but I like using a yellow potato. They hold their shape better after a long cook time and overall I prefer their flavour.

Slow cook your onions. This is a must! I’m super impatient but for this dish you can rush cooking your onions. You want them soft, translucent and not even a little brown. If they brown they will discolour your cream sauce.

Layering. Add sauce and cheese in between each layer of potatoes. Now depending how thin you cut your potatoes you will have approximately 4-6 layers of potatoes. Spoon a small about of sauce over each layer and sprinkle a small amount of cheese over each layer.

Now lets get into this delicious recipe!

IMG_20190317_172358.jpg

Scalloped Potatoes

Yields: 12 servings

Ingredients:

  • 3 tbsp Butter
  • Yellow Onion, thinly sliced into half moons
  • 4 Garlic Cloves, minced
  • 1/4 cup All Purpose Flour
  • 1 cup Vegetable Broth (you can use chicken)
  • 2 cups Milk (I use 2%)
  • 1 1/2 tsp Salt
  • 1/2 tsp Pepper
  • 1 tsp Fresh Thyme, chopped
  • 4 pounds Yellow Potatoes, peeled and sliced 1/8 inch thick
  • 2 cups Old Cheddar Cheese, grated
  • 1/2 cup Fresh Parmesan Cheese, grated

Directions:

Preheat oven to 400°F.

In a large sauté pan melt butter over medium low heat. Add onions sauté until soft and translucent, about 6-7 minutes. Add garlic and cook until fragrant. Add flour to the pan. Cook flour and onions for about a minute. Slowly add vegetable stock, stir constantly until a thick but smooth sauce forms. Slowly add milk to sauce, stir until smooth. Add salt, pepper and thyme. Cook over low heat for 5 minutes to thicken slightly. Set aside.

Line a 13×9 inch baking dish with a layer of potatoes. Top with 1/3 cup sauce (approx.) and onions. Sprinkle 1/4 cup cheese over sauce. Continue to layer potatoes until complete. Pour the remaining sauce over the top layer of potatoes. Sprinkle with remaining cheese.

Cover pan with foil and bake for 30 minute. Remove foil and bake for an additional 30-40 minutes until the top is brown and the potatoes are cooked though.

Remove from the oven and let cool for 5 minutes before serving. Top with additional thyme and cheese if desired.

Recipe adapted from Gimme Some Oven.

Scalloped Potatoes copy

Salted Caramel Brownies

March 22, 2019 by Danielle 1 Comment

Super fudgy brownies with pockets of delicious salted caramel!

IMG_20190224_145434_1-2x3

Brownies are probably one of my favourite desserts, and you already know about my love of salted caramel (here, here and here!). I love brownies because I can whip them up in one bowl. Fast easy and impressive… totally my jam! Now of course salted caramel is a wee bit more involved than a one bowl brownie, but I promise it is worth it! For this recipe we will be using my favourite Homemade Salted Caramel Sauce! It’s straightforward, delicious and there might be leftovers for your ice cream.

IMG_20190224_145727-2x3IMG_20190224_145808-2x3

Before we get into this mouth watering recipe I have a few tips.

  1. Freeze your caramel, this helps prevent over spreading when the brownies bake
  2. Don’t over bake, I life a gooey brownie so stick to the cook time below
  3. If cutting them is a challenge pot them in the fridge
  4. Sprinkle with sea salt at the end

These are seriously delicious and I defiantly need to make another batch very soon!

IMG_20190224_145734_1-2x3

Salted Caramel Brownies

Yields: 9-12 brownies (I recommend cutting these small since they are super rich!)

Ingredients:

  • Homemade Salted Caramel Sauce (we will use 2/3 of the recipe in the brownies the rest can be saved for another use – ps. it freezes great!)
  • 4 oz Unsweetened Chocolate
  • 1/2 cup Butter, melted
  • 1 1/4 cup Sugar
  • 2 Eggs
  • 1 Tsp Vanilla
  • 1 cup All Purpose Flour
  • Pinch of Salt
  • 1/2 cup Chocolate Chips
  • Optional: Flaked Seas Salt for finishing

Directions:

Make my Homemade Salted Caramel Sauce recipe. Pour 2/3 of the recipe into a square baking dish lined with parchment paper. Place in your freezer. Store the rest in an air tight container in your fridge or freezer.

Preheat the over to 350°F. Line an 8×8 inch baking dish with parchment paper, spray with baking spray. Set aside.

In a large microwave safe bowl place butter and chocolate. Microwave in 30 second intervals, stir in between until the chocolate and butter have just melted. Add sugar, eggs, vanilla and salt. Stir well until smooth and combined. Add flour, fold into batter until combined. Once combined stir in chocolate chips.

Pour brownie batter into prepared baking sheet. Remove caramel from the freezer. Break or cut into small squares. Place the caramels on to the brownie batter. Space evenly and press slightly into batter.

Bake the brownies for 20-30 minutes until set. Sprinkle with flakey sea salt if desired. Cool before serving. Enjoy!

Adapted from Pinch of Yum.

Salted Caramel Brownies - Yum!

Irish Whiskey Sour

March 15, 2019 by Danielle 1 Comment

A classic cocktail with an Irish twist!

IMG_20190301_170318-2x3-2x3-2x3.jpg

Sunday is St. Patrick’s Day, so I’m sharing a little last minute cocktail inspiration. A Whiskey Sour is a fantastic classic cocktail that I think everyone should learn how to make! It’s a delicious balance of sweet and sour. And that is the key! Balance!

Now you may be looking at this cocktail and going wheres the foam!? I get it! But hear me out, the foam you typically find topping a whiskey sour is made with egg whites and that’s just not for me. It’s one extra step and I never trust that my eggs are fresh enough.

If your a die hard foam in your whiskey sour fan I’ll teach you how down below.

Another note about this recipe stick to these exact proportions, taste, and then adjust the sweetness. It’s easy to start tweaking things before you taste, but then you’re likely to end up with a weak cocktail. And I know none of you want that! I made the portions in this cocktail work with Jameson Irish Whiskey, since this is a St. Patrick’s Day recipe, but you could defiantly use the traditional bourbon or Canadian Whiskey. If you use a different variety of whiskey you need to adjust your proportions of sweet and sour to suit your palette and whiskey. It’s not an exact science.

IMG_20190301_165914-2x3-2x3-2x3IMG_20190301_170546-FB-2x3

Irish Whiskey Sour

Yields: 1 cocktail

Ingredients:

  • 2 ounces Jameson Irish Whiskey
  • 1 ounce Lemon Juice, fresh
  • 1 ounce Simple Syrup (buy at the liquor store or make it – so easy!)
  • Optional: Fresh Egg White
  • Garnish: Maraschino Cherry and Lemon Peel

Directions:

If using egg whites add whites to an empty cocktail shaker. Dry shake the egg white for about 30 seconds to break them up and create froth.

Add ice, whiskey, lemon juice and simple syrup to the cocktail shaker. Shake well, about 30 seconds. Strain into a glass filled with ice. If using egg whites I recommend a double strain.

Adapted from 31 Dover.

Irish Whiskey Sour - A twist on a Classic for St. Patrick's Day!,/div>

Guinness Shepherd’s Pie

March 8, 2019 by Danielle 1 Comment

Seriously delicious and very comforting!

IMG_20190301_162106-2x3

St. Partick’s day is just over a week away. On Wednesday I shared my St. Patty’s party fav’s and now I’m sharing the perfect meal to serve at your party! It also has Guinness in it which adds a nice festive twist! Not only is this recipe great if your hosting people for St. Patrick’s day, but it’s also amazing for dinner year round. It’s delicious, filling and comforting.

When I was a kid my mom used to make shepherd’s pie out of leftover roast beef. It’s so good that way but today I’m using ground beef since it’s easy and readily available. Did you know that technically when you use beef you’re making cottage pie. Seriously lamb is traditionally used in shepherd’s pie. It gets it’s name from the shepherd’s who tend to the sheep. But since I know it as shepherd’s pie that’s what we’re going with.

IMG_20190301_163638-2x3IMG_20190301_163619-2x3IMG_20190301_163839-2x3

The first time I made Shepherd’s pie it was a failure. It was dry and tasteless. Since then I’ve discovered a few very important secrets to making a delicious Shepherd’s pie. First things first you need to make a thick flavourful gravy. Nothing is worse than dry filling. Cook down onions, garlic and carrots to create a flavourful base. brown off your ground beef add flour to thicken and then deglaze with Guinness. Seriously this creates an insane amount of deep flavour. Then add beef broth to create a thick luscious gravy.

The other tip I have is to make a super flavourful spreadable mashed potato. You need pretty loose mashed potatoes. You want them to still be soft and smooth when you eat them. Since they have to go in the oven if you dont add enough butter and milk they will really dry out. Also adding parmesan or another cheese can’t hurt either!

This recipe is seriously delicious and a must make for St. Patrick’s day, or any day!

IMG_20190301_162110-2x3.jpg

Guinness Shepherd’s Pie

Yields: 6 servings

Ingredients:

Filling:

  • 2 tbsp Olive Oil
  • 2 Garlic Cloves, minced
  • 1 Onion, diced
  • 2 Carrots, diced
  • 1 tsp Dried Thyme
  • 1 tsp Dried Rosemary
  • 1.5 lbs Extra Lean Ground Beef
  • 1/4 cup All Purpose Flour
  • 1/4 cup Tomato Paste
  • 1/2 cup Guinness
  • 2 cups Beef Broth
  • 1 Beef Bouillon cube
  • 1 tbsp Worcestershire Sauce
  • Salt and Pepper, to taste
  • 1 cup Frozen Peas
  • 1 cup Frozen Corn

Mashed Potato

  • 2 lbs Russet Potatoes, peeled and quartered
  • 3/4 cup Milk (I used 2%)
  • 1/4 cup Butter, melted

Topping

  • 3 tbsp Parmesan Cheese, grated
  • 2 tbsp Butter, melted

Directions:

In a large skillet over medium heat warm oil. Add onion, cook for 1 minute. Add carrots, cook for 1 minute until starting to soften and brightening in colour. Season with salt and pepper. Add garlic and cook for an additional 3 minutes until vegetables are soft.

Turn heat up to medium high and add ground beef. Break into small pieces and cook until browned.

Add flour, stir and cook for one minute to remove the raw four taste. Add tomato paste, bouillon cube, Worcestershire sauce, thyme and rosemary. Mix seasoning into meat until well distributed. Deglaze the pan with Guinness. Scrape brown its off the bottom of the pan until the beer cooks don and the pan becomes mostly dry again.

Add beef broth to the pan. Continue to scrape the pan to release the brown bits. Bring the mixture to a simmer, turn down the heat to low. Cook for 20 minutes, string occasionally. A thick gravy will develop. Taste gravy, add additional salt and pepper if desired. Stir in peas and corn. Cook for an additional 3-5 minutes to defrost the vegetables.

Cool the mixture and place in the fridge until ready to use.

Place potatoes in a large pot, cover with water, season with salt and bring to a boil. Cook for 15 minutes until the potatoes are fork tender.

Drain potatoes. Leave in the colander to dry for 5-10 minutes. In the mean time melt the butter in the microwave and measure out the milk. Return the potatoes to the pot. Using a potato masher or a hand mixer mash the plain potatoes. Add half the butter and milk to the potatoes, mash together. Check the consistency. The potatoes should be looser then regular mashed potatoes. They should be spreadable but not runny. Continue to add milk and butter until the mashed potatoes reach the desired consistency.

Preheat the oven to 350°F. Pour filling into a 9×11 inch baking pan, spread evenly. Spread mashed potatoes out evenly to cover the filling. Sprinkle parmesan cheese over the potatoes evenly. Spoon melted butter evenly over potatoes. Bake for 45 minutes or until the filling is bubbling and the top is golden brown.

Allow to cool for 10-15 minutes to make serving easier. Serve with peas or a side salad.

Adapted from RecipeTin Eats.

Guinness Shepherd's Pie - St. Patrick's Day Favourite, so delicious!.jpg

Raspberry Lemon Linzer Cookies

February 9, 2019 by Danielle 4 Comments

Lemon and raspberry cookies cut in heart shapes, perfect for Valentine’s Day!

00000IMG_00000_BURST20190201155312845_COVER-2x3.jpg

Valentine’s Day is now less then a week away! Have you bought your sweetie a gift? If you haven’t check out my Valentine’s Day gift guides. Have you made your reservations? Planned a special date? Or are you a last minute planner? We booked our dinner reservation and I got my husband a gift a few weeks ago. This year we are going to our favourite restaurant. It’s walking distance from our house so we can enjoy a long dinner, share a few too many drinks before safely walking home.

For our first Valentine’s Day we dressed up and went out to a fine dining restaurant, ate a very expensive preset menu and ordered oysters. We thought it would be the perfect dinner. But of course Calvin hated his duck and we discovered that neither of us like oysters. The dinner was so expensive my husband still won’t tell me how much the dinner costs. We were collage kids with no money so this dinner was a really big deal. Although it wasn’t perfect we still look back at it as a great memory of our early days.

The year after that we got teen burgers from A&W, I made some treats and we had a picnic in the living room. Over the last six years we’ve done everything from fancy dinners to fast food. Last year we made homemade heart shaped pizza (my pizza dough recipe) and chocolate lava cakes (YUM!). Regardless of how we’ve celebrated we’ve spent quality time together showing our love for the other and reminding ourselves how important our relationship is.

00100dPORTRAIT_00100_BURST20190201155529317_COVER-2x3.jpg00000IMG_00000_BURST20190201155304888_COVER-2x300000IMG_00000_BURST20190201155157724_COVER-Edited 2x3

I love to celebrate everything, big and small. I like to show people that I care about them. I love to give gifts, but giving people something you made is so special. These cookies are perfect to give to family and friends or serve to your sweetheart. They are also just really cute and festive!

Linzer cookies are super simple to make kind of like a sugar cookie but way better! But they have almond flour and are made without leavener. They are delicate, flavourful and rich. The addition on lemon zest adds a fresh light citrus flavour to the cookie. Raspberry jam is sandwiched between two cookies to add a delicious berry flavour.

These cookies are so so so good. They are also really fun to make. They look really impressive too so they are perfect to giveaway. I love when a simple baked good makes someones day! These are totally worth it!

00100dPORTRAIT_00100_BURST20190201155513446_COVER-2x3

Lemon Raspberry Linzer Cookies

Yields: 12 cookies

Ingredients:

  • 3/4 cup Unsalted Butter
  • 1/2 cup White Sugar
  • Zest of One Lemon
  • 1 Egg Yolk
  • 1 teaspoon Vanilla Extract
  • 1 cup All Purpose Flour
  • 3/4 cup Almond Flour
  • 1/8 teaspoon Salt
  • Seedless Raspberry Jam
  • Confectioner’s Sugar

Directions:

In a medium bowl whisk together all purpose flour, almond flour and salt together. Set aside.

Using a stand mixer beat butter, sugar until pale until fluffy. About 2 minutes. Add lemon zest, egg yolk and vanilla extract, beat until smooth. Add dry ingredients to the bowl and mix on low until just combined. Divide dough into two disks, wrap in plastic wrap and chill in the fridge for 30 minutes.

Line two baking sheets with parchment paper and set aside. Roll dough a quarter inch thick. Using a medium sized heart shaped cookie cutter cut out 24 hearts. Using a smaller heart shaped cookie cutter cut the centre out of 12 of the cookies. Place the cookies on the baking sheets. Place the cookie sheets in the fridge for an hour to chill.

Preheat the oven to 350°F.

Bake cookies for 8-10 minutes until the edges are just beginning to turn brown. Allow the cookies to cool on the baking sheet for 5 minutes before transferring to a cooling rack.

Once completely cool dust cookie tops with confectioner sugar. Spread 1/2 teaspoon of jam on each of the cookie bottoms. Leave a boarder around the jam to ensure the jam doesn’t spill out the sides of the cookies. Place the tops pf the cookies on the bottom.

Chill the cookies in the fridge or 30 minutes before serving to set the jam. Store in the fridge for up to one week.

Recipe adapted from King Arthur Flour.

Lemon Raspberry Linzer Cookies - Valentine's Day Treats, yummy!
« Previous Page
Next Page »

Primary Sidebar

Danielle at Home

Hi, I’m Danielle. I am a twenty something woman working her office job by day and blogging at night! I’m married, a new home owner and I love sharing all my favourite things on this blog. So grab a glass of wine and follow along. I’m so glad you’re here!

SUBSCRIBE & FOLLOW

Pinterest
Instagram
Facebook
Twitter

Footer

Copyright © 2025 Danielle at Home on the Foodie Pro Theme