• Skip to primary navigation
  • Skip to main content
  • Skip to primary sidebar
  • Skip to footer

DANIELLE AT HOME

  • HOME
    • About
    • Contact
  • LIFESTYLE
    • Favourites
    • Goals
    • Home
      • DIY Projects
      • Organization
    • Holidays
      • Christmas
      • Easter
      • Halloween
      • New Years
      • Thanksgiving
      • Valentine’s Day
      • Gift Guides
  • STYLE
  • WELLNESS
  • FOOD + DRINK
    • Appetizers
    • Breakfast
    • Dessert
    • Drinks
    • Side Dishes
    • Snacks
    • Holiday Recipes
      • Christmas
      • Cinco De Mayo
      • Easter
      • Father’s Day
      • Halloween
      • Mother’s Day
      • New Years
      • St. Patrick’s Day
      • Thanksgiving
      • Valentine’s Day

Holiday Recipes

Lemon Ricotta Blueberry Pancakes

May 16, 2019 by Danielle 2 Comments

Light airy and delicious pancakes…

IMG_0262_1

Breakfast is my favourite meal of the day. Now of course most mornings I’m gulping down a smoothie on my way to work, but on the weekends it’s a whole other story. I always try to make a special breakfast at least one morning of the weekend. We flip back and forth between sweet and savoury. Sometimes it’s eggs, bacon and hash browns and other days it’s waffles or pancakes.

Today’s pancake recipe is for those who like things on the sweeter side. This recipe is inspired by my dad. He loves lemons, he is even trying to grow lemons in his backyard. His next crop is expected to be a big one and I’m really hoping he will share. Anyway he loves all things lemon, citrus and tart flavours. He actually made similar recipe to this on for me once and it was pretty tasty.

IMG_0232_1IMG_0259IMG_0260

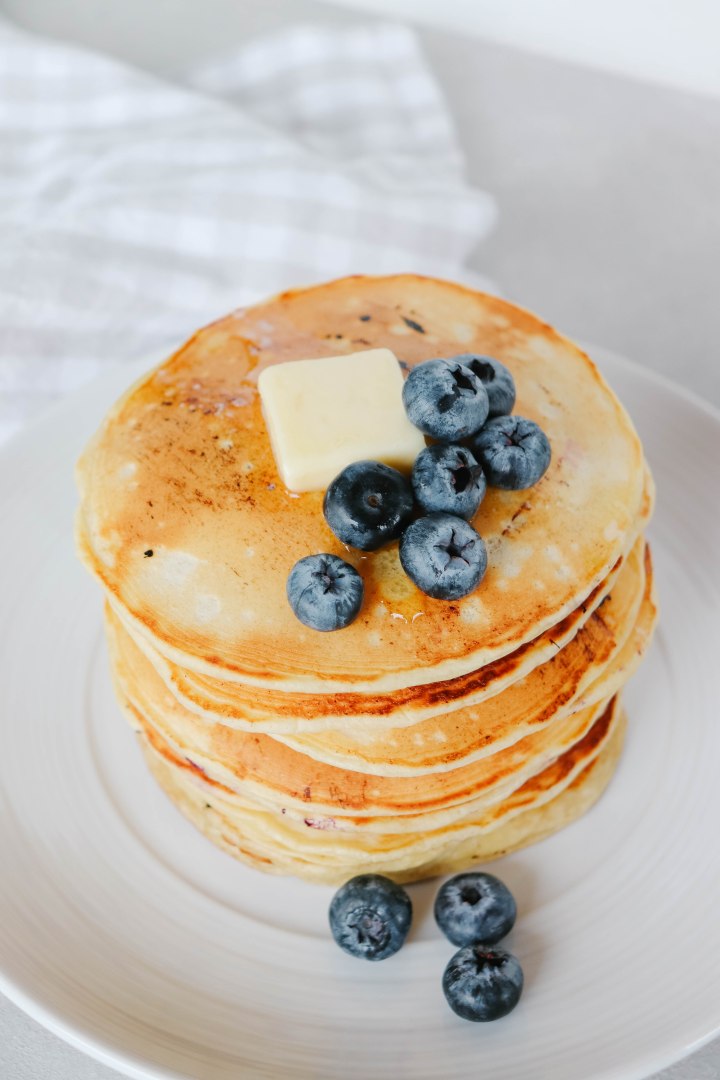
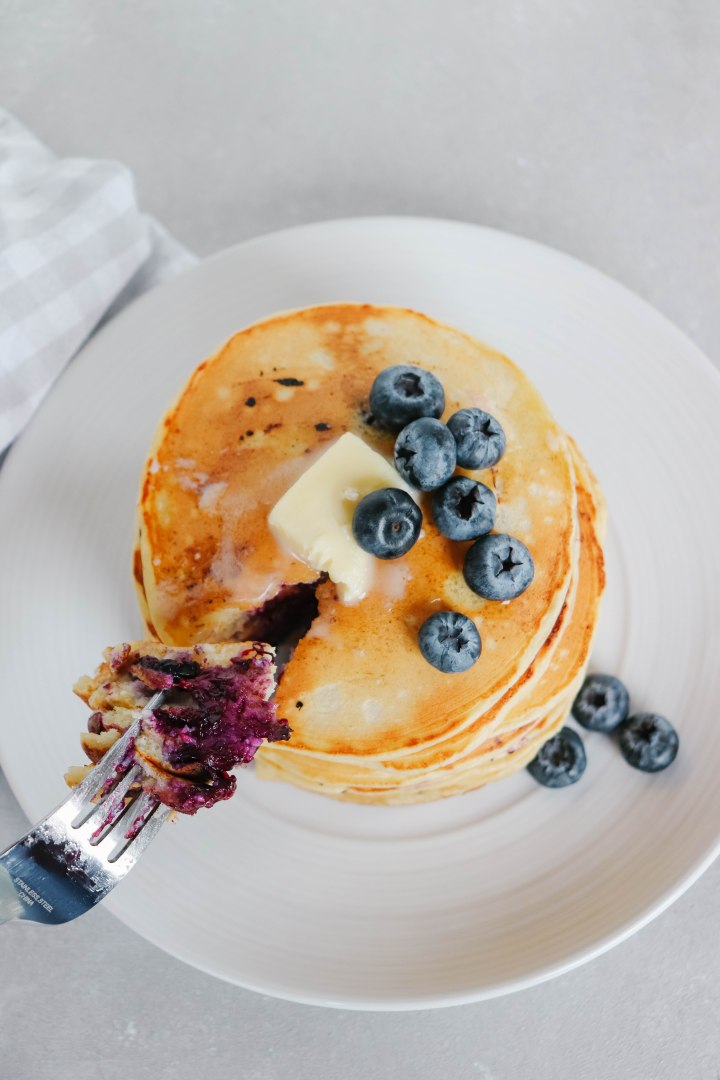
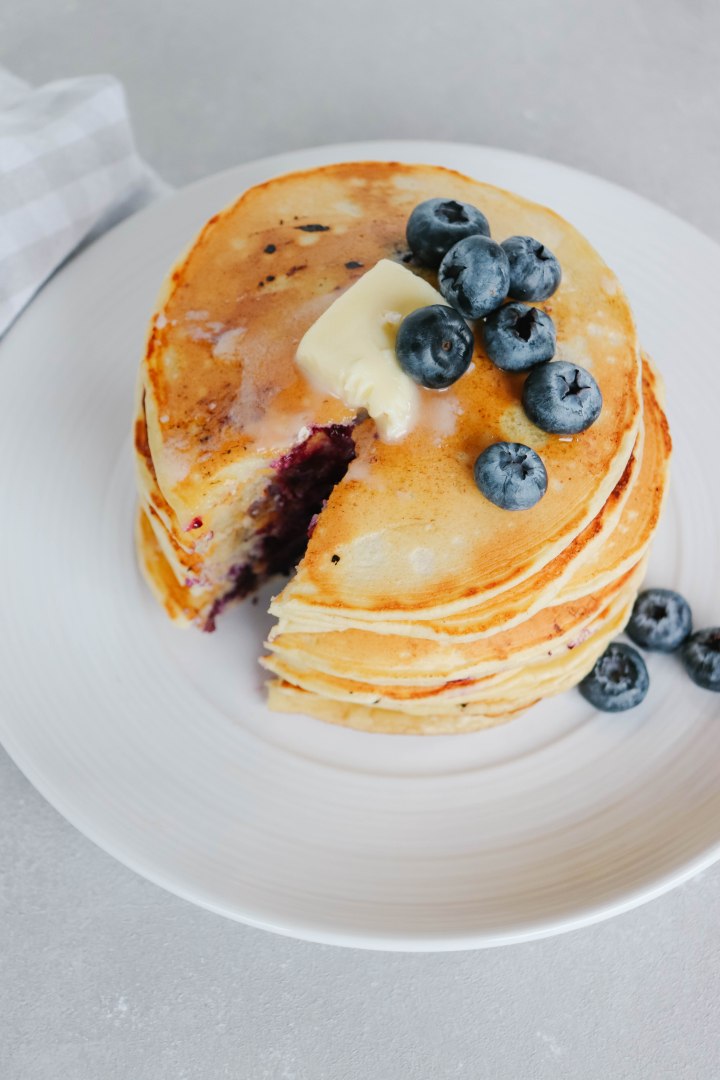
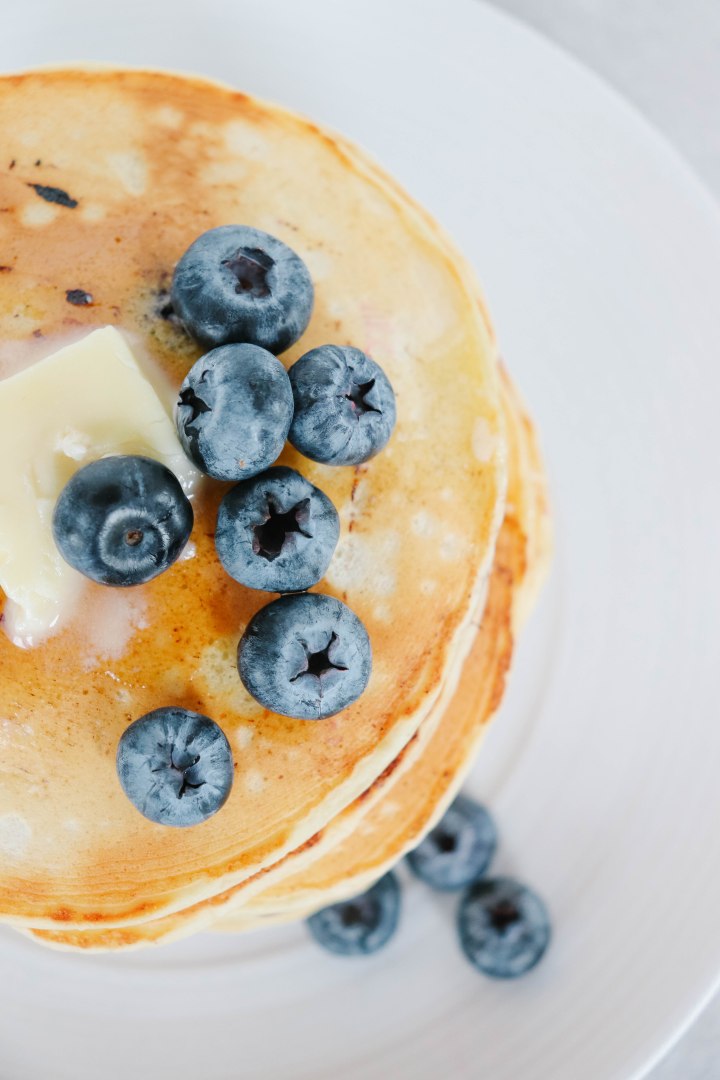
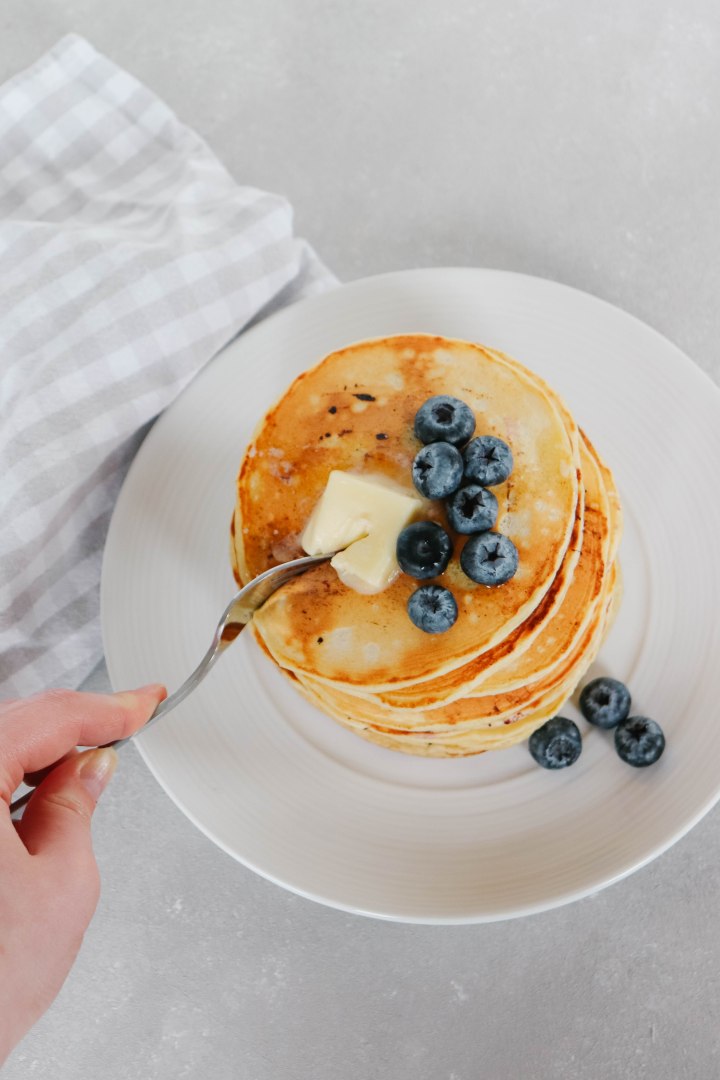
These pancakes have ricotta, lemon, vanilla and lots of blueberries. The ricotta adds a really nice fluffy texture to the pancakes. Lemon juice flavours the pancakes with just enough tart and sweet flavour. Now of course these pancakes have all the delicious components of a classic pancake recipe, and by that I mean butter and vanilla. In my opinion all pancakes require vanilla and copious amounts of butter. Once the batter is prepared (be sure not to over mix) fold in those juicy blueberries. So yummy!

Serve these pancakes with butter, real maple syrup an a squeeze of lemon juice! Such a delicious combo and the perfect weekend breakfast. Give them a try!!

IMG_0251.jpg

Lemon Ricotta Blueberry Pancakes

Yields: 18 pancakes

Ingredients:

  • 1 1/2 cups All Purpose Flour
  • 3 tbsp Sugar
  • 2 tsp Baking Powder
  • 1/4 tsp Baking Soda
  • 1/2 tsp Salt
  • 1 cup Milk (I used 2% but any dairy or non dairy works)
  • 3/4 cup Ricotta Cheese (I had whole milk ricotta on hand but you could use any)
  • 3 large Eggs
  • 1 tsp Vanilla Extract
  • 1/4 cup Lemon Juice
  • Zest of One Lemon
  • 2 tbsp Butter, melted
  • 3/4 cup Blueberries (I prefer fresh but frozen works in a pinch)

Directions:

In a large bowl whisk flour, sugar, baking powder, baking soda and salt together, set aside. In a medium bowl whisk milk, ricotta, eggs and vanilla. Once combined add lemon juice, lemon zest and butter to the wet ingredients, the wet ingredients will curdle. Don’t be alarmed the curdling is normal and it won’t affect your batter.

Pour the wet ingredients into the dry. Fold until just combined. Make sure to keep some lumps, a lump batter makes a better pancake. Fold blueberries into batter.

Heat a fry pan or electric griddle over medium/medium high heat. Pout 1/3 cup batter onto the skillet and cook on one side until golden brown and bubbles begin to form on the top. Flip and cook on the other side until golden brown and cooked though.

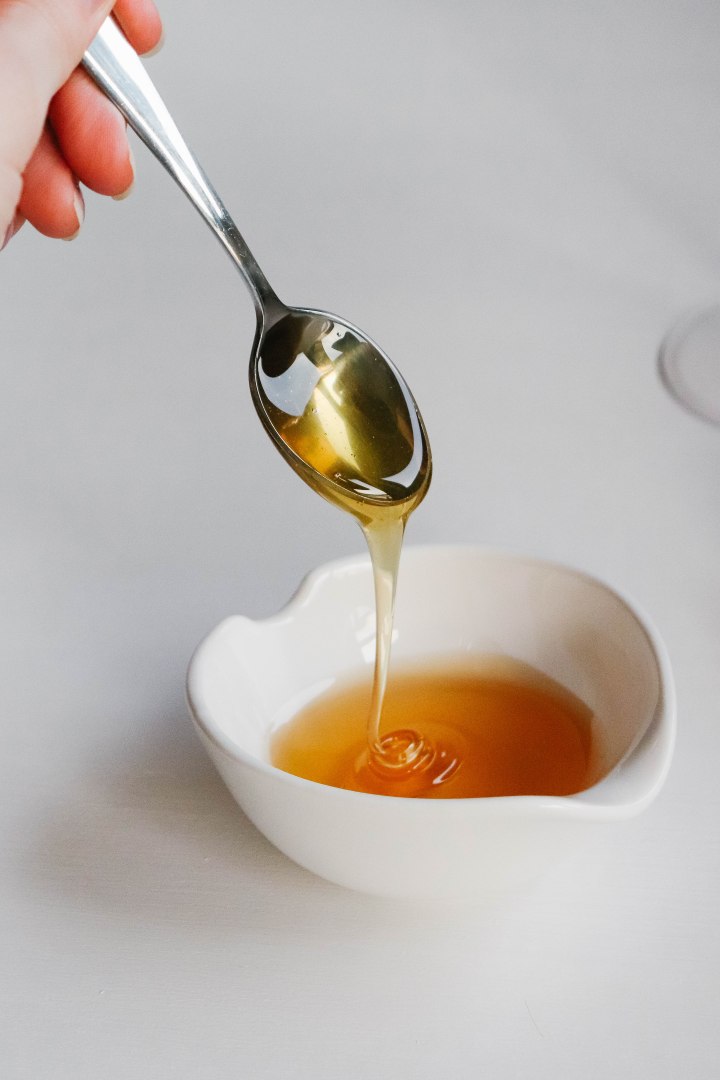
Serve with butter, maple syrup and a squeeze of lemon.

Recipe adapted from Cooking Classy.

Strawberries and Cream Naked Cake

May 8, 2019 by Danielle Leave a Comment

Packed full of berry flavour and perfect for spring.

IMG_0394

Today I am sharing my new favourite cake recipe. It’s pretty fitting to share a cake on your birthday right! Yep it’s my 26th birthday today! This year has gone so fast and I can’t believe I’m turing another year older. Twenty five was a huge year for me, I got married, was in a wedding, attended weddings, saw friends and family become Mamas for the first time, lost my Grandma, changed jobs twice, got asked to be a bridesmaid (again!), made the biggest purchase of my life (more to come on that!) and started this BLOG! This year was big! I’m heading into 26 more confident, wiser, more patient and ready to tackle anything life throws my way. I though it would be hard to say goodbye to this age since 25 was so great, but I’m actually ok with turning another year older. I’m grateful for my life and ready to see what the second half of my twenties has in store.

Now enough about me let’s talk cake! I made this cake with Mother’s day in mind, fun fact we always celebrate my birthday, my grandmas birthday (we’re birthday twins!) and mother’s day all at once. So cake is always the dessert of choice. My grandma was what inspired this pink cake! She loves pink and since mother’s day and her birthday get rolled into one I think she deserves a pink cake. She’s also turning 90 this year, so believe me when I say we are celebrating hard this weekend.

IMG_0370IMG_0422IMG_0373

I made this cake a naked cake because I don’t like too much frosting. Plus the actual cake is quite sweet. Between the cake layers and strawberries you really dont need too much buttercream. So let’s break this thing down!

Cake Layers: The cake layers are strawberry flavoured. I use a strawberry purée to flavour the classic vanilla cake layer. This also tints the cake a slight pink colour which is a perfect compliment to the bright white frosting!

Filling: Fresh strawberries! Pretty self explanatory, but you can’t have a strawberry cake without it if you ask me!

Frosting: A classic vanilla frosting! This is always my go to frosting, it’s highly requested in my house! It goes well on just about everything including this cake.

IMG_0431

Ok guys no excuses, this cake is almost as easy as a boxed one, but so much better! Make it for your Momma this Sunday or heck make it in honour of my birthday!! xo

IMG_0437

Strawberry and Cream Naked Cake

Yields: 2 layer cake

Ingredients:

Cake Layers:

  • 2 1/2 cups All Purpose Flour
  • 2 tsp Baking Powder
  • 1/2 tsp Baking Soda
  • 1 tsp Salt
  • 3/4 cup Unsalted Butter, softened
  • 1 3/4 cups White Sugar
  • 5 Egg Whites
  • 1/3 cup Sour Cream
  • 2 tsp Vanilla Extract
  • 1/2 cup Whole Milk
  • 1 pound Strawberries

Filling:

  • 10-12 Strawberries, sliced

Frosting:

  • 1 cup Salted Butter
  • 4 – 5 cups Confectioner’s Sugar
  • 1/4 cup Half & Half (or whole milk)
  • 2 tsp Vanilla Extract

Directions:

Cake Layers:

In a blender or food processor blend 1 pound of strawberries until smooth. Add blended strawberries to a small sauce pan over medium heat. Cook until the mixture reduces and starts to thicken slightly about 10-15 minutes. Allow to cool fully in the fridge for at least an hour, or overnight.

Pre heat the oven to 350°F. Grease and flour two 9 inch cake pans, set aside.

In a bowl whisk together flour, baking powder, baking soda and salt. Set aside. Add butter to the bowl of a stand mixer. Beat on high for 2-5 minutes until the butter is pale yellow or white in colour. Add sugar to the whipped butter. Mix on medium until fully combined. Add egg whites and whip on high until combined and fluffy. Add sour cream and vanilla mix on medium low until well combined.

Add half of the dry ingredients on low until just combined. Keeping the mixer on low slowly drizzle in half of the milk until combined. Repeat with the remaining flour and milk mixtures. Add strawberry purée to batter and mix on low until combined.

Pour batter into cake pans. Bake for 20-25 minutes or until a toothpick comes out clean. Allow to cool in pans for 5 minutes before transferring to a cooling rack. Cool completely before assembling and icing.

Buttercream Frosting:

Add butter to the bowl of stand mixer. Whip on high for at least 5 minutes until pale in colour and light and fluffy. Add confectioners sugar on low until well mixed. Add vanilla and half and half to the bowl. Continue to whip on high until frosting is fluffy and is you desired consistency.

Filling & Assembly:

Trim tops of cake layers to level if necessary. Place cake layer on your cake plate or cake stand. Place about a cup of frosting on first cake layer. Spread slightly to cover. Cover frosting with layers of sliced strawberries. Place second cake layer on top. Cover the cake with the remaining frosting. Keeping most of the frosting on the top of the cake. Decorate with whole strawberries. Place in the fridge for an hour to set before serving.

Adapted from Sally’s Baking Addiction strawberry cake and buttercream frosting.


Queso Dip

May 3, 2019 by Danielle Leave a Comment

Want to really kick your next Mexican feast up a notch? Make homemade queso. It’s actually really easy!

IMG_0361

Ok guys today I am sharing what might be the best recipe I’ve ever shared! Seriously this queso dip is bomb! And it’s insanely easy to make for any party or even for Cinco De Mayo! Which check your calendars is coming up on Sunday!

I love queso whether its from the best tex-mex restaurant or out of a jar from the grocery store I will eat it. I do prefer to eat real food though, not necessarily health food but really food with ingredients I actually recognize. Most commercially prepared queso has processed cheese, some how it’s gross and delicious at the same time. I won’t judge you for having either opinion! Also please note although I will eat processed queso from a jar I won’t eat Cheese Wiz or Velveeta… go figure!

IMG_0349IMG_0357

This queso recipe has jalapeños, onions, cumin, cream cheese, chipotle, jack cheese and sharp cheddar! Defiantly the kind of ingredients I want in my queso. This recipe has just enough spice to warm your mouth but isn’t over the top. Personally I like my salsa hot, my queso medium and my guacamole mild. Anyone else?

Essentially you cook the jalapeños and onions together then add the rest of the ingredients and heat together slowly. Seriously simple. Serve it warm with lots of chips! Or pour it over chips and your favourite nacho fixings for the ultimate and most delicious nachos you’ve ever tasted.

Ok guys this recipe is a must make for Cinco De Mayo!

IMG_0362.jpg

Queso Dip

Yields: 4 servings

Ingredients:

  • 1 tbsp Butter
  • 1/4 cup Onion, diced
  • 1 Jalapeños, chopped with seeds and ribs removed (keep the seeds if you like it spicy)
  • 2 Garlic Cloves, minced
  • 1 tsp Cumin
  • 2 ounces Cream Cheese
  • 1 1/4 cup Whole Milk
  • 8 ounces Sharp Cheddar Cheese, grated
  • 8 ounces Monterey Jack Cheese, shredded
  • 1 tbsp All Purpose Flour
  • 1 Chipotle Pepper in Adobo, finely minced
  • Salt to taste

Directions:

In a fry pan over medium low heat sauté onions, garlic and jalapeños until loft and onions are translucent. Season with cumin and continue to cook for another minute or two. Add cream cheese to the pan. Melt and combine with vegetables. Add milk to the pan and warm through.

Combine shredded cheese with flour. Add cheese and flour to the pan. Heat and stir until the cheese fully melts. Stir chopped chipotle peppers to the mixture. Taste and adjust salt and seasonings accordingly.

Serve warm with tortilla chips.

Adapted from Half Baked Harvest.


Spring Vegetable Pasta with Ricotta Cream Sauce

April 27, 2019 by Danielle Leave a Comment

Fresh pasta and spring vegetables tossed in a creamy and cheesy sauce…

IMG_0273

I’m a serious pasta lover and I’m really surprised I haven’t shared more pasta recipes on the blog yet. I have shared a few, lasagna and spaghetti and meatballs, but that’s just not enough carbs! We’re going to change that. Today’s recipe contains tender and delicious spring vegetables, a ricotta cream sauce and fresh linguini. It’s perfect for spring.

The vegetables in this pasta are the true star. Asparagus, snap peas and english green peas. The asparagus and snap peas are sautéed in olive oil with minced garlic and shallots. This gives the vegetables a delicious flavour. Toss the frozen english peas in at the end to warm through and infused with delicious flavour.

IMG_0279_1IMG_0319_1IMG_0312_1

Now the sauce is super simple. It’s just a few ingredients warmed together and reduced slightly. The sauce is just milk and ricotta cheese that is liberally seasoned with salt and pepper. Once the sauce vegetables and pasta are combined that’s when the magic happens…. and the magic is parmesan cheese and pasta water. It is the ONLY way to pull a pasta dish together. Toss a bit of pasta water in with your pasta and sauce to loosen and have all the components combine. The parmesan cheese melted into the pasta takes the flavour over the top! It takes things from delicious pasta to NEXT LEVEL delicious pasta!

Ok now run to the store get your ingredients and get cooking. I promise this recipe will deliver!

IMG_0298_1

Spring Vegetable Pasta with Ricotta Cream Sauce

Yields: 4 servings

Ingredients:

  • 4 ounces Snap Peas
  • 8 ounces Asparagus, trimmed and sliced in half
  • 2 tbsp Olive oil
  • 1 cup English Green Peas (fresh or frozen)
  • Shallot, finely chopped
  • 2 Garlic Cloves, minced
  • 12 ounces Linguini (I used fresh but dry also works great)
  • 3/4 cup Ricotta Cheese
  • 1/2 cup Milk (I used whole but 2% would also work)
  • 2/3 cup Parmesan Cheese, grated
  • Salt & Pepper to taste

Directions:

In a sauté pan over medium low heat sauté shallots, garlic, snap peas and asparagus for 5 minutes or until tender. Season with salt and pepper. Toss peas with the other vegetables until heated though, about 1-2 minutes. Remove from the pan and set aside.

Bring a large pot of salted water to a boil, cook pasta according to package instructions. Before draining remove one cup of pasta water and set aside.

Meanwhile add ricotta and milk to the pan. Heat for 10-15 minutes until warmed though, simmering and slightly reduced. Season with salt and pepper.

Add vegetables and cooked pasta to the sauce. Toss until combined. Depending on how dry your pasta is you will need to add pasta water. I always add at least a 1/4 cup but typically add about 1/2 cup. In addition to the pasta water add the parmesan cheese. Toss the pasta until the water in combined with the sauce and the cheese has melted. Taste and adjust seasoning if needed.

Serve immediately and top with additional parmesan cheese if desired.

Adapted from Pasta Primavera with Asparagus and Peas.


Honey Lemon Gin Sour

April 20, 2019 by Danielle Leave a Comment

Delicious gin cocktail sweetened with honey with a secret ingredient…

IMG_0065

Today I’m sharing a fun classic cocktail with a secret ingredient.

Gin is my favourite hard alcohol to create cocktails with. So I’m always trying to experiment with different ways to use it. Citrus goes so well with gin. Lemon is my favourite. This cocktail is perfect for spring. Honey and lemon scream springtime to me!

IMG_0068IMG_0140IMG_0092

This cocktail contains four simple ingredients; gin, lemon juice, honey and aquafaba.

Ok so aquafaba might not sound so simple…. Traditionally sour cocktails contain egg whites. The egg whites create a light airy foam on top of the cocktail. Personally I don’t like using egg whites in cocktails. There is something so weird about drinking egg whites. Plus they smell funky. Just my opinion. If it’s your jam you can sub egg whites for aquafaba one to one.

So what the heck is aquafaba? Aquafaba is the liquid found in a can of chickpeas. So essentially bean liquid. Sounds so weird right? But it’s a really common vegan substitute for egg whites. It’s used in recipes that call for whipped egg whites like meringues.

I swear as weird as it sounds you won’t taste it. If you’re not ready to try it yet then just omit it. The flavours of the cocktail will be the same but the texture won’t be as good. It won’t have the same body and foaminess.

Ok now are you going to try this sour with or without the aquafaba?

IMG_0064

Honey Lemon Gin Sour

Yields: 1 cocktail

Ingredients:

  • 2 ounces Gin
  • 1 ounce Fresh Lemon Juice
  • 3/4 ounce Honey
  • 3/4 ounce Aquafaba (strained chickpea liquid)
  • Ice

Directions:

Add aquafaba to a cocktail shaker. Dry shake until frothy about 30 seconds. Fill shaker with ice. Add gin, lemon juice and honey. Shake again until well mixed and the shaker becomes very cold. At least 30 seconds.

Strain cocktail into preferred glass. I like using a coupe or martini glass. Enjoy!

Adapted from Liquor.com


Sun-dried Tomato Spinach and Goat Cheese Quiche

April 12, 2019 by Danielle Leave a Comment

Flavourful springtime quiche

IMG_20190315_162001-2.jpg

Is your family more of an Easter brunch or Easter dinner family? We’re both lol! I love quiche for brunch. I’m a fan of a savoury brunch over sweet. I picture servings this quiche with a simple salad, or my lemon parmesan green beans. Add some homemade cinnamon buns, fresh fruit and yogurt with granola to really round out the buffet.

And if you need a dessert for Easter how about carrot cake cupcakes?

Now lets get into this delicious quiche recipe!

IMG_20190315_162001IMG_20190315_162731

This quiche starts with my grandma’s classic pie dough recipe. You’ve seen it before for my chicken pot pie and my grandma’s famous berry pie! Today we’re using half of her recipe as the base of our crust.

The base of this quiche is so simple; just eggs and milk!

To flavour the quiche we are adding garlic, sun-dried tomatoes, spinach and crumbled goat cheese. Such a yummy combination.

After blind baking the pie shell pour the filling into the shell and bake,

Once baked this quiche is great cold or warm. Super delicious! And entertaining worthy!

IMG_20190315_161951.jpg

Sun-dried Tomato Spinach and Goat Cheese Quiche

Yields: 6 servings

Ingredients:

Pie Dough:

  • 1 1/3 cups All Purpose Flour
  • 1 tsp Salt
  • 1/4 cup Vegetable Shortening, cold
  • 1/4 cup Unsalted Butter, cold
  • 4 to 8 tbsp Ice Water

Filling:

  • 1 tsp Butter
  • 2 Garlic Cloves, minced
  • 2 cups Spinach
  • 4 Eggs
  • 1 cup Whole Milk
  • 1/3 cup Sun-dried Tomatoes, drained and chopped
  • 4 ounces Goat Cheese, crumbled
  • Salt & Pepper, to taste

In a medium bowl whisk together flour and salt. Using a pastry cutter cut butter and shortening into flour until combined and mixture resembles peas and sand. Slowly add ice water one tablespoon at a time until a ball forms. Form into a disk, wrap in plastic wrap and store in the fridge for at least an hour.

Preheat oven to 350°F.

Roll pastry into a 9 inch disk. Line your pie dish. Crimp the edges of the crust. Prick the crust with a fork. Place a piece of parchment paper over the crust. Fill with dry beans or pie weights. Bake for 10 minutes. Remove from the oven and allow to cool.

In a fry pan over low heat add butter, spinach and garlic. Sauté until it spinach begins to wilt. Place in a small bowl to cool.

In a large bowl whisk together eggs and milk. Add sun-dried tomatoes, spinach, goat cheese, salt and pepper to the egg mixture. Fold together. Pour filling into pie shell.

Bake for 45-60 minutes until the crust starts to brown and the centre of the quiche is set. Allow to cool slightly before serving, 5-10 minutes.

Adapted from Sally’s Baking Addiction and Danielle at Home.

« Previous Page
Next Page »

Primary Sidebar

Danielle at Home

Hi, I’m Danielle. I am a twenty something woman working her office job by day and blogging at night! I’m married, a new home owner and I love sharing all my favourite things on this blog. So grab a glass of wine and follow along. I’m so glad you’re here!

SUBSCRIBE & FOLLOW

Pinterest
Instagram
Facebook
Twitter

Footer

Copyright © 2025 Danielle at Home on the Foodie Pro Theme