• Skip to primary navigation
  • Skip to main content
  • Skip to primary sidebar
  • Skip to footer

DANIELLE AT HOME

  • HOME
    • About
    • Contact
  • LIFESTYLE
    • Favourites
    • Goals
    • Home
      • DIY Projects
      • Organization
    • Holidays
      • Christmas
      • Easter
      • Halloween
      • New Years
      • Thanksgiving
      • Valentine’s Day
      • Gift Guides
  • STYLE
  • WELLNESS
  • FOOD + DRINK
    • Appetizers
    • Breakfast
    • Dessert
    • Drinks
    • Side Dishes
    • Snacks
    • Holiday Recipes
      • Christmas
      • Cinco De Mayo
      • Easter
      • Father’s Day
      • Halloween
      • Mother’s Day
      • New Years
      • St. Patrick’s Day
      • Thanksgiving
      • Valentine’s Day

Halloween

Slow Cooker Vegetarian Chili

September 25, 2018 by Danielle Leave a Comment

IMG_20180914_142616

I’ve been trying to cook less during the week. Life is just so busy and there aren’t enough hours in the day to get everything accomplished. So I’ve been cooking big batches of food and reheating leftovers. Making up pans of lasagna and enchiladas to get us though busy weeknights. Of course another great time saver is the slow cooker. I will admit I don’t utilize mine as much as I should. I mostly use mine to batch cook soups, stews and sauces. It really is satisfying to come home from work and smell dinner cooking away.

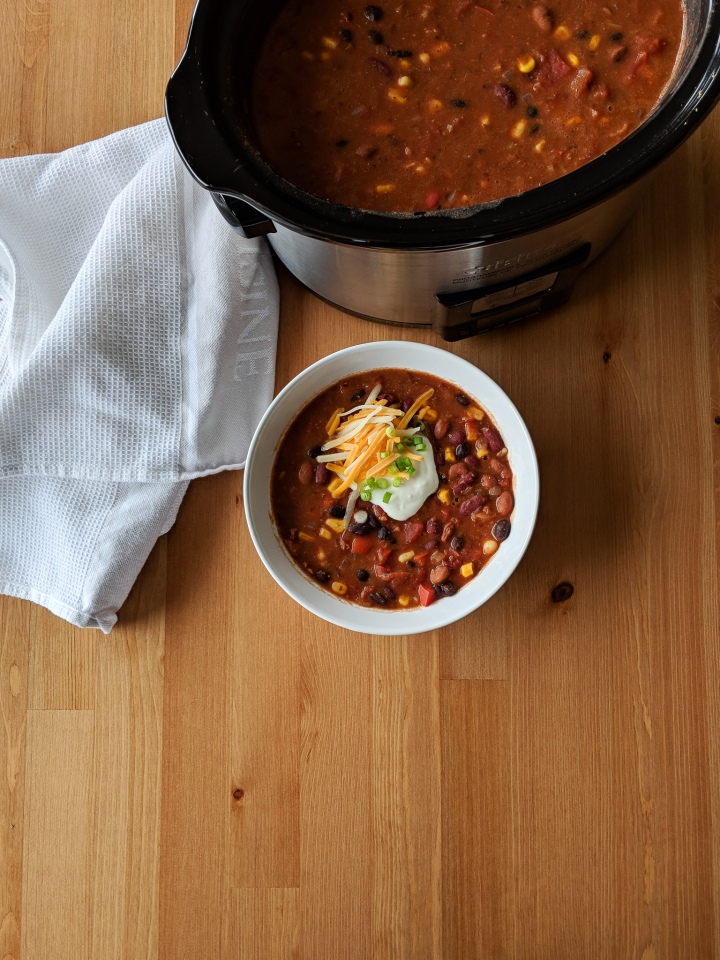
One of my favourite recipes for the slow cooker is vegetarian chili. I love this recipe because it’s cheap, it’s easy and it’s flavourful. This recipe doesn’t require browning or sautéing. You can literally just dump everything in the slow cooker and let it do it’s thing.

IMG_20180914_142559

For this chili recipe all you have to do is chop your vegetables, blend one can of tomatoes and add everything to the slow cooker. It really is crazy how simple that is.

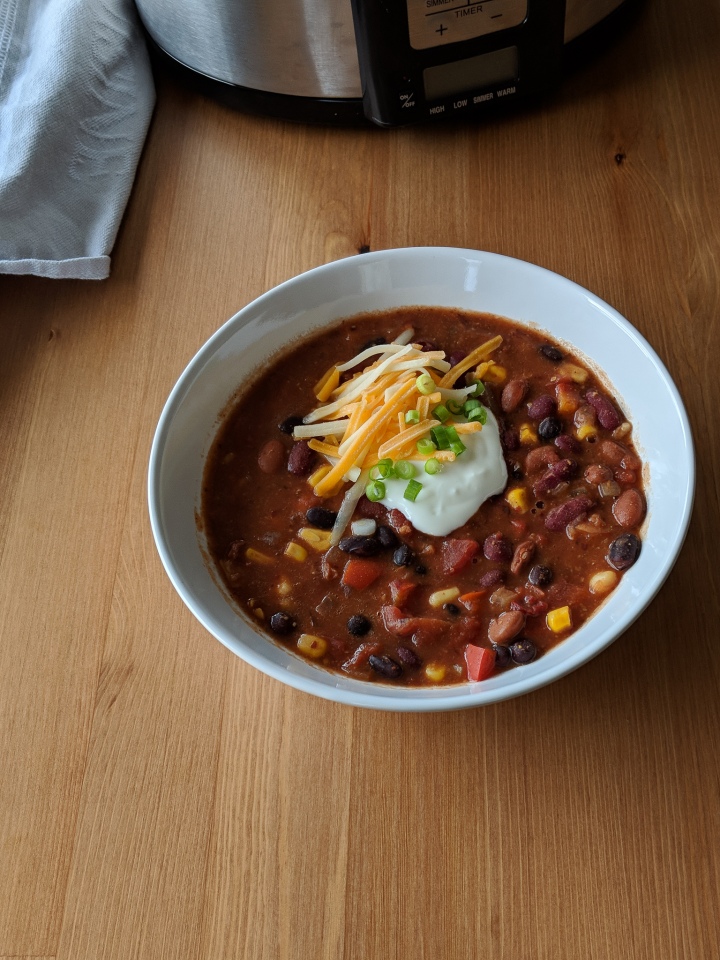
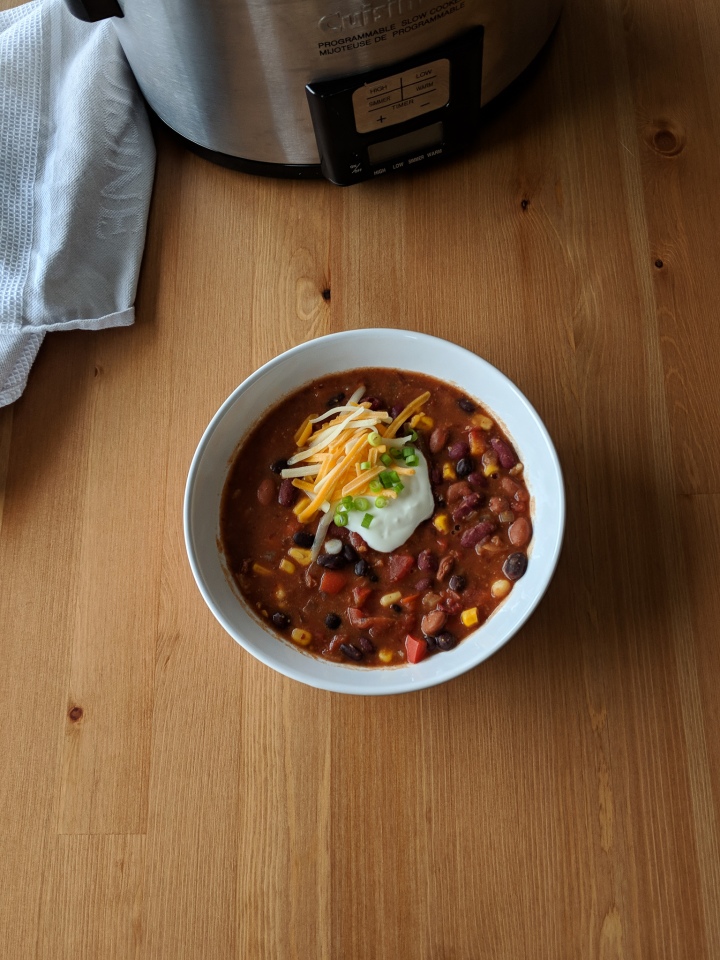
Once your chili is ready it’s time to add toppings! I like sour cream, cheddar cheese and green onion. Tortilla chips or Fritos (YUM!) are also great on top. I also like to serve my chili with a bun or some cornbread to round out the meal.

It’s seriously so delicious and couldn’t be easier! It also screams fall and football Sundays. I love throwing all the ingredients in the slow cooker running my Sunday errands, going on our weekly walk and coming home to a perfect Sunday dinner. A perfect Sunday dinner that makes enough leftovers for Monday and even more for your freezer! I mean isn’t that what we all need?

IMG_20180914_142557.jpg

Slow Cooker Vegetarian Chili

Yields: 8 servings

Ingredients:

  • 1 White Onion, diced
  • 2 Carrots, diced
  • 2 Stalks of Celery, diced
  • 1 Red Pepper, chopped
  • 4 Cloves of Garlic, minced
  • 1 Chipotle in Adobo Sauce, chopped
  • 2 Tsp Adobo Sauce
  • 2 15 oz Cans Fire Roasted Tomatoes
  • 1 15 oz Can Red Kidney Beans, rinsed
  • 1 15 oz Can Black Beans, rinsed
  • 1 15 oz Can Pinto Beans, rinsed
  • 1 Cup Frozen Corn
  • 1 Cup Low Sodium Vegetable Broth
  • 3 Tbsp Chili Powder
  • 2 Tbsp Ground Cumin
  • Salt & Pepper to taste

Directions:

Chop onion, carrots, celery, red pepper, garlic and chipotle pepper. Add to the slow cooker. Pulse one can of the tomatoes in a food processor or blender until tomatoes break down and the mixture is thick. Add the pulsed tomatoes and the can of un pulsed tomatoes to slow cooker. Drain and rinse kidney beans, black beans and pinto beans. Add beans and corn to the slow cooker. Add vegetable broth, adobe sauce, chili powder and cumin to the slow cooker. Cook on low for 8 hours, or high for 4 hours. Before serving add salt and pepper if needed.


You may also like…

IMG_3554

Cheddar Drop Biscuits

IMG_20180916_094102

Skillet Cornbread


Skillet Cornbread

September 20, 2018 by Danielle 1 Comment

IMG_20180916_100150

I remember the first time I ever had a piece of cornbread. I was at a random BBQ restaurant by SeaTac airport. Although I’m sure it was one of the wort places to try cornbread I still loved it. It’s my favourite side to soup and chili. It would also be great alongside some BBQ Chicken. I also can’t wait to try using this cornbread as a base for stuffing. I bet it would be amazing!

I like making cornbread in a cast iron skillet because the hot skillet creates a really nice crust. If you don’t have a cast iron skillet any oven safe skillet or baking pan will work for this recipe.

IMG_20180916_094102

This recipe is great plain but it is also great with mix ins. For savoury mix in’s I like fresh corn, cheddar cheese, jalapeños and chives. If you like a sweet cornbread try some dried cranberries, blueberries, or even swirl in raspberry jam. My favourites are Jalapeno and cheddar, or raspberry jam. I recommend adding 1 cup of which ever mix in’s you choose.

IMG_20180916_100225.jpg


Skillet Cornbread

Yields: 8 Servings

Ingredients:

  • 1/2 Cup Unsalted Butter
  • 1/4 Cup Honey
  • 1 Egg
  • 1 Cup Buttermilk
  • 1 Cup Cornmeal1
  • 1 Cup All Purpose Flour
  • 1 Tsp Baking Powder
  • 1/2 Tsp Baking Soda
  • 1/8 Tsp Salt

Directions:

Preheat oven to 400°F. Melt butter in a 12 inch cast iron skillet over low heat stirring occasionally.  Pour melted butter into a medium-sized bowl and allow to cool for 5-10 minutes. In a large bowl whisk together cornmeal, flour, baking powder, baking soda and salt. Set aside. Add honey, egg and butter milk to the melted butter. Whisk to combine. Pour when ingredients into the dry, and whisk until combined.

If adding mix in’s fold them into the batter careful not to over mix.

If your skillet is no longer warm heat it on low for a few minutes to warm up. Once skillet is heated pour in the batter. Bake for 15-20 minutes until the edges are golden brown and a tooth pick comes out clean. Allow to cool before slicing.

Adapted from, Sally’s Baking Addiction


You might also like…

IMG_3554

Ceddar Drop Biscuits

IMG_3592

BBQ-less BBQ Chicken

Hot Apple Cider

September 18, 2018 by Danielle Leave a Comment

IMG_3955.jpg

Fall has a arrived early here on the coast of BC. Normally September is just as warm as August, and October is crisp with a few rainy days. The constant grey rain clouds don’t normally set in until November. So far September is full of rain and misty days, with a bit of sunshine in between. Normally I wouldn’t give into fall flavours quite this soon, but with this weather I just can’t get enough.

There’s just something about venturing out in the crisp fall air that brings me such joy. On Sunday’s rain or shine we go out for a long trail walk. When we get home we bundle up and make ourselves a hot drink to warm us up. Hot apple cider is my fall go to. I love it because it’s warm and spicy, but not too sweet.  It really has all the flavours of fall in one glass (well except pumpkin).

IMG_3953.jpg

I like to make apple cider on the stove, but if I was having a party I would make this recipe in a slow cooker. You will find both methods below. This recipe is made with unfiltered apple juice instead of actual apples. I just don’t feel that the extra work to make it from apples is really worth it. There are some great unfiltered apple juices on the market, so I’d rather save myself the trouble. You will notice that this recipe has brown sugar as an optional ingredient. Some people like a sweeter cider and some prefer a spicy cider. I don’t like sweet beverages, so I like to leave it out. My husband prefers it a little more sweet. It’s really up to you and your preferences.

This recipe is non-alcoholic, so if I’m serving this at a party I would create a spike-it-yourself station. The best alcohol for adding to cider is bourbon, brandy, or dark rum. This would be perfect for thanksgiving, or a halloween party.

IMG_3964.jpg

Hot Apple Cider

Yields: 16 8oz servings

Ingredients:

  • 4 Litres (gallon) Unfiltered Apple Juice (not apple cider)
  • 1 Orange, sliced
  • 1 Apple, quartered
  • 5 Cinnamon Sticks
  • 1 Whole Nutmeg
  • 1 Tbsp Whole Cloves
  • 2 Tbsp Brown Sugar (optional)

Stove Method:

Add all ingredients to a large pot over medium heat and bring liquid to a simmer. Turn the heat down to low and cook for 20-30 minutes. Keep warm on the stove until ready to serve.

Slow Cooker Method:

Add all ingredients to your slow cooker. Heat on low for 4 hours. Place cider on the keep warm setting until ready to serve.


You might also like….

IMG_3729

Dutch Apple Pie Bars

Homemade Salted Caramel Sauce

August 23, 2018 by Danielle 1 Comment

For caramel lovers this recipe is heaven on earth. This recipe has a deep caramel flavour, it’s sweet but balanced and has a finish of salt that rounds out the flavour.

IMG_3757

Now I know making caramel can be intimidating, but with a few tips you can conquer the caramel. Fist things first choose your pot. You want to use a medium or large-sized pot with high sides. This will ensure that your caramel wont boil over. Secondly choose your utensils. I like to use a silicone spatula for melting the sugar and a whisk for mixing in the butter and cream.

IMG_3770

Now the ingredients. Pre measure everything out before starting to cook. With caramel you have to work fast and you will burn your sugar if your other ingredients aren’t ready. I also like to leave my butter and heavy cream out on the counter for an hour or more before I start cooking. This helps bring the ingredients up to room temperature and will make mixing them into the caramel easier.

IMG_3769

This sauce is great on ice cream, brownies, pies, bars, a spoon… seriously addicting.

Have you ever made caramel before?

Yields: 1 cup

Ingredients:

  • 1 Cup White Sugar
  • 6 Tablespoons Salted Butter, room temperature cut into small pieces
  • 1/2 Cup Heavy Cream (30-40% milk fat, sometimes called whipping cream, double cream can also be substituted)
  • 1 Teaspoon Salt

Directions:

In a medium or large sauce pan melt sugar over medium heat, stirring constantly with a silicone spatula or a wooden spoon.

The sugar will start to clump, but will eventually melt and thicken slightly. Once the sugar fully melts and becomes amber in colour you can add the other ingredients.

Add the butter to the pan, the caramel will bubble rapidly, so be very careful. Using a whisk mix the butter into the caramel completely, this can take 2-3 minutes.

Very slowly drizzly in the heavy cream while whisking. Again be extremely careful as the mixture will bubble up again.

Allow to boil for 1 minute, the mixture will bubble up the pan slightly.

Remove the mixture from the heat and whisk in the salt. Pour caramel into a storage container and allow to cool before using.

The salted caramel sauce can be stored in the fridge for up to 2 weeks.

Adapted from Sally’s Baking Addiction

You might also like…

IMG_3193

Chocolate Chunk Cookies


« Previous Page

Primary Sidebar

Danielle at Home

Hi, I’m Danielle. I am a twenty something woman working her office job by day and blogging at night! I’m married, a new home owner and I love sharing all my favourite things on this blog. So grab a glass of wine and follow along. I’m so glad you’re here!

SUBSCRIBE & FOLLOW

Pinterest
Instagram
Facebook
Twitter

Footer

Copyright © 2025 Danielle at Home on the Foodie Pro Theme