• Skip to primary navigation
  • Skip to main content
  • Skip to primary sidebar
  • Skip to footer

DANIELLE AT HOME

  • HOME
    • About
    • Contact
  • LIFESTYLE
    • Favourites
    • Goals
    • Home
      • DIY Projects
      • Organization
    • Holidays
      • Christmas
      • Easter
      • Halloween
      • New Years
      • Thanksgiving
      • Valentine’s Day
      • Gift Guides
  • STYLE
  • WELLNESS
  • FOOD + DRINK
    • Appetizers
    • Breakfast
    • Dessert
    • Drinks
    • Side Dishes
    • Snacks
    • Holiday Recipes
      • Christmas
      • Cinco De Mayo
      • Easter
      • Father’s Day
      • Halloween
      • Mother’s Day
      • New Years
      • St. Patrick’s Day
      • Thanksgiving
      • Valentine’s Day

Christmas

Dutch Apple Pie Bars with Salted Caramel

August 30, 2018 by Danielle 1 Comment

IMG_3729

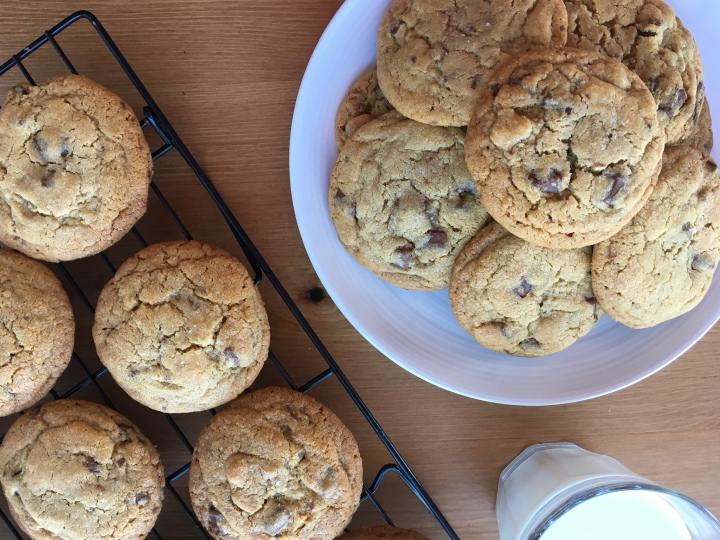
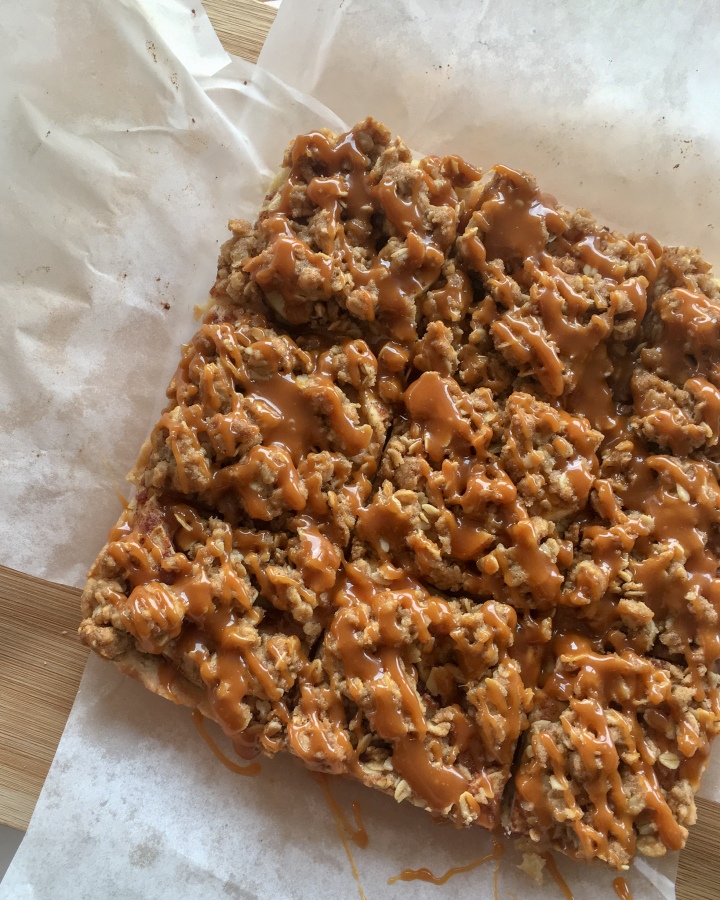
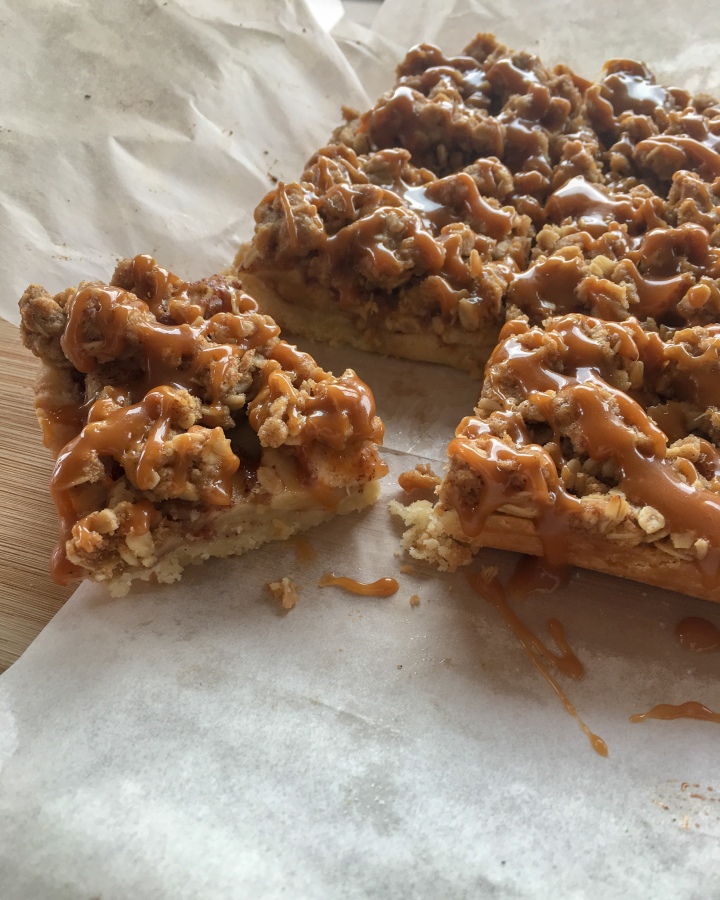
We all know I love pie, and dutch apple pie is one of my favourites. What makes apple pie different from dutch apple pie it that instead of a top crust their is a crumble topping. It’s the best of both worlds. Now these bars a essentially a portable dutch apple pie. They are also drizzled with salted caramel, so you know they are good.

IMG_3731

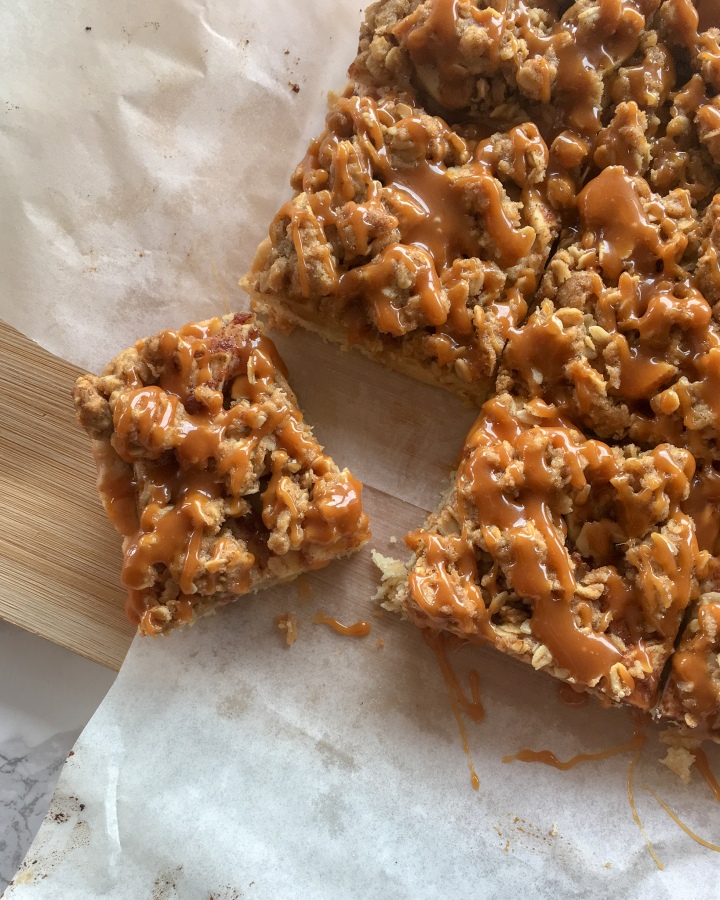
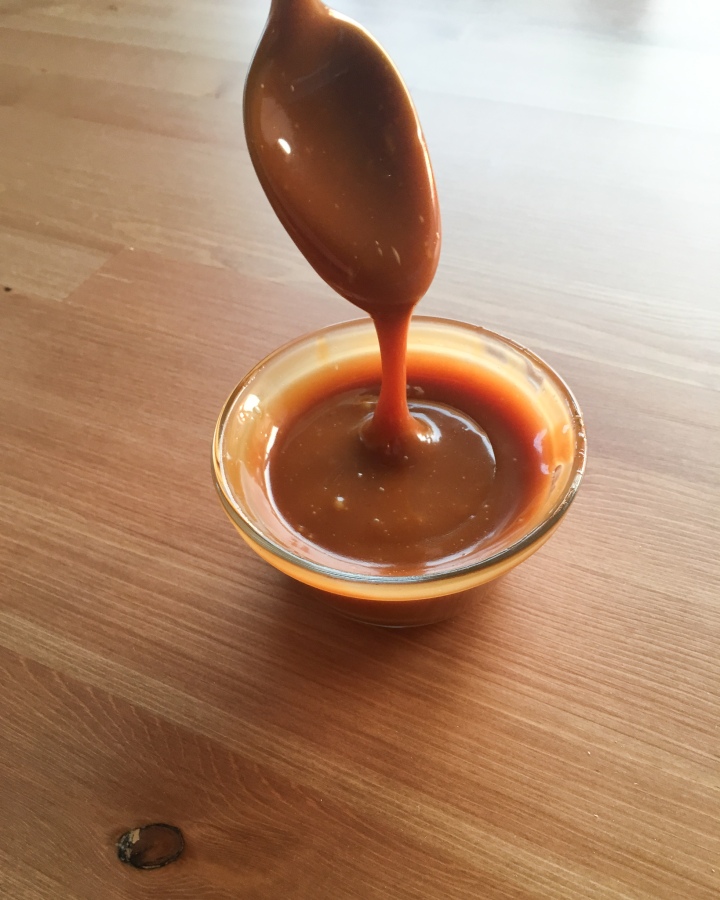
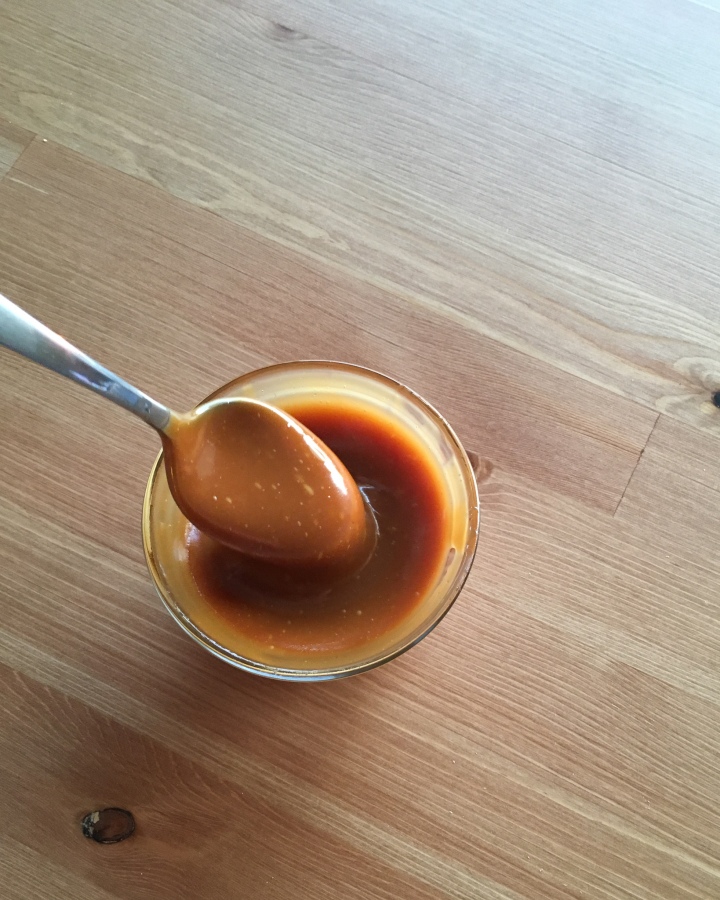
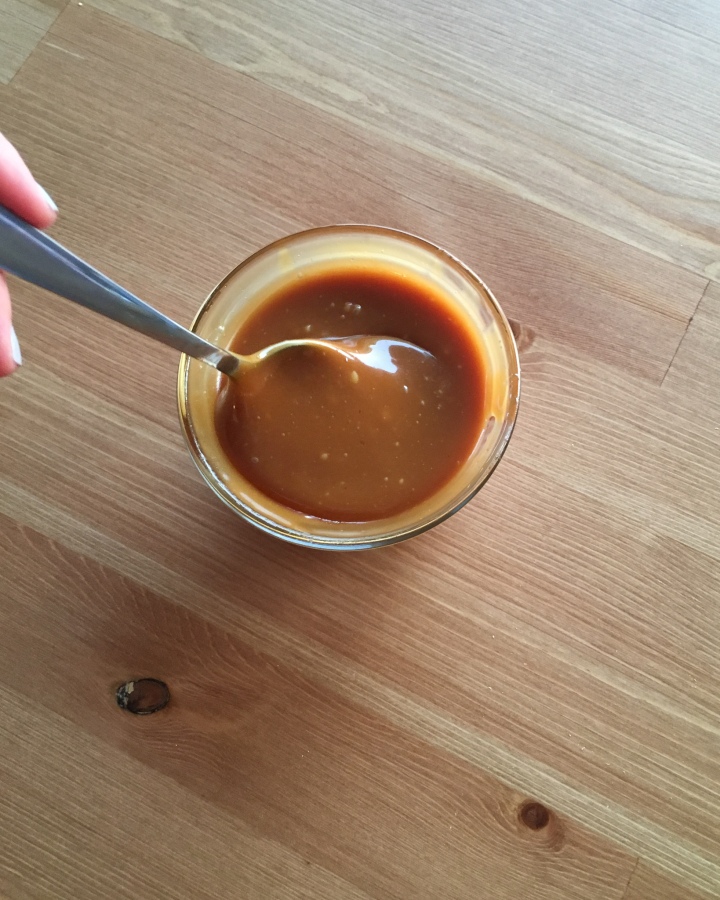
These bars have four layers, shortbread crust, apple filling, crumble topping and caramel drizzle. I know that seems like a lot of work, but the ingredients and simple and so is the method. The tricky part is the caramel sauce. Now I like to make homemade salted caramel, it simple is the best. If you have the time please do yourself a favour and make the sauce from scratch. You wont be disappointed.

If you’re short on time, or just aren’t ready to try your hand at homemade caramel sauce you can use store bought. Buy the best quality caramel sauce you can find. Drizzle that on top of your bars and sprinkle some flaky sea salt on top. They will be almost as good.

IMG_3733

These are perfect to serve at an end of summer barbecue or on a fall dessert buffet. These bars with a cup of tea after your thanksgiving dinner… with a side of pumpkin pie of course.

Yields: 9-16 Bars

Ingredients:

Shortbread Crust:

  • 1/2 Cup Unsalted Butter, melted
  • 1/4 Cup White Sugar
  • 1 Teaspoon Vanilla Extract
  • 1/4 Teaspoon Salt
  • 1 Cup All Purpose Flour

Apple Filling:

  • 2 Apples, peeled and thinly sliced
  • 2 Tablespoons All Purpose Flour
  • 2 Tablespoons White Sugar
  • 1 Teaspoon Cinnamon

Streusel:

  • 1/2 Cup Rolled Oats
  • 1/3 Cup packed Brown Sugar
  • 1/4 Teaspoon Cinnamon
  • 1/4 Cup All Purpose Flour
  • 1/4 Cup Unsalted Butter, cold and cubed

Homemade Salted Caramel Sauce

Directions:

Preheat the oven to 300°F. Line the bottom and sides of an 8-inch square baking pan with parchment paper, leaving enough overhang on all sides. Set aside.

Make the crust: In a small bowl stir together the melted butter, granulated sugar, vanilla, and salt. Add the flour and stir until everything is combined. Press the mixture into the prepared baking pan. Bake for 15 minutes.

Make the apple filling:Combine the sliced apples, flour, granulated sugar and cinnamon together in a large bowl until all of the apples are evenly coated. Set aside.

Make the streusel: Whisk the oats, brown sugar, cinnamon, and flour together in a medium bowl. Cut in the chilled butter with your hands until the mixture resembles coarse crumbs. Set aside.

Remove the crust from the oven, and turn the oven up to 350°F (177°C). Layer the apples on top of the warm crust. Sprinkle the apple layer with streusel and bake for 30–35 minutes or until the streusel is golden brown.

Remove from the oven and allow to cool for at least 20 minutes at room temperature. Lift the bars out of the pan using the tabs of the parchment. Cut the bars into your desired serving size. I normally cut them into 12 squares, but 9 or 16 will also work. Once cut, drizzle the bars with the salted caramel sauce. The bars can be served warm, room temperature or cold.

Adapted from Sally’s Baking Addiction

Homemade Salted Caramel Sauce

August 23, 2018 by Danielle 1 Comment

For caramel lovers this recipe is heaven on earth. This recipe has a deep caramel flavour, it’s sweet but balanced and has a finish of salt that rounds out the flavour.

IMG_3757

Now I know making caramel can be intimidating, but with a few tips you can conquer the caramel. Fist things first choose your pot. You want to use a medium or large-sized pot with high sides. This will ensure that your caramel wont boil over. Secondly choose your utensils. I like to use a silicone spatula for melting the sugar and a whisk for mixing in the butter and cream.

IMG_3770

Now the ingredients. Pre measure everything out before starting to cook. With caramel you have to work fast and you will burn your sugar if your other ingredients aren’t ready. I also like to leave my butter and heavy cream out on the counter for an hour or more before I start cooking. This helps bring the ingredients up to room temperature and will make mixing them into the caramel easier.

IMG_3769

This sauce is great on ice cream, brownies, pies, bars, a spoon… seriously addicting.

Have you ever made caramel before?

Yields: 1 cup

Ingredients:

  • 1 Cup White Sugar
  • 6 Tablespoons Salted Butter, room temperature cut into small pieces
  • 1/2 Cup Heavy Cream (30-40% milk fat, sometimes called whipping cream, double cream can also be substituted)
  • 1 Teaspoon Salt

Directions:

In a medium or large sauce pan melt sugar over medium heat, stirring constantly with a silicone spatula or a wooden spoon.

The sugar will start to clump, but will eventually melt and thicken slightly. Once the sugar fully melts and becomes amber in colour you can add the other ingredients.

Add the butter to the pan, the caramel will bubble rapidly, so be very careful. Using a whisk mix the butter into the caramel completely, this can take 2-3 minutes.

Very slowly drizzly in the heavy cream while whisking. Again be extremely careful as the mixture will bubble up again.

Allow to boil for 1 minute, the mixture will bubble up the pan slightly.

Remove the mixture from the heat and whisk in the salt. Pour caramel into a storage container and allow to cool before using.

The salted caramel sauce can be stored in the fridge for up to 2 weeks.

Adapted from Sally’s Baking Addiction

You might also like…

IMG_3193

Chocolate Chunk Cookies


Yeast Raised Waffles

July 17, 2018 by Danielle Leave a Comment

I really try to slow down and enjoy my weekends. Since I lead a pretty busy life this can be hard to do, but I always try to carve out one morning to relax. I love to sip coffee and cook a special breakfast with my husband. These waffles are our go to on the days we know we have time to savour the morning.

IMG_3072

Now these aren’t your typical waffles. These waffles are yeast raised. The yeast makes them light and airy, but gives them an extra depth of flavour. One other thing that is different about these waffles is that the batter is made the night before. So a little planning is involved, but I promise they are worth it!

IMG_3078

I like to top mine with butter and real Canadian maple syrup, but I bet they would be extra yummy with berries and whipped cream. I bet you’d even love them plain!

So what your family’s favourite weekend breakfast?

IMG_3074

Servings: 20 Waffles

Ingredients:

  • 1 packet active dry yeast
  • 1/2 cup warm water
  • 2 cups milk (I use 2%)
  • 1⁄2 cup unsalted butter, melted
  • 1 teaspoon salt
  • 1 teaspoon sugar
  • 2 cups All Purpose Flour
  • 2 large eggs
  • 1⁄4 teaspoon baking soda
  • Your favourite toppings (butter, syrup, Nutella, strawberries, whipped cream)
Directions:
Whisk yeast and sugar in ½ cup warm water until dissolved. Set aside for 5-10 minutes or until foamy and doubled in size. Add milk, melted butter, salt, and flour to the bowl. Whisk until smooth. Cover with plastic wrap and refrigerate over night.
Preheat your waffle iron. Whisk eggs and baking soda into the batter until smooth. Pour batter into the wells of your waffle iron (1/4 to 1/2 cup depending on the style of the iron). Allow to cook for thirty second before closing the lid. Lower the lid and cook per your waffle irons specifications until golden brown. Repeat with remaining batter.
Adapted from Marion Cunningham’s Yeast-Raised Waffles, Saveur

Grandma’s Berry Pie

July 16, 2018 by Danielle Leave a Comment

It feels like just yesterday I was rolling out dough on my grandma’s sea-foam green counter tops. Laughing and making an absolute mess of her kitchen. It’s funny how food and cooking is so tied to memories and emotions. I’ll never forget her passing on all her best tips to me during our many baking sessions.

My grandma was famous for her baking, but nothing was quite as good as her pies. I first started making pies with her when I was six, and now I’ve become the head pie maker in our family.  It seemed only fitting that the first recipe I shared on this blog was the first recipe I ever made.


IMG_3093

I of course have tweaked grandmas recipe slightly over the years to make it my own, but I still follow grandma’s methods. My grandma’s recipe was based on the Crisco’s classic pie dough, it’s the same recipe her mother used. Personally I prefer to use half butter half shortening to give the dough more flavour. I also add a bit of sugar to my dough to sweeten the crust slightly (per my husbands request). After much trial and error this has become my favourite pie dough. I make my dough using an old-fashioned pastry cutter. You can of course use a food processor instead, but be careful not to over work the dough.


IMG_3094

This pie is so delicious I could eat the whole thing myself… I wish I was kidding.

My favourite way to eat this pie is cold straight out of the fridge, but my family likes it served warm with vanilla ice cream. Whats your favourite way to enjoy a slice of pie?

Serves: 8

Ingredients:

Crust:

  • 2 2/3 cups All Purpose Flour
  • 1 teaspoon salt
  • 1 teaspoon white sugar
  • 1/2 cup Vegetable Shortening, cold
  • 1/2 cup Unsalted Butter, cold
  • 8 to 12 tablespoons ice water
  • Egg
  • 2 tablespoons water
  • Sugar for dusting

Filling:

  • 6 cups fresh or frozen blackberries (if using frozen completely defrost and drain excess juices, do not rinse)
  • 1 cup white sugar
  • 1/4 cup Corn Starch
  • Juice of half a lemon

Directions:

In a large bowl mix the flour, salt and sugar together. Add the cold butter and shortening. Cut the butter and shortening into the flour mixture using a pastry cutter or two forks until the chunks of butter and shortening are the size of small peas.

Drizzle in the ice water and stir the mixture to bring the dough together. Continue to add water until the dough starts to clump and form a ball. Form the dough into a ball. Cut dough in half and form each half into discs. Wrap each disc tightly in plastic wrap, and chill in the fridge for at least 1 hour.

Preheat the oven to 400°F (204°C).

Mix together berries, lemon juice, corn starch and sugar. Set aside.

Roll out one of the discs to fit your pie tin. Gently place the dough into the pie tin. Pour the berry mixture into the tin. Discard any extra juice from the filling (it will make the pie watery). Roll out the second disc. Gently place the top crust onto the pie.

Gently fold over and seal the edges of the pie to form a crust. Mix together egg and water. Use a pastry brush to cover the pie in egg wash. Sprinkle sugar over the pie. Using a sharp knife cut vent holes into the crust.

Bake the pie for 45 – 60 minutes until golden brown. Cover the pie with foil partway through cooking if the pie browns too quickly.

Cool for at least 20 minutes before serving.

Adapted from Crisco.


« Previous Page

Primary Sidebar

Danielle at Home

Hi, I’m Danielle. I am a twenty something woman working her office job by day and blogging at night! I’m married, a new home owner and I love sharing all my favourite things on this blog. So grab a glass of wine and follow along. I’m so glad you’re here!

SUBSCRIBE & FOLLOW

Pinterest
Instagram
Facebook
Twitter

Footer

Copyright © 2026 Danielle at Home on the Foodie Pro Theme