• Skip to primary navigation
  • Skip to main content
  • Skip to primary sidebar
  • Skip to footer

DANIELLE AT HOME

  • HOME
    • About
    • Contact
  • LIFESTYLE
    • Favourites
    • Goals
    • Home
      • DIY Projects
      • Organization
    • Holidays
      • Christmas
      • Easter
      • Halloween
      • New Years
      • Thanksgiving
      • Valentine’s Day
      • Gift Guides
  • STYLE
  • WELLNESS
  • FOOD + DRINK
    • Appetizers
    • Breakfast
    • Dessert
    • Drinks
    • Side Dishes
    • Snacks
    • Holiday Recipes
      • Christmas
      • Cinco De Mayo
      • Easter
      • Father’s Day
      • Halloween
      • Mother’s Day
      • New Years
      • St. Patrick’s Day
      • Thanksgiving
      • Valentine’s Day

Dessert

Peppermint Chocolate Cookies

December 15, 2018 by Danielle Leave a Comment

Week three in my Christmas cookie series has arrived! If you missed the last two weeks find those posts here, and here.

This weeks cookie is so so delicious. These cookies are so delicious and rich, there are the perfect chocolate cookie for your Christmas spread. I actually have to make a few more batches of these since we can’t stop eating them!

I love the combination of a chewy brownie like double chocolate cookie, cooling peppermint and rich white chocolate. It truly is perfection. These are also great warmed up and eaten with a fork like a warm brownie. YUM!

Now when it comes to decorating these cookies with white chocolate the world is your oyster. Light drizzle, heavy drizzle. Half dunk, full dunk. Go ahead and do whatever you love. Just remember to work fast so your crushed candy canes will stick! Also did you know you can buy crushed candy canes? I found that out shortly after making this recipe and am so annoyed I wasn’t informed earlier. Crushing candy canes is such a pain. Oh well I guess I can buy pre crushed for next year!

Make sure to come back next week for the final Christmas cookie in this series…. I can’t believe we’re already there!

Peppermint Chocolate Cookies

Yields: 24 cookies 

Ingredients:

  • 1/2 Cup Unsalted Butter, softened
  • 1/2 Cup White Sugar
  • 1/2 Cup Brown Sugar, packed
  • 1 Egg
  • 1 Teaspoon Vanilla Extract 
  • 1 Teaspoon Peppermint Extract
  • 1 Cup All Purpose Flour
  • 1/2 Cup + 2 Tablespoons Unsweetened Cocoa Powder
  • 1 Teaspoon Baking Soda 
  • 1/8 Teaspoon Salt
  • 1 Cup Mini Chocolate Chips
  • 8 Ounces White Chocolate
  • 3 Candy Canes, crushed

Directions:

Using your stand mixer beat the butter on medium speed until smooth and creamy. Add the sugars and beat on medium high speed until fluffy and combined. Mix in the egg, vanilla and peppermint on high speed. 

In a medium bowl whisk the flour, cocoa powder, baking soda and salt together until combined. On low speed add the dry ingredients to the wet and mix until just combined. Beat in the chocolate chips. Cover and chill for at least 3 hours or overnight. 

Preheat oven to 350°F (177°C). Line two large baking sheets with parchment paper. Scoop out dough and roll into balls. Place on the cookie sheet about 2 inches apart. Bake the cookies for 8-10 minutes.  Allow to cool for 5 minutes on the cookie sheet. Then transfer to cooling rack to cool completely.

Melt the white chocolate in the microwave, string in 30 second intervals. Drizzle or dip each cooled cookie in the white chocolate. Sprinkle with crushed candy canes. Repeat for all the cookies. Place in the refrigerator to set completely.

Adapted from Sally’s Baking Addiction.

You may also like…
Sugar Cookie Snowflakes
Cranberry White Chocolate Oatmeal Cookies

Sugar Cookie Snowflakes

December 8, 2018 by Danielle 1 Comment

It’s week two in my Christmas Cookie series, to see last weeks click here.

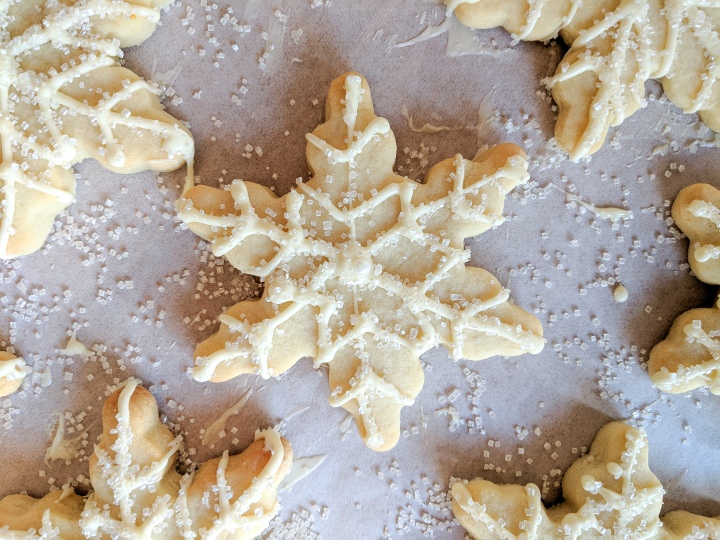
Sugar cookies like shortbread are a controversial cookie. People either love them or hate them. Personally I’ve always been a fan. But I know a lot of people only like them for the icing. This recipe for sugar cookies is perfect. What makes them so good is that they are thick and soft. These cookies also have white chocolate icing. Personally I don’t enjoy royal icing and buying meringue powder annoys me. I hate having to go to specialty stores for ingredients. And buying something that will go bad before I need to use it again.

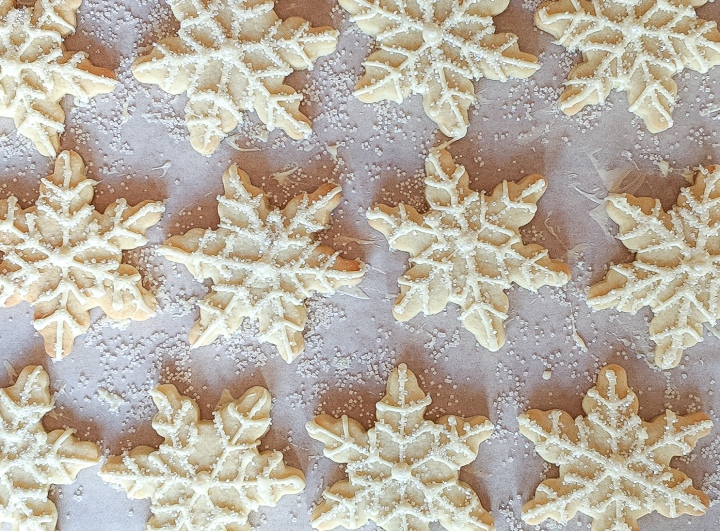
These cookies are topped with pure tempered white chocolate, sprinkles and a sugar pearl.  And I’ll let you in on a secret I decorated them in about 5 minutes using a Ziploc bag! Yep easy peasy. I don’t even own a pipping bag. I feel like I’ve broke some blogger rule by admitting that but lets get real I’m not a cake decorator so I don’t need one.

Of course today I’m sharing snowflakes with you but you could absolutely use you favourite cookie cutter and make whatever shape you love. You can also follow the same tempering method used for the white chocolate icing with milk or dark chocolate. If you want colour you could dye the white chocolate with gel food colouring (water based will cause you chocolate to separate), or even candy melts if thats your thing. The chocolate world really is your oyster! The chocolate will harden if you allow them an hour or so to set up. I like to make my cookies in advance and pop them in the freezer to store until Christmas. It’s not necessary but it will absolutely make sure that chocolate is super firm.

I really hope you enjoy these cookies, sugar cookies have always been my favourite!

Sugar Cookie Snowflakes

Yields: 18-24 cookies depending on the size of your cookies

Ingredients:

Cookies:

  • 2 1/4 Cups All Purpose Flour
  • 1/2 Teaspoon Baking Powder
  • 1/4 Teaspoon Salt
  • 3/4 Cup Unsalted Butter, softened
  • 3/4 Cup White Sugar
  • 1 Egg
  • 2 Teaspoons Vanilla Extract

Icing:

  • 6 ounces White Bakers Chocolate, chopped
  • Optional: sprinkles, sanding sugar and sugar pearls

In a medium bowl whisk flour, baking powder and salt together. Set aside.

In the bowl of a stand mixer cream softened butter until pale and fluffy. Add sugar and beat until smooth. Add eggs and vanilla to the bowl. Beat on high until combined. Scrape down the sides of the bowl.  Add the dry ingredients to the wet ingredients on low speed until just combined.

Divide the dough in half, form dough into two disks Wrap in plastic wrap and place in the fridge to chill for at least an hour.

Preheat the oven to 350°F . Line to baking sheets with parchment and set aside.

Roll out you first disk of dough the 1/4-1/2 inch thick. Using a snowflake cookie cutter cut your dough into shapes. Place cookies on the prepared baking sheet about 2 inches apart. Re roll the remaining dough until it is all used. Repeat with the second disk.

Bake the cookies for 10-12 minutes until they are set and the edges are just starting to brown. My oven has hot spots so I rotate my cookies half way through to prevent over browning. Allow cookies to cool on the baking sheet for 5 minutes. Then transfer to a cooling rack to fully cool.

Melt 4 ounces of chopped chocolate in the microwave in 30 second intervals. Once completely melted stir in the remaining 2 ounces of chopped chocolate to melt. Pour chocolate into a Ziploc bag. Allow to cool for 5 minutes before snipping on corner of the bag to act as a pipping bag. Decorate your cookies with the pipped white icing in the designs of your choosing. Finish your cookies with sanding sugar and sugar pearls if desired.

Cookies recipes adapted from Sally’s Baking Addiction, icing recipe from Danielle at Home.

You may also like…

Cranberry White Chocolate Oatmeal Cookies

Cranberry White Chocolate Oatmeal Cookies

December 1, 2018 by Danielle Leave a Comment

IMG_20181118_142912

Happy December 1st! It is officially the Christmas season and that means this blog is going to be full of lots of holiday content and bonus posts from now until Christmas. Technically I kicked off the schedule a little early by coming out with 4 posts this week, and that will be continuing until Christmas. So in addition to my regularly schedules 2 recipes per week you will also see gift guides and edible gift posts on Wednesdays and a brand new Christmas cookie series on Saturdays. Yes that’s right weekend posts!

So every Saturday until Christmas you will see a new Christmas cookie recipe hit the blog! I am so excited about this cookie series as you have already been told I love cookies they are my favourite dessert, so this post is near and dear to my heart. Also Christmas cookies and Christmas baking in general brings me so much nostalgia and happiness. My mom has never been a big Christmas baker, but both my Grandma’s were. So baking at Christmas makes me think of making minced meat tarts with my mom’s mom and sitting at the kitchen table scarfing down cherry shortbread with my Dad’s mom.

IMG_20181118_142343

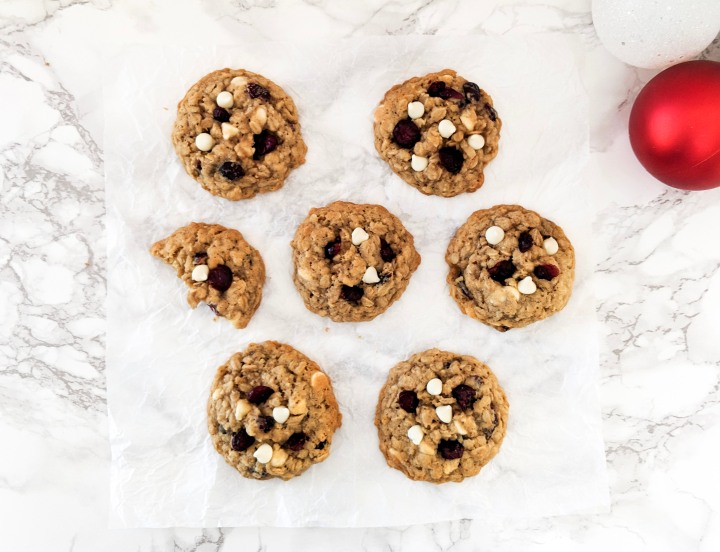
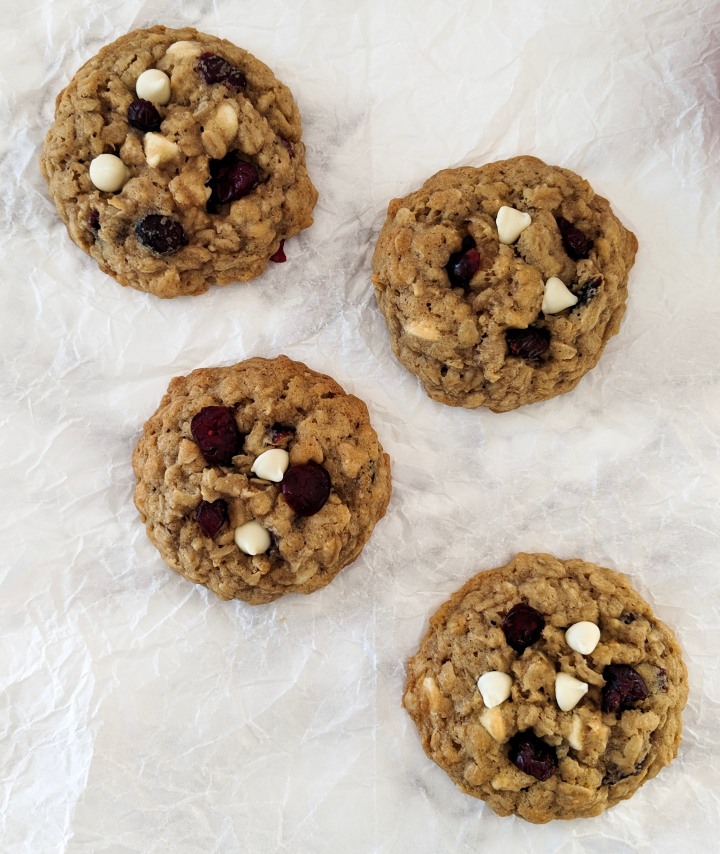
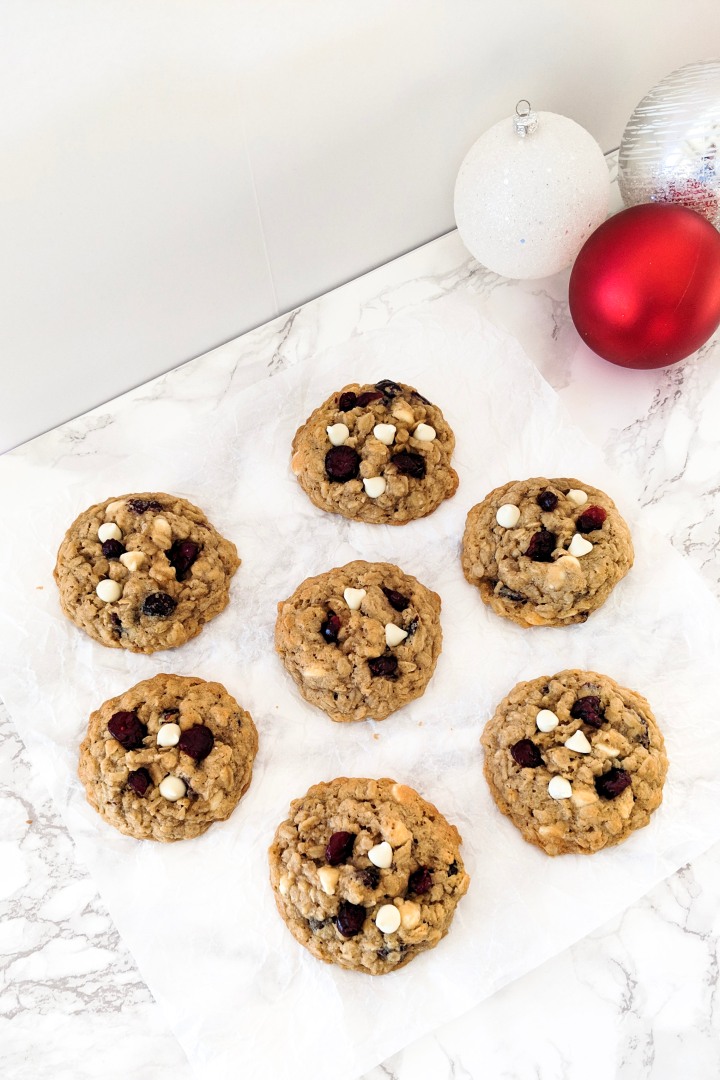
Today’s recipe is one I have made many variations of over the years. These are a thick and chewy oatmeal cookie jammed packed with dried cranberries and white chocolate chips. I would love to say that this batch of cookies is still in my freezer waiting to be pulled out for Christmas, but these are long gone and are probably the most beloved Christmas cookie that I make. This weekend I’ll be making a double batch and immediately putting them into the freezer…. hopefully this batch makes it until Christmas (finger crossed!).

I love this recipe because it’s so easy… I love a drop cookie. They are my preferred type of cookie because I simple am busy (and LAZY!). I’d much rather scoop and bake then roll out dough and cut out shapes. So many Christmas cookies are cut outs and it’s nice to have a few Christmas cookies that are quick and easy! Also the flavours of cranberry and white chocolate scream Christmas to me. I think these are a great cookie to include on your cookie tray!

IMG_20181118_142755


Cranberry White Chocolate Oatmeal Cookies

Yields: 36 cookies

Ingredients:

  • 1 1/2 cups All Purpose Flour
  • 1 teaspoon Baking Soda
  • 1/2 teaspoon Salt
  • 3 cups Rolled Oats
  • 1 cup Unsalted Butter, softened
  • 1 cup Brown Sugar
  • 1/4 cup White Sugar
  • 2 Eggs
  • 2 teaspoons Vanilla Extract
  • 1/2 cup Dried Cranberries
  • 1/2 cup White Chocolate Chips

Directions:

Whisk flour, baking soda and salt together, set aside.

In the bowl of a stand mixer cream butter on high until pale yellow and fluffy. Add sugars and cream on medium speed to combine. Add vanilla and mix until combined. Add the flour mixture and the oats to the bowl mix on low until just combined.

Add cranberries and white chocolate mixing on low speed. Cover the bowl with plastic wrap and chip in the fridge for  3 hours or overnight.

Preheat oven to 350°F. Roll out dough into balls and place 2 inches apart on a parchment lined baking sheet. Bake for 10-12 minutes or until the edges are lightly browned. The centres will look slightly under baked (that’s what makes then chewy!). Allow to cool on the baking sheet for at least 5 minutes before transferring to a wire rack.

Adapted from Sally’s Baking Addiction.


You may also like…

IMG_20181026_160151

Salted Caramel Cookies

Cranberry Orange Coffee Cake

November 29, 2018 by Danielle 2 Comments

IMG_20181125_093407

Today we are talking all things Christmas morning breakfast. Growing up my Christmas mornings were very different then most kids. We would travel to visit my Dad’s family for Christmas Eve. And then on Christmas morning we would wake up in my Grandma’s house and would drive home to our house. We wouldn’t get home to open our presents until 2pm! That’s right my Christmas morning was more like a Christmas afternoon. I still have yet to wake up in my own bed on Christmas Day. Yes we still travel on Christmas Day. When my husband and I started dating he claimed he would never travel on Christmas, but here he is with 4 travelling Christmas’ under his belt (he skipped the first year).

Christmas morning is a big deal for my husband’s family. His whole family goes to his parents house to open presents and eat brunch. Now when I say whole family I mean aunts, uncles, grandparents… the works. There is no Christmas dinner on the 25th, his family saves that for boxing day. So Christmas morning is the big event. Finding a way for me to still visit my family while make it home in time for his families brunch has been tricky we have managed to make it work. It means a very early morning for us and a long drive after a late night with my family. But this year is the last year we will be going away at Christmas… I’m sad about it, but I know it’s time for us to make new traditions now that we are our own little family of two.

IMG_20181125_101005

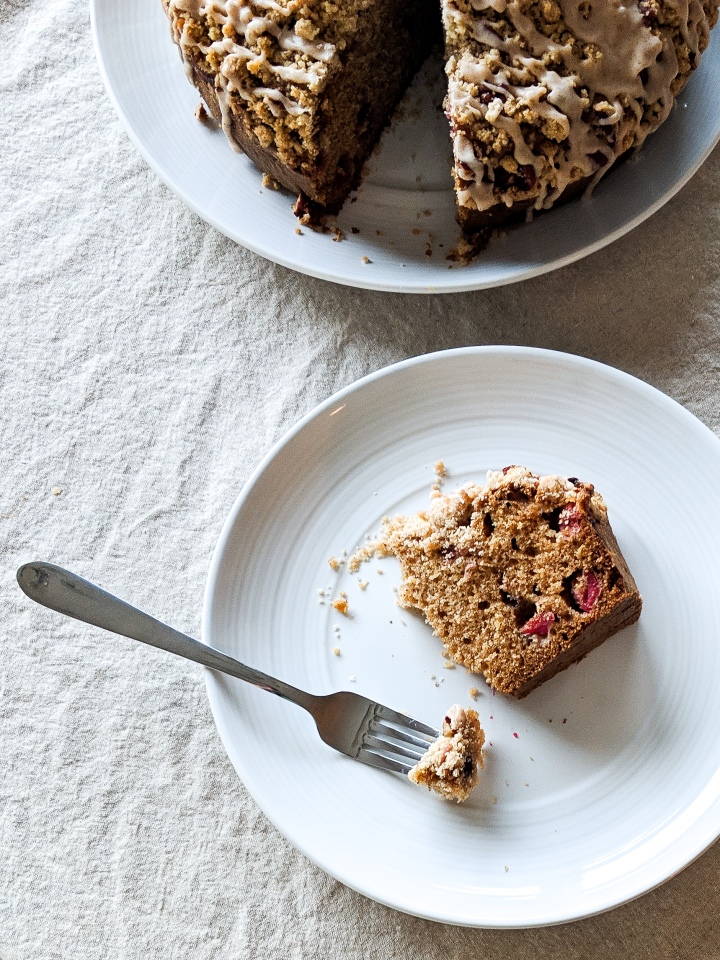
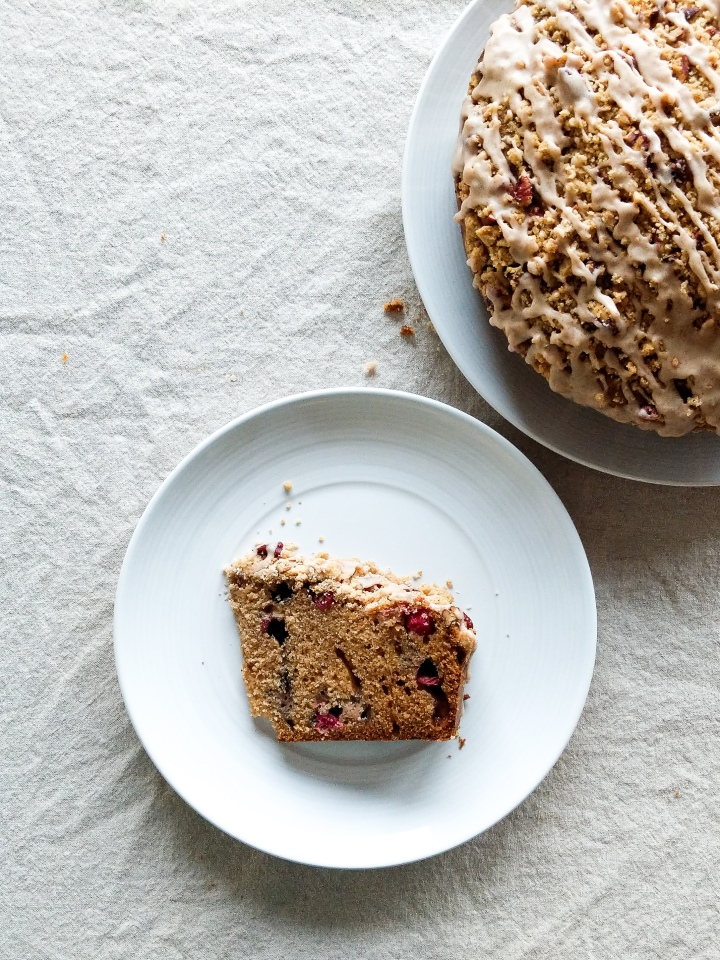
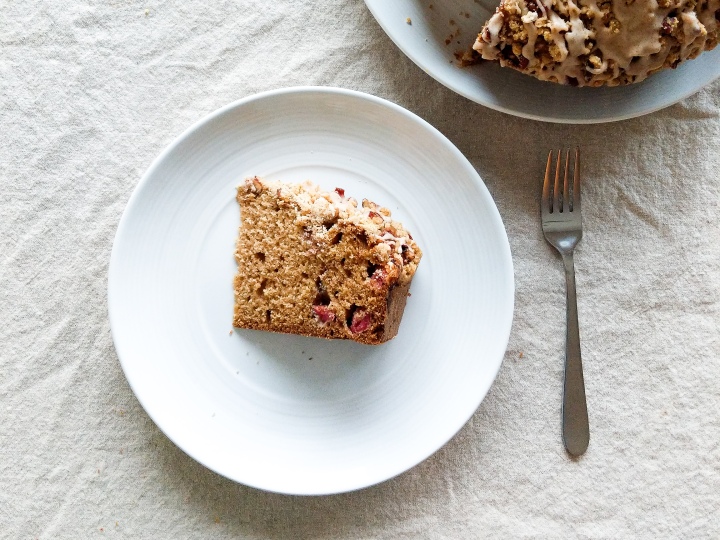
Since I’ve done my fair share of travelling at Christmas I know a thing or two about making things in advance and travelling with food. So today I am sharing the perfect treat for Christmas morning that can be made well in advance. It would also be a great hostess gift. Cranberry orange Coffee Cake. I’m actually planing to make this for my in-laws Christmas brunch this year. My plan is to bake the cake far in advance and give it to my mother-in-law a few days before Christmas. It can defrost while were out of town for Christmas Eve.

I think that this cake would be perfect to put out with some coffee and hot chocolate on Christmas morning. Every one can nibble at it while they open presents. I know it’s how I’d like to start my morning.

IMG_20181125_093137.jpg

Cranberry Orange Coffee Cake

Serves: 16

Ingredients:

For the Cake:

  • 4 Eggs
  • 1 Cup Vegetable oil
  • 1/2 Cup Sugar
  • 1/2 Cup Brown Sugar
  • Zest and Juice of 1 Orange
  • 1/2 Cup Water
  • 1 Teaspoon Vanilla Extract
  • 1 2/3 Cups All Purpose Flour
  • 2 Teaspoons Baking Powder
  • 1 Teaspoon Salt
  • 1 Teaspoon Cinnamon
  • 1 1/2 Cups Fresh or Frozen Cranberries

For the Crumb Topping:

  • 1/2 Cup Flour
  • 1/4 Teaspoon Baking Powder
  • Pinch of Salt
  • 2 Tablespoons Sugar
  • 2 Tablespoons Brown Sugar
  • 1/4 Teaspoon Cinnamon
  • 1/4 Cup Butter, melted
  • 1/3 Cup Pecans, chopped

For the Glaze:

  • 1 Cup Confectioners Sugar
  • 4 Tablespoons Milk (adjust for consistency)
  • 1/4 Teaspoon Cinnamon
  • 1 Teaspoon Vanilla

Directions:

Cake:

Preheat oven to 350° F. Grease a springform pan (or a high sided cake pan), set aside.

In a large bowl whisk to combine eggs, oil, sugar, orange zest and juice, water and vanilla. Set aside. In a small bowl whisk together flour, baking powder, salt and cinnamon. Stir dry ingredients into wet until just combined. Fold in cranberries. Pour batter into prepared cake pan.

Topping:

In a small bowl whisk flour, baking soda, salt, sugar and cinnamon. Add melted butter and whisk with a fork until a crumb forms. Add chopped pecans. Sprinkle crumb topping into cake, gently pressing the topping into the batter.

Bake the cake for 50-75 minutes or until a skewer comes out clean. Allow to cool for 20-30 minutes.

Glaze:

In a small bowl whisk together confectioner sugar, cinnamon, vanilla and milk. Glaze should be thick but pourable. Drizzle glaze over the cake. Allow to set for a few minutes before serving.

Adapted from Entertaining with Beth.

Salted Caramel Chocolate Chip Cookies

November 6, 2018 by Danielle Leave a Comment

IMG_20181026_160103_1.jpg

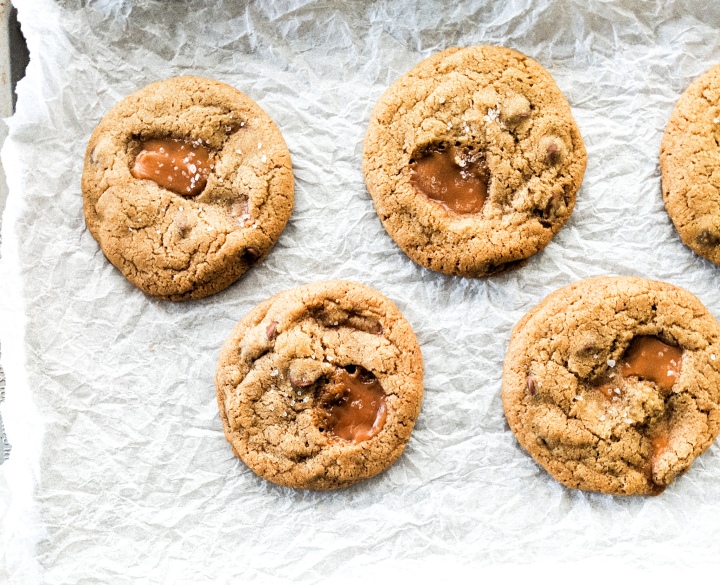
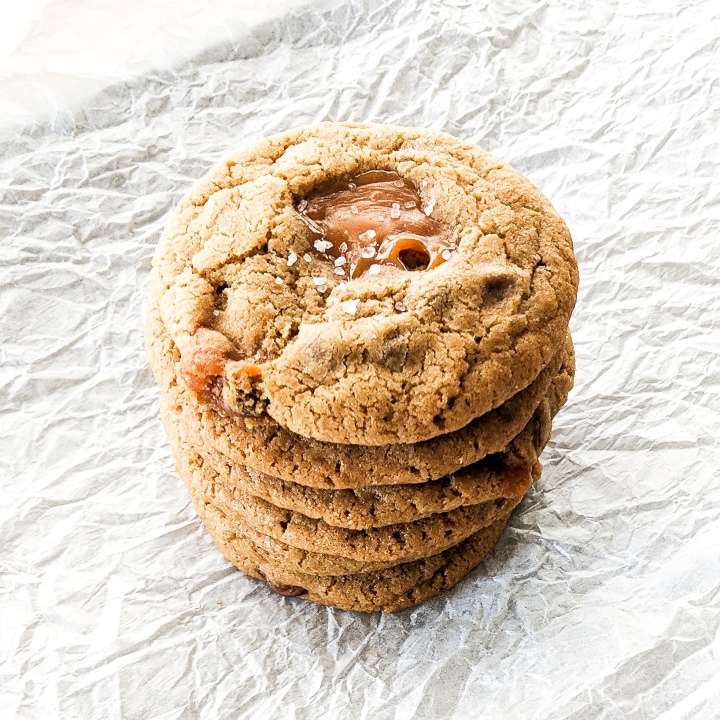
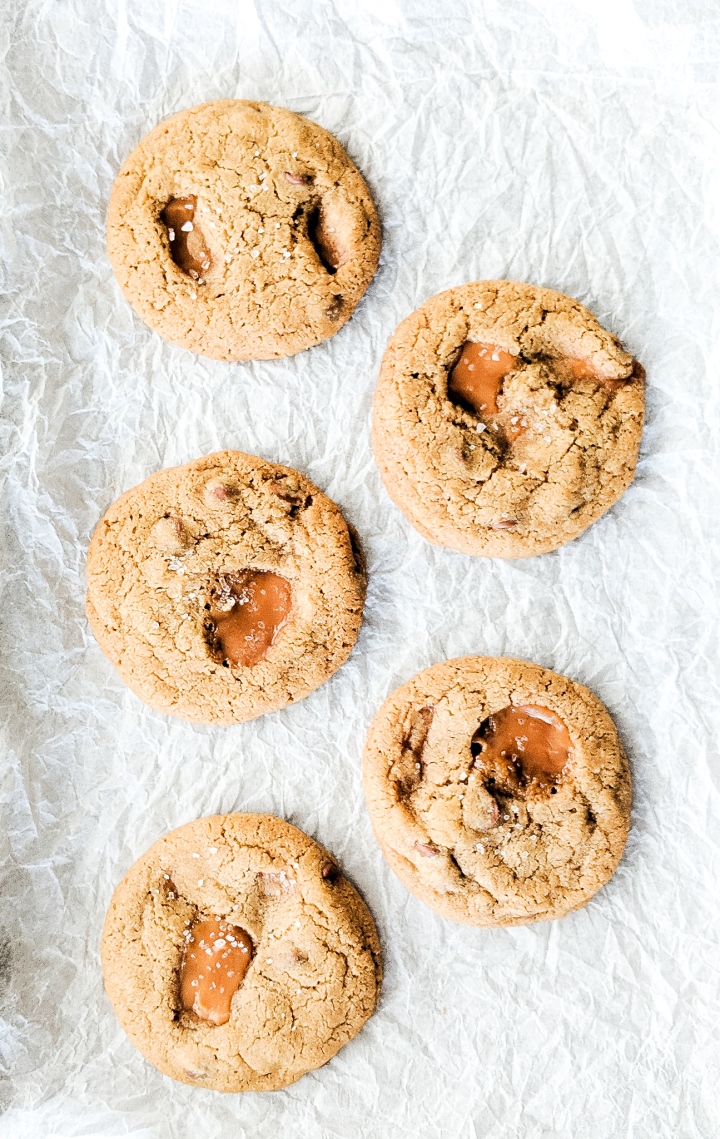
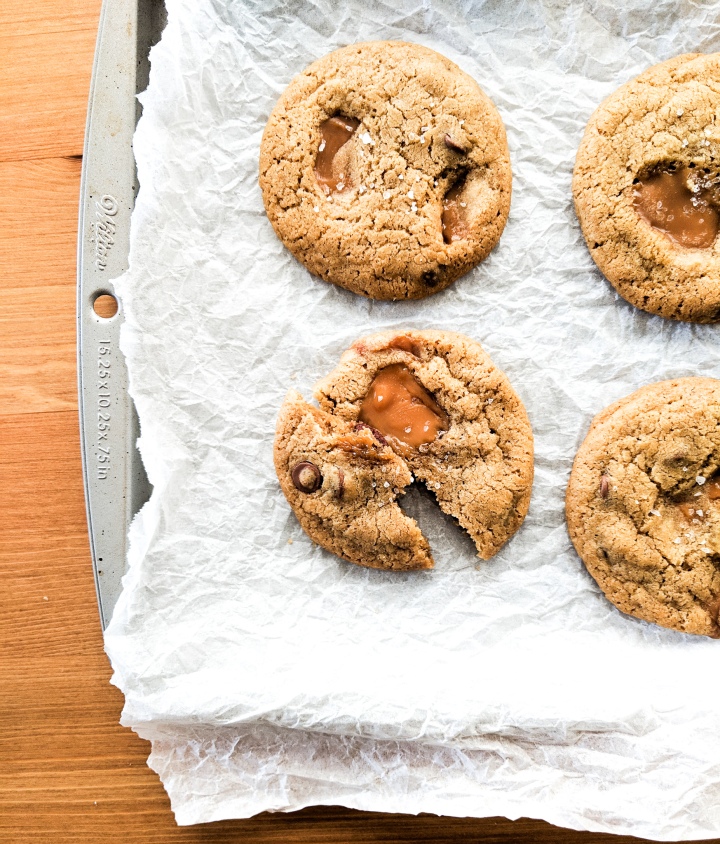
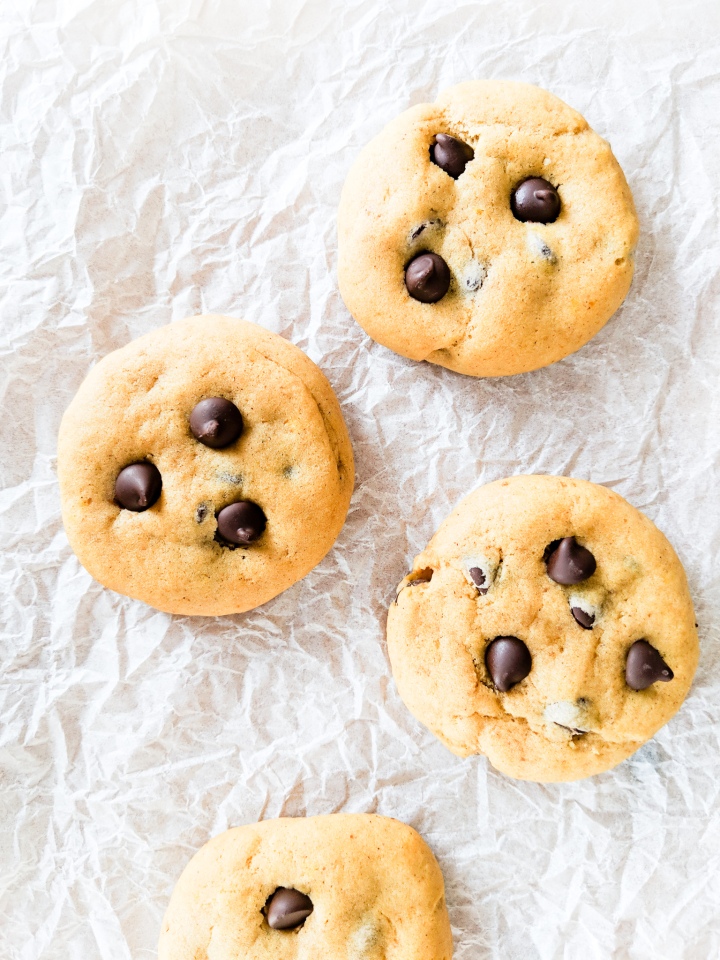
So a few months back I was at the grocery store picking up a few things when I spotted a bag of Salted Caramel Chocolate Chip Cookies. Of course being the cookie obsessed woman that I am I had to buy them. I am slightly embarrassed to say that my husband and I ate the entire bag later that evening. Since then we have vowed to never eat that many cookies in one sitting ever again. That stomach ache was horrible… but probably worth it. Since then I have tried finding these cookies every time I go to the store. It’s been months and I still can’t find them. Isn’t that just the worst? So I’ve been craving these delicious soft, chewy caramely (not a word…just go with it!) cookies for months. Since I couldn’t find them I thought I’d try making them. Why not right?

After the first batch I asked Calvin, my husband and eager tester for his brutally honest opinion. He had a two suggestions… more chocolate and smaller chunks of caramel. He then thought about it for a minute and said actually these are amazing! So of course I still made a few tweaks because I can’t leave well enough alone, but he was right these are amazing! Dare I say better then the store bought version.

IMG_20181026_160151

This cookie recipe is an adaptation of my favourite Chocolate Chip Cookie recipe. I love it because it’s super flavourful, rich, soft and chewy without being cakey or doughy. It was the perfect base for these cookies. I also chose to use milk chocolate chips in this cookie because it’s a favourite in my house, but since these are salted I thought the extra sweetness would work well. As for the caramel part of this cookie I first thought I would make homemade caramels and pack these cookies full of them. But really who has time for that? Honestly? As much as I love homemade caramel sauce and we know I love it, here, here and here. I just didn’t this the extra effort was worth it in this case. I used those caramels you get at Halloween that are wrapped in cellophane. Now that I think about it though unwrapping all those caramels was kind of a pain in the ass… possibly more then making homemade caramel. Regardless I used soft caramel candies and chopped them up into halves and quarters to add them to the batter. You need to chop them otherwise you get huge chunks of caramel that are crazy chewy and will remove all your loose fillings!

IMG_20181026_160154

These cookies might actually be the best cookies I’ve ever made, but my Christmas cookies are coming soon so maybe we can top them? If it means more taste testing I’m up for the challenge!

IMG_20181026_155825

Salted Caramel Chocolate Chip Cookies

Yields : 16-18 Cookies

Ingredients:

  • 1 Cup Unsalted Butter
  • 1 Cup Brown Sugar, lightly packed
  • 1/4 Cup White Sugar
  • 4 Egg Yolks
  • 1 Tablespoon Vanilla
  • 1 3/4 Cup All Purpose Flour
  • 1/2 Teaspoon Baking Soda
  • 1/2 Teaspoon Salt
  • 3/4 Cup Chocolate Chips (Dark, milk or semi sweet)
  • 40 Caramel Candies (approx 1/2 cup)
  • Flakey Sea Salt

Directions:

Melt butter in the microwave for 30 seconds, or until just starting to melt. Cream butter on high until whipped and pale white in colour about 2 minutes. Add sugar and beat on high until smooth about 1 minute. Add eggs and vanilla, beat on medium until combined.

Whisk flour, baking soda, and salt together in a medium-sized bowl. Add the dry ingredients to the butter and sugar mixture. Beat on low until just combined. It’s ok if some four is still showing.

Chop un wrapped caramel candies into thirds and quarters. Measure out a half cup of the chopped caramels. Reserve the rest for later. Fold in chocolate chips and caramel pieces. Cover with plastic wrap and refrigerate dough for at least 3 hours or overnight.

Preheat the oven to 350°F. Line two baking sheets with parchment paper or silicone baking mats. Using an ice cream scoop or two spoons to scoop out the dough. Roll the dough into balls and press on or two of the remaining caramel pieces into the top of each ball of dough. Space the cookies 2 inches apart on the baking sheet.

Bake cookies for about 15 – 17 minutes until the edges are golden brown. Remove from the oven and sprinkle with flaky sea salt immediately. Allow to cool on the baking sheet for 10 minutes before transferring to a cooling rack.

Adapted from Chocolate Chunk Cookies

You may also like…

IMG_3192-3

Chocolate Chunk Cookies


IMG_20180929_134835

Pumpkin Chocolate Chip Cookies


Homemade Caramel Corn

October 30, 2018 by Danielle 2 Comments

IMG_20181012_142119

BOO! I have one more Halloween post before the big day tomorrow! I hope you all enjoy the fun and spooky day, and if you have kids I hope they have the best time trick or treating! Like I said in this post, I wish I could go! Anyway I hope you are all doing something festive (I love festive!).

Today I thought I’d share one of my favourite fall recipes that I think is the perfect treat for Halloween night! I think this is a great recipe if you’re staying in watching a scary movie, or if you’re having people over for a Halloween party. I know I get sick of these mini chocolate bar and prefer to have festive fall treats at Halloween parties.

Tomorrow we will be snacking on Caramel Corn, drinking a beer and watching a scary movie. Oh and by scary movie I mean Hocus Pocus….it’s the scariest movie I can handle (Pathetic I know!).

IMG_20181012_142314_1

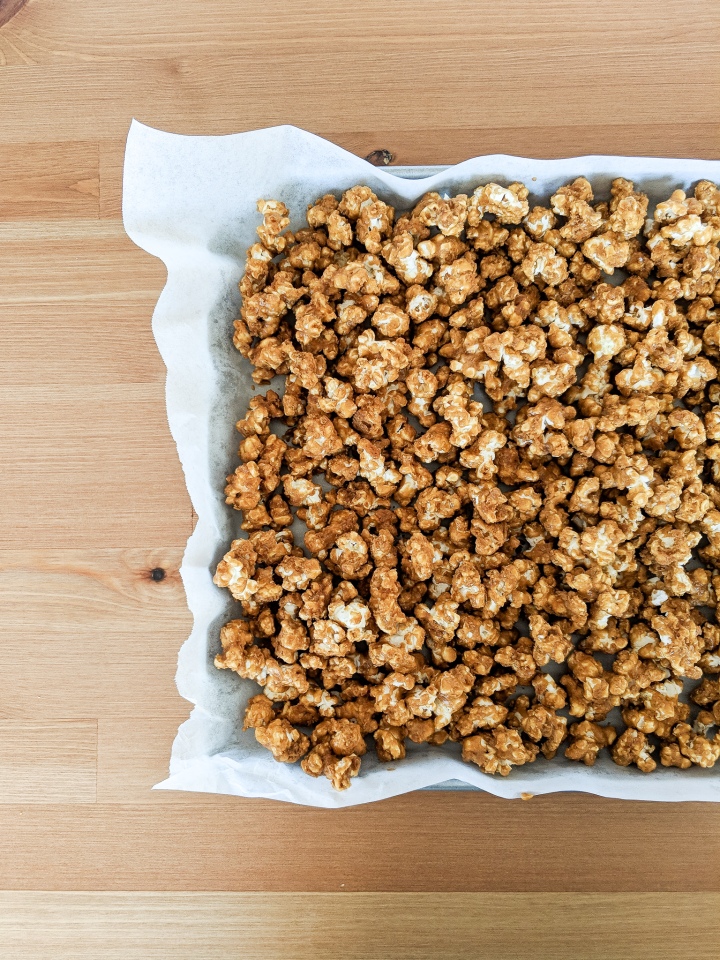
I always found caramel intimidating, so I never tried making my own caramel corn until recently. Once I did I felt really silly for waiting so long since it is incredibly easy! It’s perfect for halloween or really and day ending in Y! We’re addicted! So please give this a try it’s really easy and really delicious!

IMG_20181012_142115

Homemade Caramel Corn

Yields: 12 Cups

Ingredients:

  •  12 Cups Popped Popcorn (1 cup kernels, approx.)
  •  1 Cup Unsalted Butter
  •  1 1/2 Cup Brown Sugar, packed
  •  1/3 Cup Light Corn Syrup
  •  1/2 Teaspoon Vanilla Extract
  •  1 Teaspoon Salt
  •  1 Teaspoon Baking Soda

Directions:

Preheat oven to 225 degrees F. Line a large baking sheet (you may need two) with parchment paper. Spread popcorn evenly on baking sheet, and set aside.


In a medium saucepan on medium heat add butter, brown sugar and corn syrup. Whisk together until butter has melted and ingredient combine into a smooth sauce. This will take 3-5 minutes. Add vanilla, salt and baking soda to the sauce. Whisk constantly. Sauce will lighten in colour and increase in volume. Continue to cook for 2-4 minutes to thicken, whisking constantly. Remove from the heat.

Pour sauce over the trays of popcorn. Use a spatula (silicone is best) to toss popcorn and coat. This does not need to be perfect.

Bake popcorn for 30 minutes. Check on the popcorn every 10 minutes. Remove the baking sheet from the oven and toss the popcorn again to continue coating and breaking up chunks. Repeat this process 2-3 times over the 30 minute baking time.

Remove baking sheet from the oven set aside and allow to cool for at least an hour. Check on your popcorn after 30 minutes to break up any large clumps that are forming. Once fully cool serve immediately or store in an airtight contained for up to 5 days.


Adapted from Homemade Hooplah, Homemade Caramel Popcorn.

« Previous Page
Next Page »

Primary Sidebar

Danielle at Home

Hi, I’m Danielle. I am a twenty something woman working her office job by day and blogging at night! I’m married, a new home owner and I love sharing all my favourite things on this blog. So grab a glass of wine and follow along. I’m so glad you’re here!

SUBSCRIBE & FOLLOW

Pinterest
Instagram
Facebook
Twitter

Footer

Copyright © 2025 Danielle at Home on the Foodie Pro Theme