• Skip to primary navigation
  • Skip to main content
  • Skip to primary sidebar
  • Skip to footer

DANIELLE AT HOME

  • HOME
    • About
    • Contact
  • LIFESTYLE
    • Favourites
    • Goals
    • Home
      • DIY Projects
      • Organization
    • Holidays
      • Christmas
      • Easter
      • Halloween
      • New Years
      • Thanksgiving
      • Valentine’s Day
      • Gift Guides
  • STYLE
  • WELLNESS
  • FOOD + DRINK
    • Appetizers
    • Breakfast
    • Dessert
    • Drinks
    • Side Dishes
    • Snacks
    • Holiday Recipes
      • Christmas
      • Cinco De Mayo
      • Easter
      • Father’s Day
      • Halloween
      • Mother’s Day
      • New Years
      • St. Patrick’s Day
      • Thanksgiving
      • Valentine’s Day

Blog Posts

April 20, 2019 by Danielle Leave a Comment

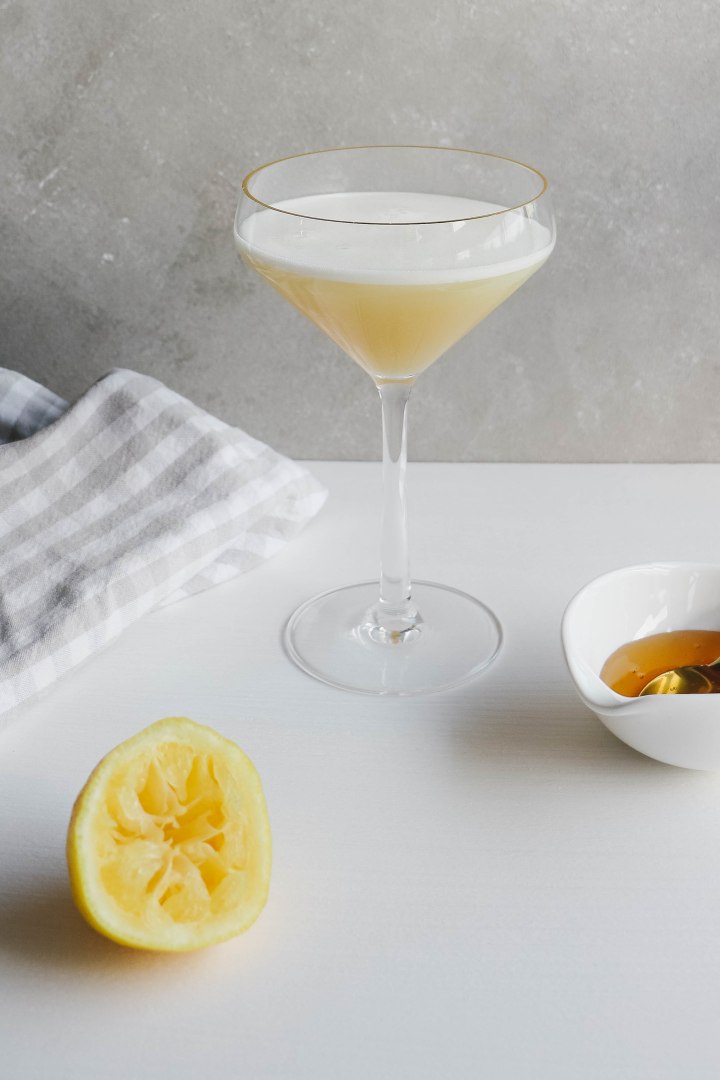
Delicious gin cocktail sweetened with honey with a secret ingredient…

IMG_0065

Today I’m sharing a fun classic cocktail with a secret ingredient.

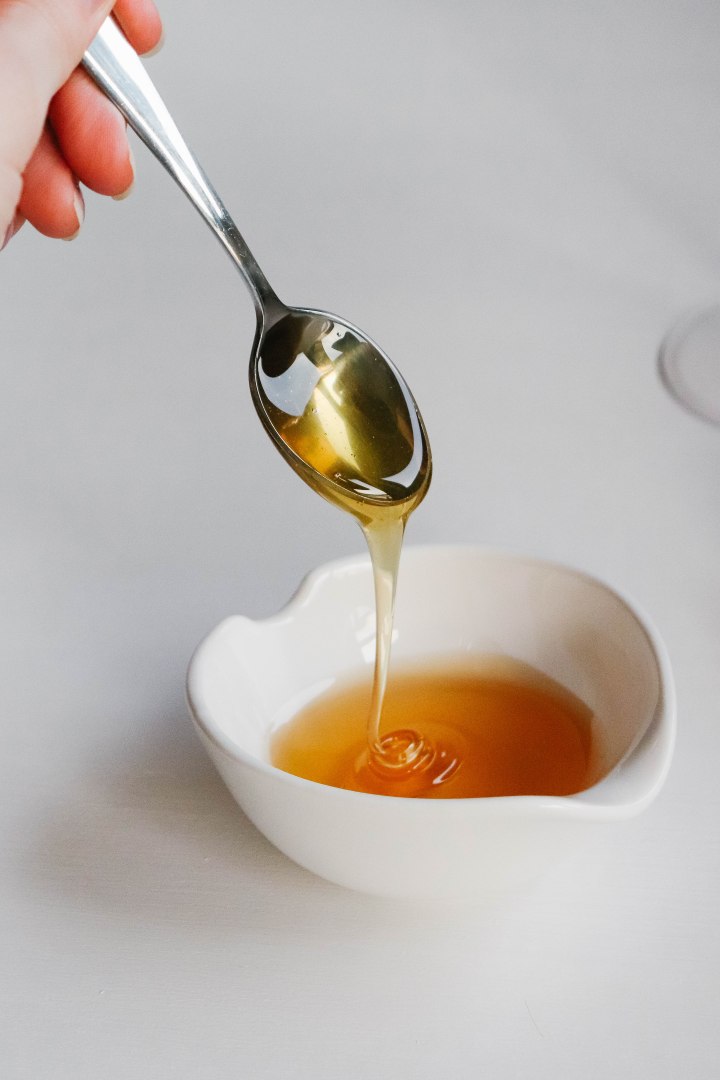
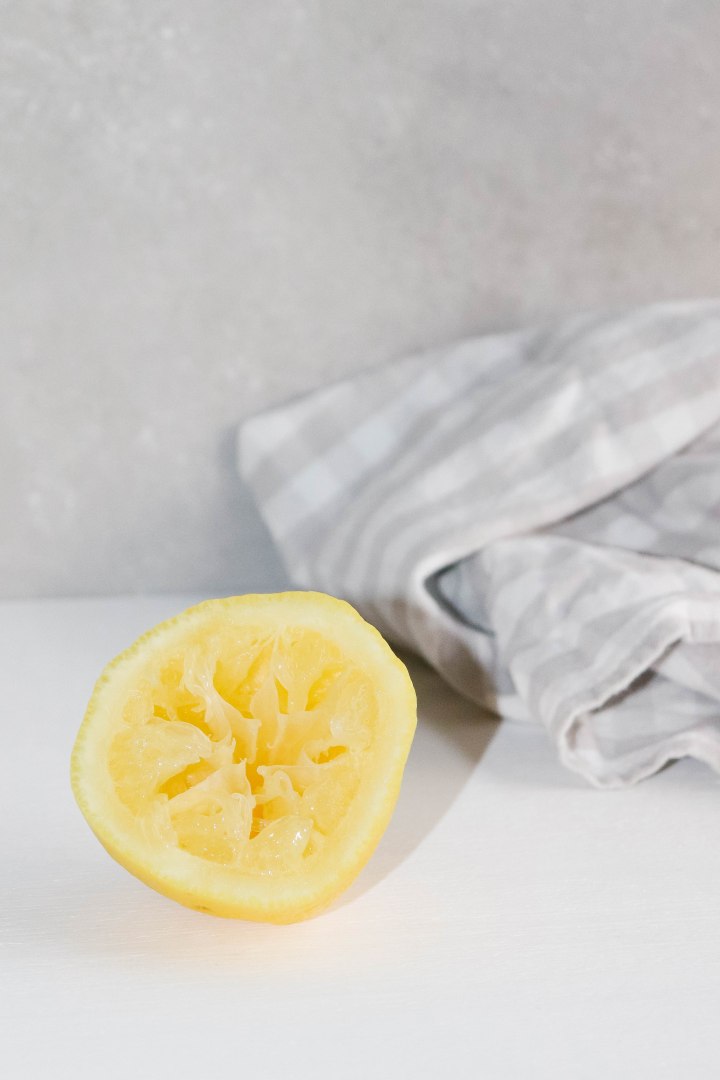
Gin is my favourite hard alcohol to create cocktails with. So I’m always trying to experiment with different ways to use it. Citrus goes so well with gin. Lemon is my favourite. This cocktail is perfect for spring. Honey and lemon scream springtime to me!

IMG_0068IMG_0140IMG_0092

This cocktail contains four simple ingredients; gin, lemon juice, honey and aquafaba.

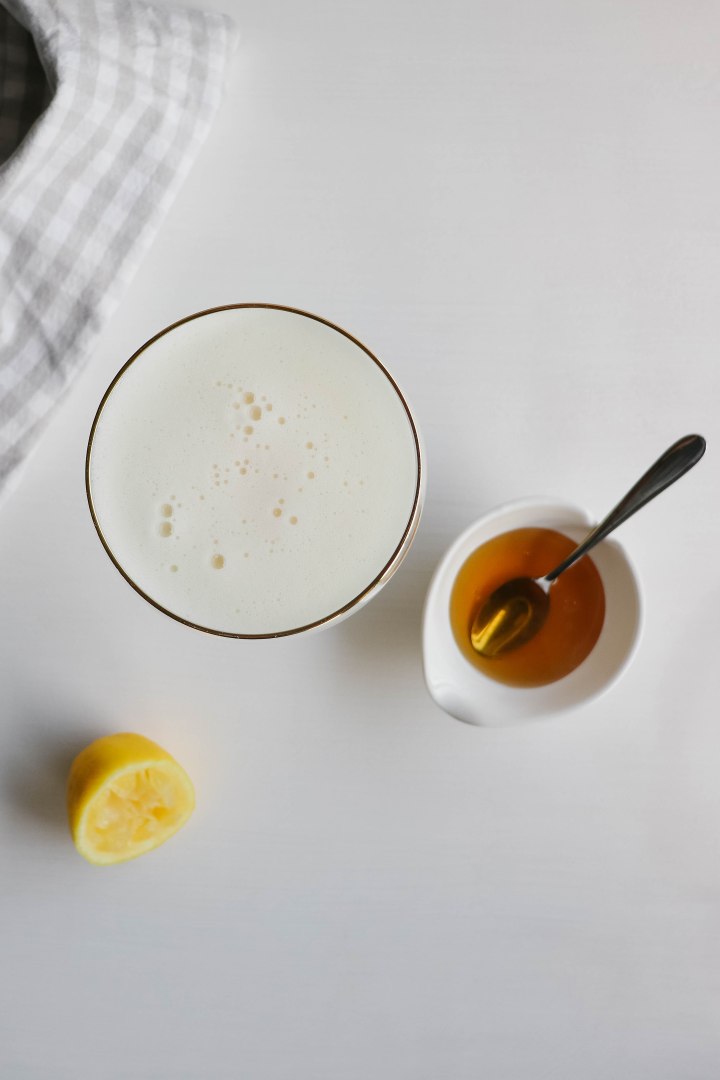
Ok so aquafaba might not sound so simple…. Traditionally sour cocktails contain egg whites. The egg whites create a light airy foam on top of the cocktail. Personally I don’t like using egg whites in cocktails. There is something so weird about drinking egg whites. Plus they smell funky. Just my opinion. If it’s your jam you can sub egg whites for aquafaba one to one.

So what the heck is aquafaba? Aquafaba is the liquid found in a can of chickpeas. So essentially bean liquid. Sounds so weird right? But it’s a really common vegan substitute for egg whites. It’s used in recipes that call for whipped egg whites like meringues.

I swear as weird as it sounds you won’t taste it. If you’re not ready to try it yet then just omit it. The flavours of the cocktail will be the same but the texture won’t be as good. It won’t have the same body and foaminess.

Ok now are you going to try this sour with or without the aquafaba?

IMG_0064

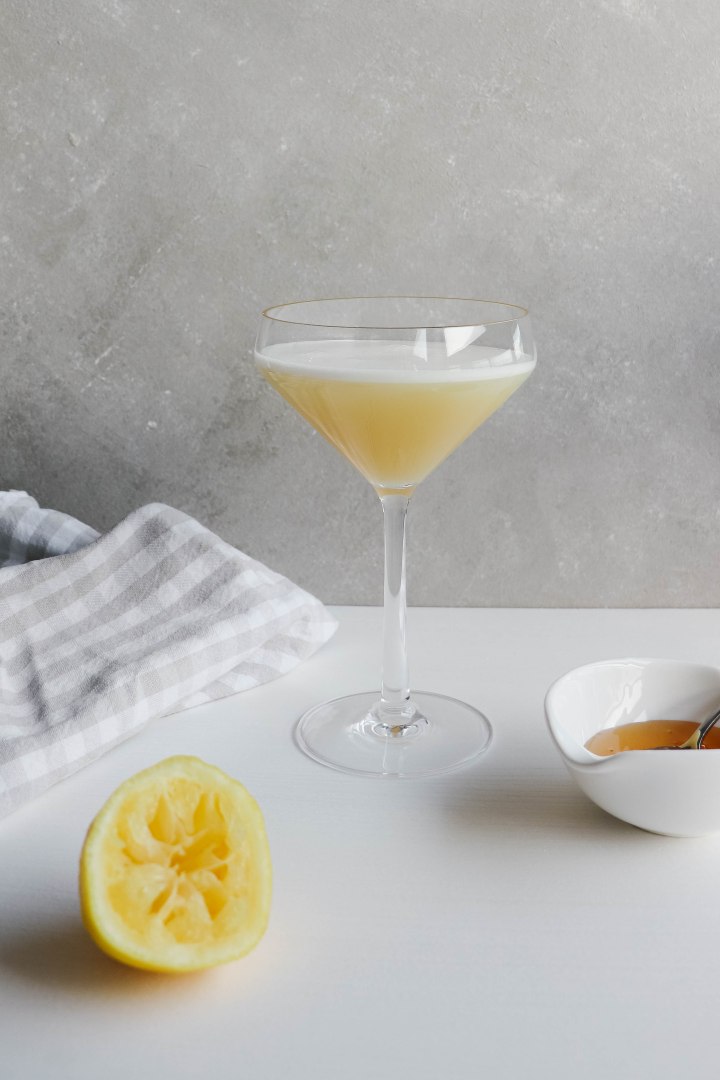
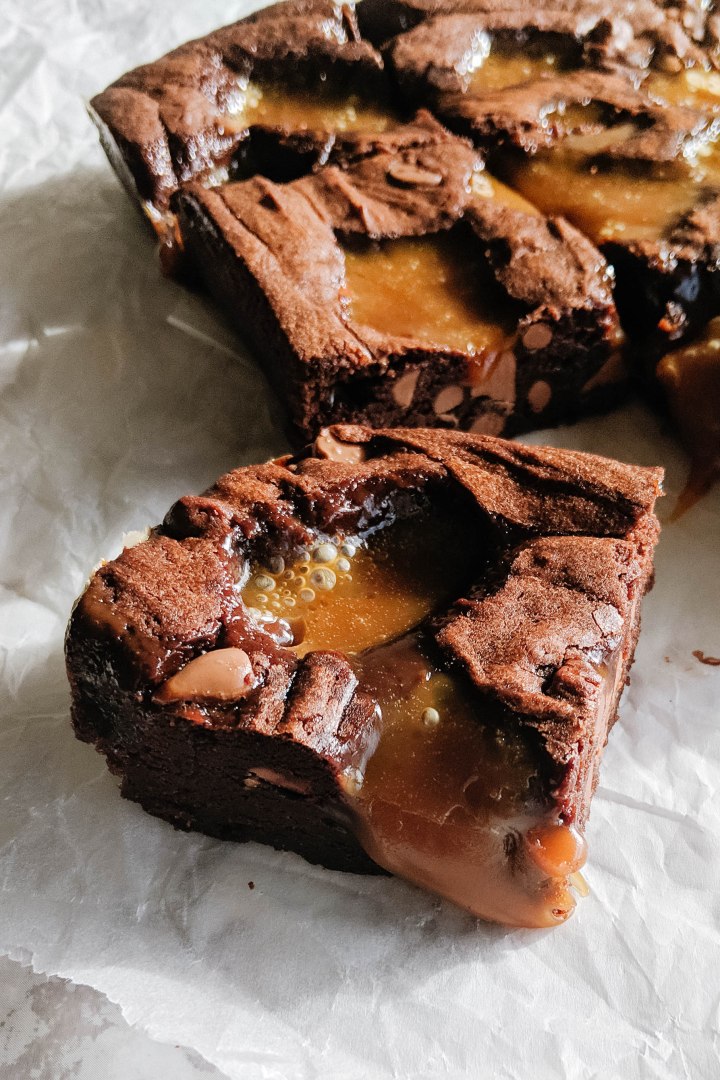
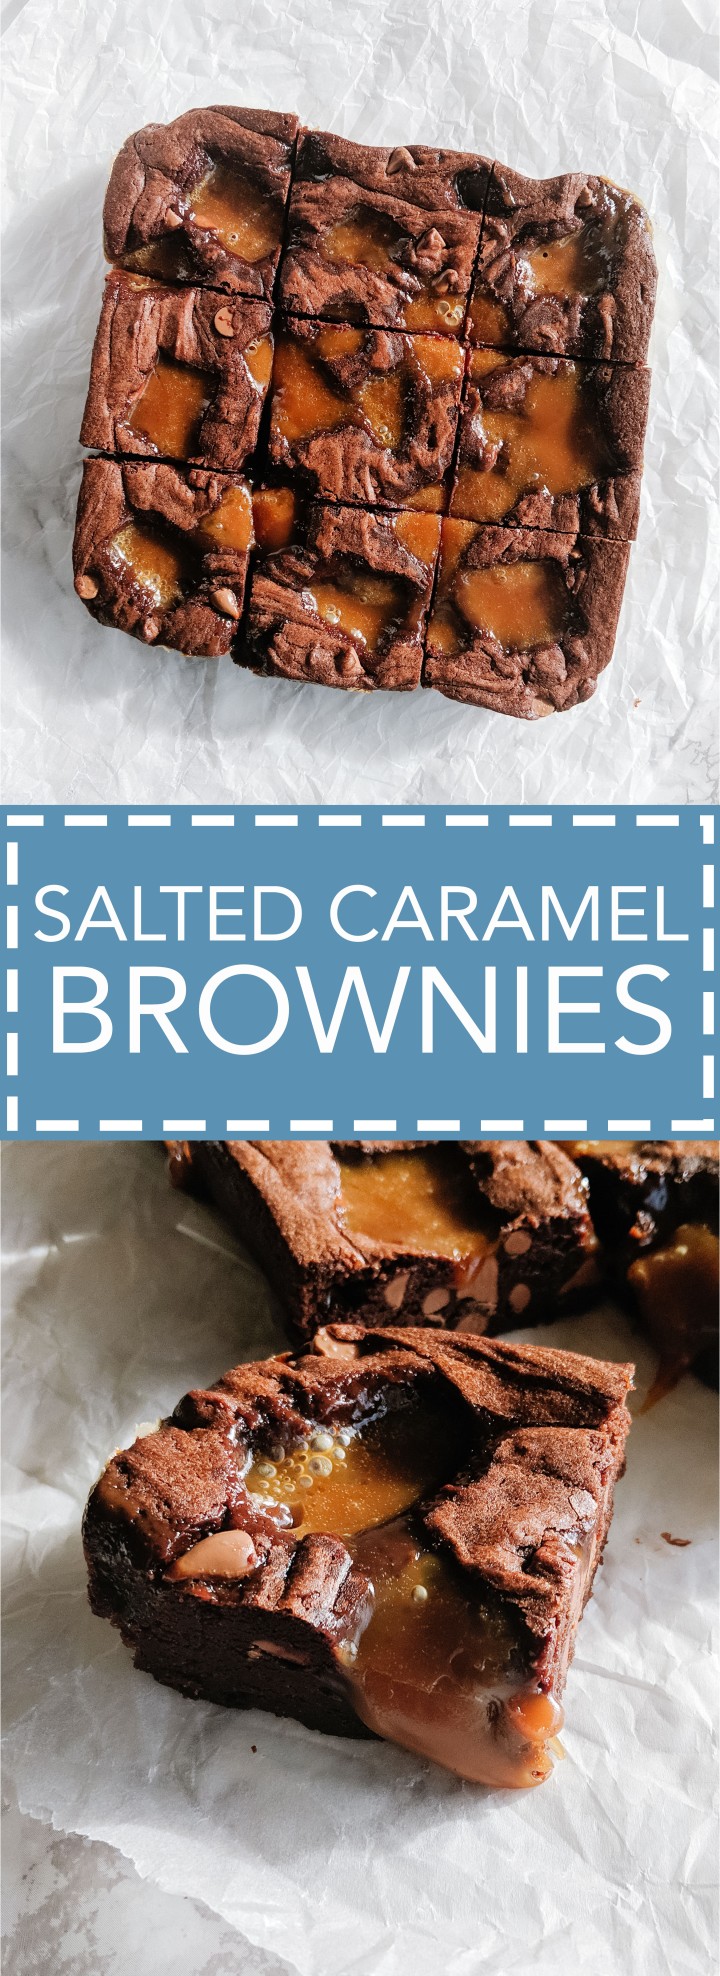
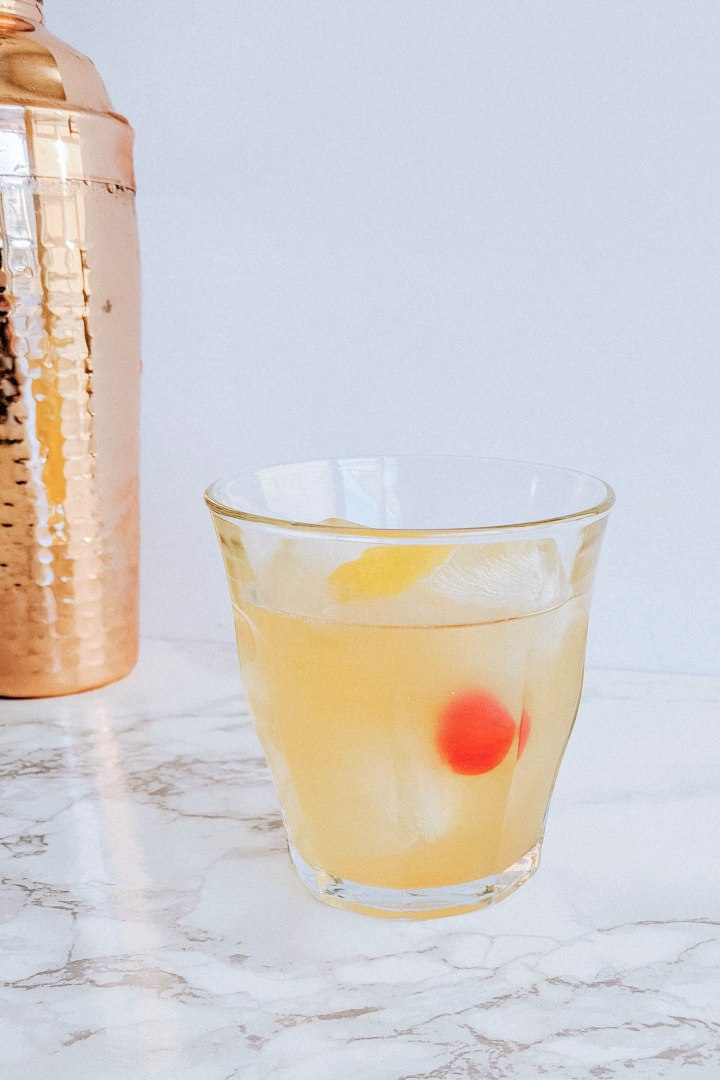
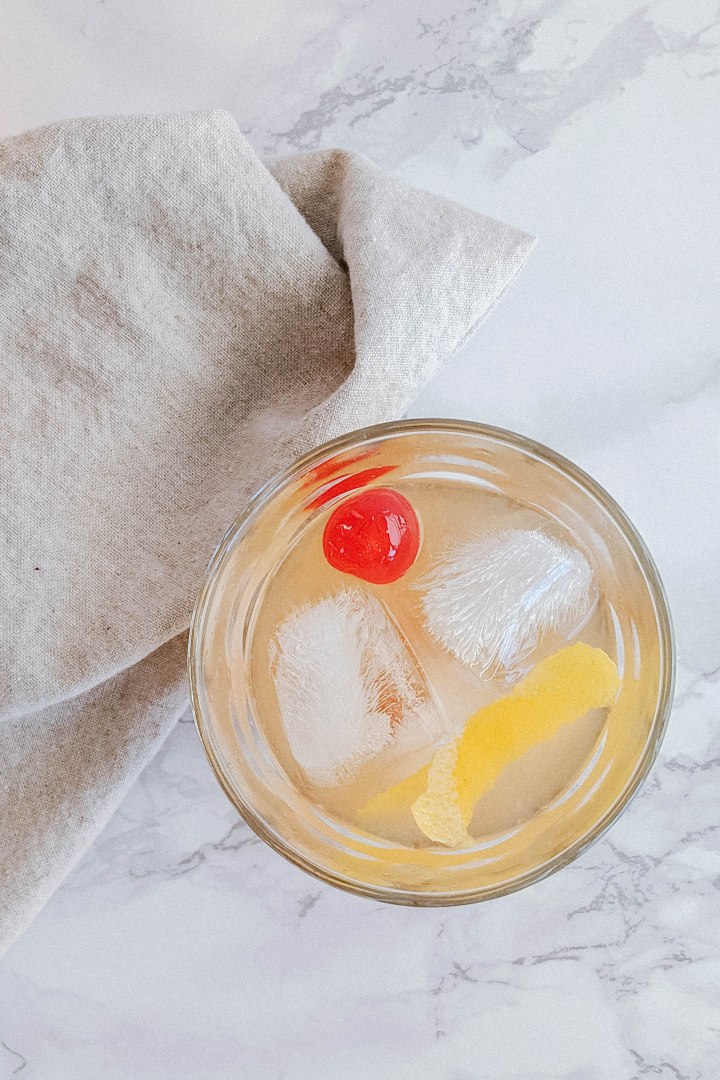
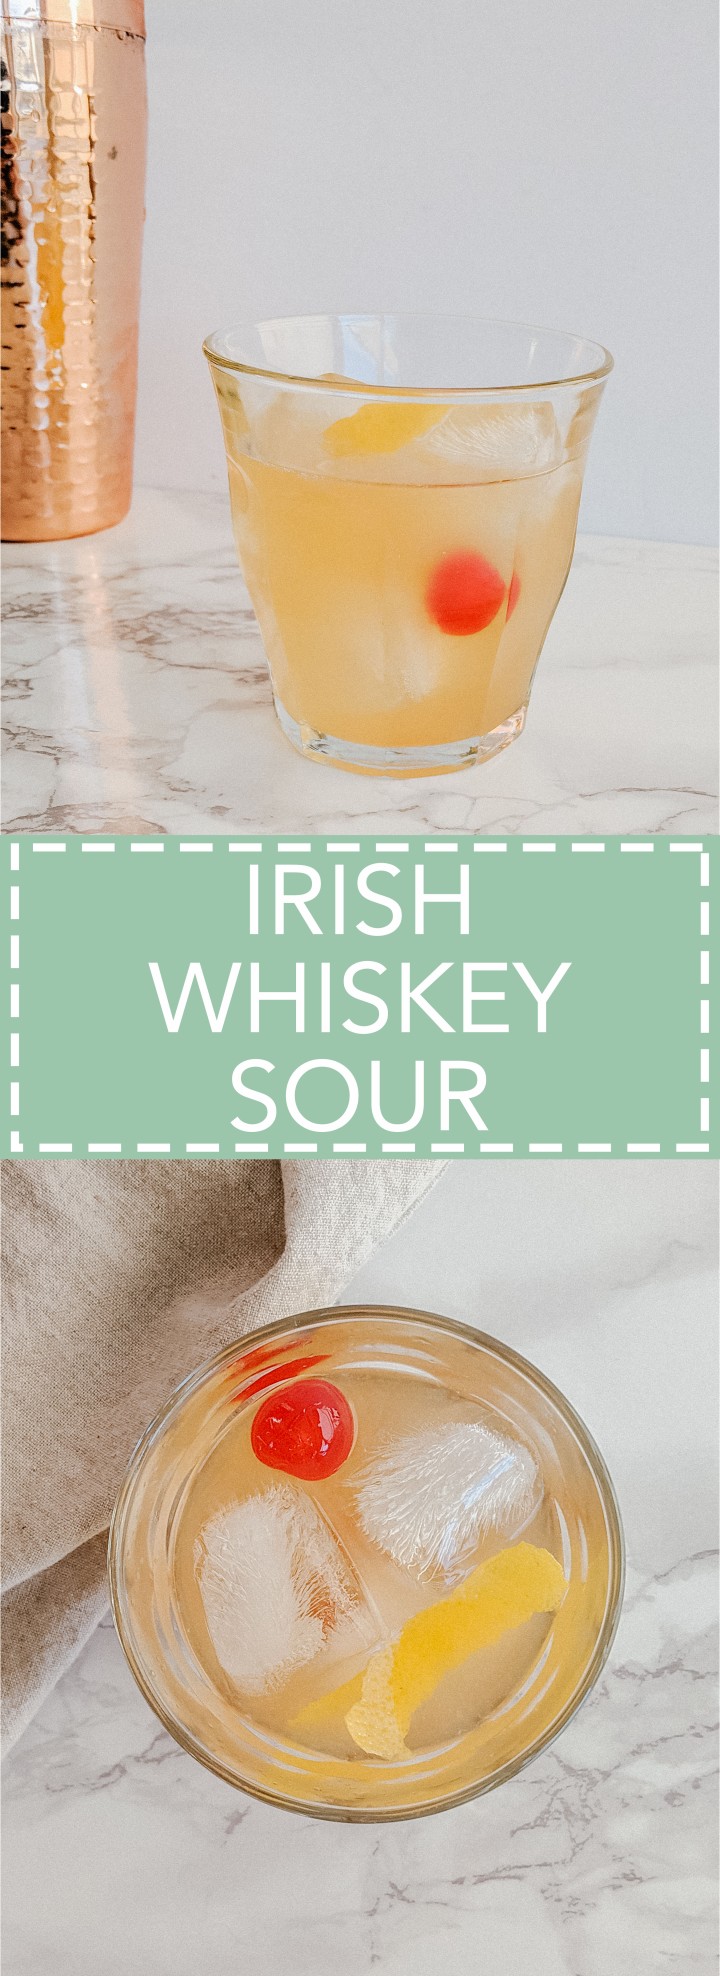
Honey Lemon Gin Sour

Yields: 1 cocktail

Ingredients:

  • 2 ounces Gin
  • 1 ounce Fresh Lemon Juice
  • 3/4 ounce Honey
  • 3/4 ounce Aquafaba (strained chickpea liquid)
  • Ice

Directions:

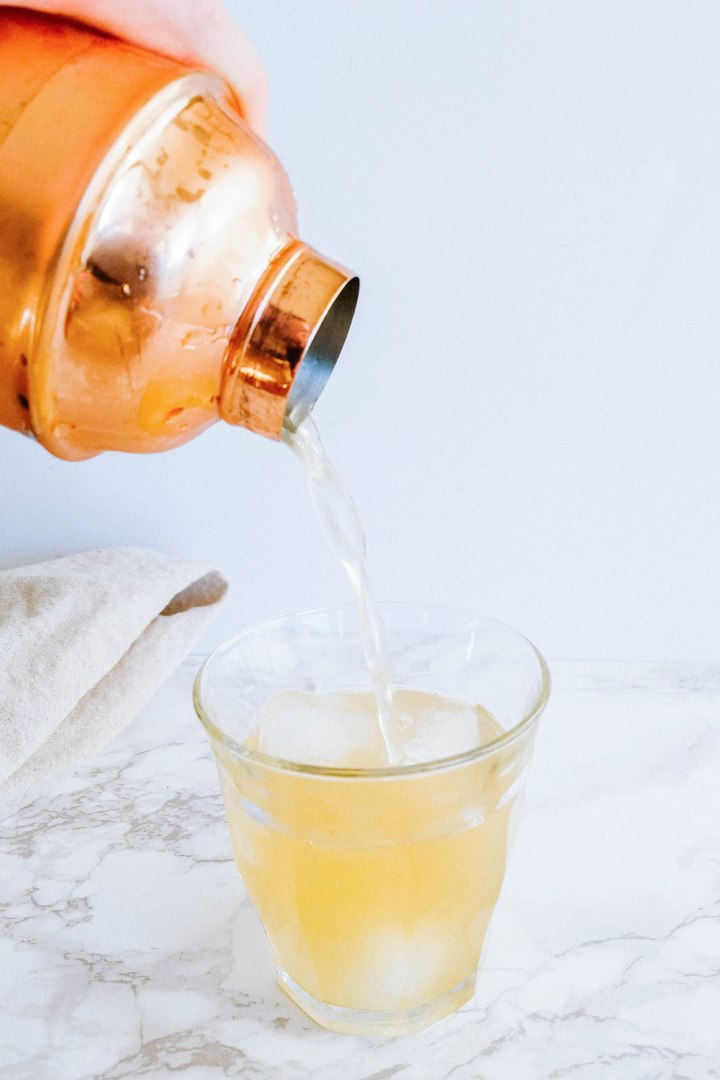
Add aquafaba to a cocktail shaker. Dry shake until frothy about 30 seconds. Fill shaker with ice. Add gin, lemon juice and honey. Shake again until well mixed and the shaker becomes very cold. At least 30 seconds.

Strain cocktail into preferred glass. I like using a coupe or martini glass. Enjoy!

Adapted from Liquor.com


April 12, 2019 by Danielle Leave a Comment

Flavourful springtime quiche

IMG_20190315_162001-2.jpg

Is your family more of an Easter brunch or Easter dinner family? We’re both lol! I love quiche for brunch. I’m a fan of a savoury brunch over sweet. I picture servings this quiche with a simple salad, or my lemon parmesan green beans. Add some homemade cinnamon buns, fresh fruit and yogurt with granola to really round out the buffet.

And if you need a dessert for Easter how about carrot cake cupcakes?

Now lets get into this delicious quiche recipe!

IMG_20190315_162001IMG_20190315_162731

This quiche starts with my grandma’s classic pie dough recipe. You’ve seen it before for my chicken pot pie and my grandma’s famous berry pie! Today we’re using half of her recipe as the base of our crust.

The base of this quiche is so simple; just eggs and milk!

To flavour the quiche we are adding garlic, sun-dried tomatoes, spinach and crumbled goat cheese. Such a yummy combination.

After blind baking the pie shell pour the filling into the shell and bake,

Once baked this quiche is great cold or warm. Super delicious! And entertaining worthy!

IMG_20190315_161951.jpg

Sun-dried Tomato Spinach and Goat Cheese Quiche

Yields: 6 servings

Ingredients:

Pie Dough:

  • 1 1/3 cups All Purpose Flour
  • 1 tsp Salt
  • 1/4 cup Vegetable Shortening, cold
  • 1/4 cup Unsalted Butter, cold
  • 4 to 8 tbsp Ice Water

Filling:

  • 1 tsp Butter
  • 2 Garlic Cloves, minced
  • 2 cups Spinach
  • 4 Eggs
  • 1 cup Whole Milk
  • 1/3 cup Sun-dried Tomatoes, drained and chopped
  • 4 ounces Goat Cheese, crumbled
  • Salt & Pepper, to taste

In a medium bowl whisk together flour and salt. Using a pastry cutter cut butter and shortening into flour until combined and mixture resembles peas and sand. Slowly add ice water one tablespoon at a time until a ball forms. Form into a disk, wrap in plastic wrap and store in the fridge for at least an hour.

Preheat oven to 350°F.

Roll pastry into a 9 inch disk. Line your pie dish. Crimp the edges of the crust. Prick the crust with a fork. Place a piece of parchment paper over the crust. Fill with dry beans or pie weights. Bake for 10 minutes. Remove from the oven and allow to cool.

In a fry pan over low heat add butter, spinach and garlic. Sauté until it spinach begins to wilt. Place in a small bowl to cool.

In a large bowl whisk together eggs and milk. Add sun-dried tomatoes, spinach, goat cheese, salt and pepper to the egg mixture. Fold together. Pour filling into pie shell.

Bake for 45-60 minutes until the crust starts to brown and the centre of the quiche is set. Allow to cool slightly before serving, 5-10 minutes.

Adapted from Sally’s Baking Addiction and Danielle at Home.

April 10, 2019 by Danielle 6 Comments

The BEST carrot cake cupcakes with tangy cream cheese frosting!

IMG_20190330_161913

Ok everyone today were taking carrot cake! Any carrot cake fans out there? I’m such a big fan. One of my wedding cake flavours was ever carrot cake. It was insanely delicious!

I make carrot cake every year for Easter which means my Uncle gets a chance to make the same joke every year. “Danielle did you grate the carrots?” Yep the joke is getting old but the cake is not.

I’ve experimented extensively with carrot cake over the years, nuts, no nuts, pineapple, yogurt, coconut etc etc etc. But the recipe I’m sharing today is a classic carrot cake. I like serving it as cupcakes because we tend to do dessert buffets at Easter and I think cupcakes are better for that. Also layered cakes are a ton of work so I tend to save them for birthdays.

IMG_20190330_161959IMG_20190330_161909IMG_20190330_162419

For my carrot cake I got nut free in the base. The cupcakes pictured are topped with nuts but you could skip that if you want. There are nut allergies in my husbands family and mine so we tend to keep our gatherings nut free. Hence why you wont find a tone of desserts containing nuts on my site.

All carrot cake recipes require some sort of moistening ingredient. I’ve used greek yogurt, apple sauce and crushed pineapple. My favourite is sour cream. For a super moist classic carrot cake this is a must.

As for the frosting I always make cream cheese frosting. I follow a 2:1 ratio of cream cheese to butter ratio. From there I add confectioner sugar and vanilla until the flavour and consistency is just right.

Now no more stalling lets get to this recipe! I know you’ll want it on your table at Easter!

IMG_20190330_162201.jpg

Carrot Cake Cupcakes and Cream Cheese Frosting

Yields: 12 cupcakes

Ingredients:

Carrot Cake:

  • 1 1/4 cups All Purpose Flour
  • 1 tsp Baking Powder
  • 1/2 tsp Baking Soda
  • 1/2 tsp Salt
  • 1 tsp Cinnamon
  • 1/2 tsp Ground Ginger
  • 1/4 tsp Nutmeg
  • 1/4 tsp Cloves
  • 1/2 cup Vegetable Oil
  • 1 cup Brown Sugar, lightly packed
  • 2 Eggs
  • 1/3 cup Sour Cream
  • 1 tsp Vanilla Extract
  • 2 Medium Carrots, grated

Cream Cheese Frosting:

  • 8 ounces Cream Cheese, softened
  • 1/2 cup Butter, softened
  • 3 cups Confectioner Sugar (more if needed for texture)
  • 1 tsp Vanilla Extract

Directions:

Preheat oven to 350°F. Line 12 count muffin tin with liners.

In a medium bowl whisk together flour, baking powder, baking soda, salt and spices. Set aside. In the bowl of your stand mixer beat vegetable oil and brown sugar until combined. Add eggs and mix on high until combined. Add sour cream and vanilla, continue to mix until combined.

Add dry ingredients to wet and mix on low until just combined. Add grated carrots and fold into batter. Fill muffin tins 3/4 of the way full.

Bake for 20-25 minutes until a toothpick comes out clean. Allow to cool completely before frosting.

Beat cream cheese and butter on high until fluffy. Add confectioners sugar and vanilla, beat on low until combined and fluffy. Once cupcakes are cool, frost and enjoy!

Adapted from Sally’s Baking Addiction.

April 5, 2019 by Danielle Leave a Comment

The perfect Easter side dish.

IMG_20190317_172403

Ok this recipe is a real winner. Scalloped potatoes are so yummy. I didn’t grown up eating scalloped potatoes with Easter dinner. My Grandma hates cheese (crazy right?!) so a potato dish covered in cheese just wasn’t on our table. But in my house we love cheese and potatoes and my hubby loves anything smothered in a creamy sauce. That means this recipe is a serious winner!

Layers of potatoes smothered in a creamy sauce , sautéed onions and more cheese than your diet would ever allow. This is comfort food people. It’s for special occasions not everyday.

IMG_20190317_172243IMG_20190317_172536

I’ve got a few tips for making this recipe and then we can get into making (and eating) this deliciousness!

Ok first things first cut those potatoes thin! As thin as you can. Personally I use a mandolin. They are really great at this job. This is the one I have. I love it because its small but effective. I use setting number two!

Secondly the type of potato. You can use russets but I like using a yellow potato. They hold their shape better after a long cook time and overall I prefer their flavour.

Slow cook your onions. This is a must! I’m super impatient but for this dish you can rush cooking your onions. You want them soft, translucent and not even a little brown. If they brown they will discolour your cream sauce.

Layering. Add sauce and cheese in between each layer of potatoes. Now depending how thin you cut your potatoes you will have approximately 4-6 layers of potatoes. Spoon a small about of sauce over each layer and sprinkle a small amount of cheese over each layer.

Now lets get into this delicious recipe!

IMG_20190317_172358.jpg

Scalloped Potatoes

Yields: 12 servings

Ingredients:

  • 3 tbsp Butter
  • Yellow Onion, thinly sliced into half moons
  • 4 Garlic Cloves, minced
  • 1/4 cup All Purpose Flour
  • 1 cup Vegetable Broth (you can use chicken)
  • 2 cups Milk (I use 2%)
  • 1 1/2 tsp Salt
  • 1/2 tsp Pepper
  • 1 tsp Fresh Thyme, chopped
  • 4 pounds Yellow Potatoes, peeled and sliced 1/8 inch thick
  • 2 cups Old Cheddar Cheese, grated
  • 1/2 cup Fresh Parmesan Cheese, grated

Directions:

Preheat oven to 400°F.

In a large sauté pan melt butter over medium low heat. Add onions sauté until soft and translucent, about 6-7 minutes. Add garlic and cook until fragrant. Add flour to the pan. Cook flour and onions for about a minute. Slowly add vegetable stock, stir constantly until a thick but smooth sauce forms. Slowly add milk to sauce, stir until smooth. Add salt, pepper and thyme. Cook over low heat for 5 minutes to thicken slightly. Set aside.

Line a 13×9 inch baking dish with a layer of potatoes. Top with 1/3 cup sauce (approx.) and onions. Sprinkle 1/4 cup cheese over sauce. Continue to layer potatoes until complete. Pour the remaining sauce over the top layer of potatoes. Sprinkle with remaining cheese.

Cover pan with foil and bake for 30 minute. Remove foil and bake for an additional 30-40 minutes until the top is brown and the potatoes are cooked though.

Remove from the oven and let cool for 5 minutes before serving. Top with additional thyme and cheese if desired.

Recipe adapted from Gimme Some Oven.

Scalloped Potatoes copy

April 3, 2019 by Danielle Leave a Comment

Breaking down my picks for Easter dresses…

Easter Dresses

Ok guys Easter is coming up so I’m breaking down my favourite dresses for Easter. Whether you’re heading to church, brunch, dinner or chasing after kiddos at an easter egg hunt there’s something here for everyone.

Classic Green Floral Wrap – Green is one of my favourite colours to wear in spring and summer. It’s so bright and beautiful. This wrap dress is a classic look for Easter. And it’s just a great dress to have in your closet. Perfect for wedding season!

Feminine Pink Ruffles – This dress is seriously sweet and perfect if you live somewhere warm since it’s short sleeved. This dress is so sweet, trimmed with ruffles and pretty pink florals.

Sleeveless Green Wrap – Again a perfect dress if you live somewhere warm! This dress is stunning and perfect for brunch. I seriously want to drink a mimosa and sit in the sun on this press. Plus that wrap style hides the food baby after eating a few too many waffles!

Blue Wrap Dress – Seriously perfect Easter dress. For me this it the perfect church dress. It’s sweet and spring appropriate. I especially love the pleating in the dress. It adds such a great visual interest. It’s also perfect for a Pacific North West Easter since chances are there could be a bit of rain!

Classic Lace Dress – I love Eliza J lace dresses. I wore one to my bridal shower last year and can’t wait to add more to my collection. They are such high quality beautiful dresses. I think this pink one would be great for Easter brunch or dinner.

Sweet Sundress – Ok this dress screams Easter egg hunt to me! I think this dress would be especially perfect if you’re chasing after littles and helping the pick up eggs. It’s a great length for bending over and the high neck prevents any possible wardrobe malfunctions!

Ok guys now get shopping!

March 29, 2019 by Danielle 2 Comments

Insanely easy and flavourful chicken marinade.

IMG_20190317_175920

Ok guys we eat a lot of chicken in my house. I’m sure you do to! It’s just such an easy, healthy and affordable protein. I’m a chicken breast fan, but my husband is partial to thighs. Since he’s such a dark meat fan I’ve had to figure out ways to prepare them that keep us both happy. I only eat chicken thighs if they are smothered in sauce or marinated and super tender! I’ve got a few favourites in my repertoire. I’ve shared how I make BBQ chicken with chicken thighs before. Today I’m sharing an asian inspired marinade.

IMG_20190317_155346IMG_20190317_155922

This marinade is one of my favourites. What I love about it is not only does it taste delicious but it has just enough sugar and sweetness to caramelize on the chicken. It creates the best crispy outside and a tender delicious chicken. So what’s in this marinade?

  • Soy Sauce
  • Olive Oil
  • Ginger
  • Garlic
  • Brown Sugar
  • Sambal Oelek

Most of these things you probably have in your pantry except the Sambal Oelek. It’s an Indonesian chili paste. I love it because it’s not too hot and has an amazing flavour. It’s available at most grocery stores in the asian food section (next to the Sriracha!).

So give this marinade a try. I promise this will give improve your weeknight chicken dinner!

IMG_20190317_175928


Sambal Chili and Garlic Chicken Marinade

Yields: 1 Marinade

Ingredients:

  • 1/4 cup Soy Sauce (I like low sodium)
  • 3 tbsp Olive Oil
  • 2 tbsp Sambal Oelek
  • 1 tbsp Brown Sugar
  • 3 Garlic Cloves
  • 2 tsp Fresh Ginger
  • 1 pound Boneless Skinless Chicken Thighs

Directions:

Roughly chop ginger and garlic and to a small bowl. Add the remainder of the ingredients to the bowl. Whisk to combine. Place chicken in an air tight container or zipper bag. Cover with marinade and place in the fridge. Marinade for a minimum of 1 hour or up to 24 hours.

Preheat your oven to 425°F. Line a baking sheet with parchment paper. Bake for 20-30 minutes until the internal temperature reaches 165°F.

March 27, 2019 by Danielle 2 Comments

Today I’m sharing a few of my favourite finds for Easter. I am slowly creating holiday decor collections for our home. I like curating my decor over time. I’ve already started buying a few new pieces for Easter. So today I thought I would share some of the items I’m loving for Easter!

Easter Decor.jpg

Floral Dinnerware – I love my classic white dinnerware, but I like adding fun plates and glasses to refresh my table for every season. I’m in love with these floral plates! I think buying half a set and placing them at every other place setting would be the perfect way to infuse fresh florals into your table scape without breaking the bank!

Egg Decor – Ok I loved decorating eggs when I was a kid but that’s not really my cup of tea anymore. So I’ve started collecting glass eggs to display around the house. I love these pastel ones!

Linen Napkins – I love a cloth napkin! I know it’s a little extra but I love them. Both of my Grandma’s used them and I loved rolling them and setting the table. I got linen napkins as a wedding gift and we use them all the time. I think these pretty pink ones would be perfect for Easter!

Pastel Candles – When I came across these tiny tapers I fell in love. I’m not much of a taper fan, but these may have just converted me. Seriously cute and along a long table. Perfection!

Candy Dish – I love a festive candy dish! And without one what would you put the mini eggs in? That’s a serious question. I think this is super cute and functional!

Place Card Holders – Ok I’m a fan of a seating plan. I’m kind of a master of them! Not to brag but many people told me how good I planned the seating for our wedding. I think it’s fun to put out name cards for holidays and events. Simple printable cards are what I use, so a fun festive holder is a must! Bunny ears! How adorable! I also love the mix of natural wood with the pastels whites and florals.

Ok guys, there you have it, my picks for Easter decor!

March 22, 2019 by Danielle 1 Comment

Super fudgy brownies with pockets of delicious salted caramel!

IMG_20190224_145434_1-2x3

Brownies are probably one of my favourite desserts, and you already know about my love of salted caramel (here, here and here!). I love brownies because I can whip them up in one bowl. Fast easy and impressive… totally my jam! Now of course salted caramel is a wee bit more involved than a one bowl brownie, but I promise it is worth it! For this recipe we will be using my favourite Homemade Salted Caramel Sauce! It’s straightforward, delicious and there might be leftovers for your ice cream.

IMG_20190224_145727-2x3IMG_20190224_145808-2x3

Before we get into this mouth watering recipe I have a few tips.

  1. Freeze your caramel, this helps prevent over spreading when the brownies bake
  2. Don’t over bake, I life a gooey brownie so stick to the cook time below
  3. If cutting them is a challenge pot them in the fridge
  4. Sprinkle with sea salt at the end

These are seriously delicious and I defiantly need to make another batch very soon!

IMG_20190224_145734_1-2x3

Salted Caramel Brownies

Yields: 9-12 brownies (I recommend cutting these small since they are super rich!)

Ingredients:

  • Homemade Salted Caramel Sauce (we will use 2/3 of the recipe in the brownies the rest can be saved for another use – ps. it freezes great!)
  • 4 oz Unsweetened Chocolate
  • 1/2 cup Butter, melted
  • 1 1/4 cup Sugar
  • 2 Eggs
  • 1 Tsp Vanilla
  • 1 cup All Purpose Flour
  • Pinch of Salt
  • 1/2 cup Chocolate Chips
  • Optional: Flaked Seas Salt for finishing

Directions:

Make my Homemade Salted Caramel Sauce recipe. Pour 2/3 of the recipe into a square baking dish lined with parchment paper. Place in your freezer. Store the rest in an air tight container in your fridge or freezer.

Preheat the over to 350°F. Line an 8×8 inch baking dish with parchment paper, spray with baking spray. Set aside.

In a large microwave safe bowl place butter and chocolate. Microwave in 30 second intervals, stir in between until the chocolate and butter have just melted. Add sugar, eggs, vanilla and salt. Stir well until smooth and combined. Add flour, fold into batter until combined. Once combined stir in chocolate chips.

Pour brownie batter into prepared baking sheet. Remove caramel from the freezer. Break or cut into small squares. Place the caramels on to the brownie batter. Space evenly and press slightly into batter.

Bake the brownies for 20-30 minutes until set. Sprinkle with flakey sea salt if desired. Cool before serving. Enjoy!

Adapted from Pinch of Yum.

Salted Caramel Brownies - Yum!

March 20, 2019 by Danielle Leave a Comment

Happy first day of Spring!

Spring Collage.jpg

The sun is shining, the temps are rising and I think my parka is officially away for another season. I’m very excited to brighten and lighten our home and my wardrobe! So today I’m sharing a few of my favourite things for spring!

Dresses – Seriously excited to ditch the heavy pants and knit dresses. I’m excited to break out all my lightweight dresses and even add a few to my collecting. Like this one from Gal Meets Glam!

Wreaths – Wreaths are not just for Christmas! I love boxwoods for spring and summer. They really brighten the front door! This one is a great price!

Dining – I love to break out some fun dinnerware for spring, it’s so fun and perfect for the patio! I think it’s the only way I can get pink in my house without my husband making a stink! I love this ceramic little market collection!

Pillows – I love changing my pillows for Spring! This one is perfect for spring without being too bright and flashy!

Baskets – Spring means spring cleaning and spring organizing! So give me all the baskets to hide my crap! This one is the exact size I’ve been hunting for and it goes perfect with my house!

Ok guys! There you have it my must haves for Spring!

March 15, 2019 by Danielle 1 Comment

A classic cocktail with an Irish twist!

IMG_20190301_170318-2x3-2x3-2x3.jpg

Sunday is St. Patrick’s Day, so I’m sharing a little last minute cocktail inspiration. A Whiskey Sour is a fantastic classic cocktail that I think everyone should learn how to make! It’s a delicious balance of sweet and sour. And that is the key! Balance!

Now you may be looking at this cocktail and going wheres the foam!? I get it! But hear me out, the foam you typically find topping a whiskey sour is made with egg whites and that’s just not for me. It’s one extra step and I never trust that my eggs are fresh enough.

If your a die hard foam in your whiskey sour fan I’ll teach you how down below.

Another note about this recipe stick to these exact proportions, taste, and then adjust the sweetness. It’s easy to start tweaking things before you taste, but then you’re likely to end up with a weak cocktail. And I know none of you want that! I made the portions in this cocktail work with Jameson Irish Whiskey, since this is a St. Patrick’s Day recipe, but you could defiantly use the traditional bourbon or Canadian Whiskey. If you use a different variety of whiskey you need to adjust your proportions of sweet and sour to suit your palette and whiskey. It’s not an exact science.

IMG_20190301_165914-2x3-2x3-2x3IMG_20190301_170546-FB-2x3

Irish Whiskey Sour

Yields: 1 cocktail

Ingredients:

  • 2 ounces Jameson Irish Whiskey
  • 1 ounce Lemon Juice, fresh
  • 1 ounce Simple Syrup (buy at the liquor store or make it – so easy!)
  • Optional: Fresh Egg White
  • Garnish: Maraschino Cherry and Lemon Peel

Directions:

If using egg whites add whites to an empty cocktail shaker. Dry shake the egg white for about 30 seconds to break them up and create froth.

Add ice, whiskey, lemon juice and simple syrup to the cocktail shaker. Shake well, about 30 seconds. Strain into a glass filled with ice. If using egg whites I recommend a double strain.

Adapted from 31 Dover.

Irish Whiskey Sour - A twist on a Classic for St. Patrick's Day!,/div>

« Previous Page
Next Page »

Primary Sidebar

Danielle at Home

Hi, I’m Danielle. I am a twenty something woman working her office job by day and blogging at night! I’m married, a new home owner and I love sharing all my favourite things on this blog. So grab a glass of wine and follow along. I’m so glad you’re here!

SUBSCRIBE & FOLLOW

Pinterest
Instagram
Facebook
Twitter

Footer

Copyright © 2025 Danielle at Home on the Foodie Pro Theme