• Skip to primary navigation
  • Skip to main content
  • Skip to primary sidebar
  • Skip to footer

DANIELLE AT HOME

  • HOME
    • About
    • Contact
  • LIFESTYLE
    • Favourites
    • Goals
    • Home
      • DIY Projects
      • Organization
    • Holidays
      • Christmas
      • Easter
      • Halloween
      • New Years
      • Thanksgiving
      • Valentine’s Day
      • Gift Guides
  • STYLE
  • WELLNESS
  • FOOD + DRINK
    • Appetizers
    • Breakfast
    • Dessert
    • Drinks
    • Side Dishes
    • Snacks
    • Holiday Recipes
      • Christmas
      • Cinco De Mayo
      • Easter
      • Father’s Day
      • Halloween
      • Mother’s Day
      • New Years
      • St. Patrick’s Day
      • Thanksgiving
      • Valentine’s Day

Blog Posts

July 24, 2018 by Danielle Leave a Comment

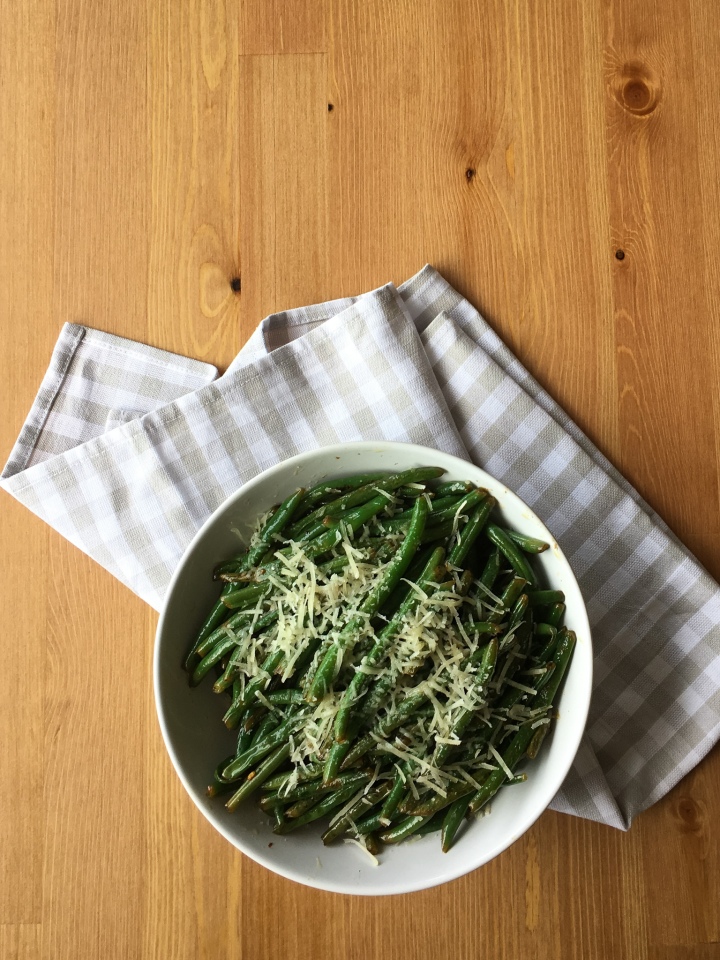
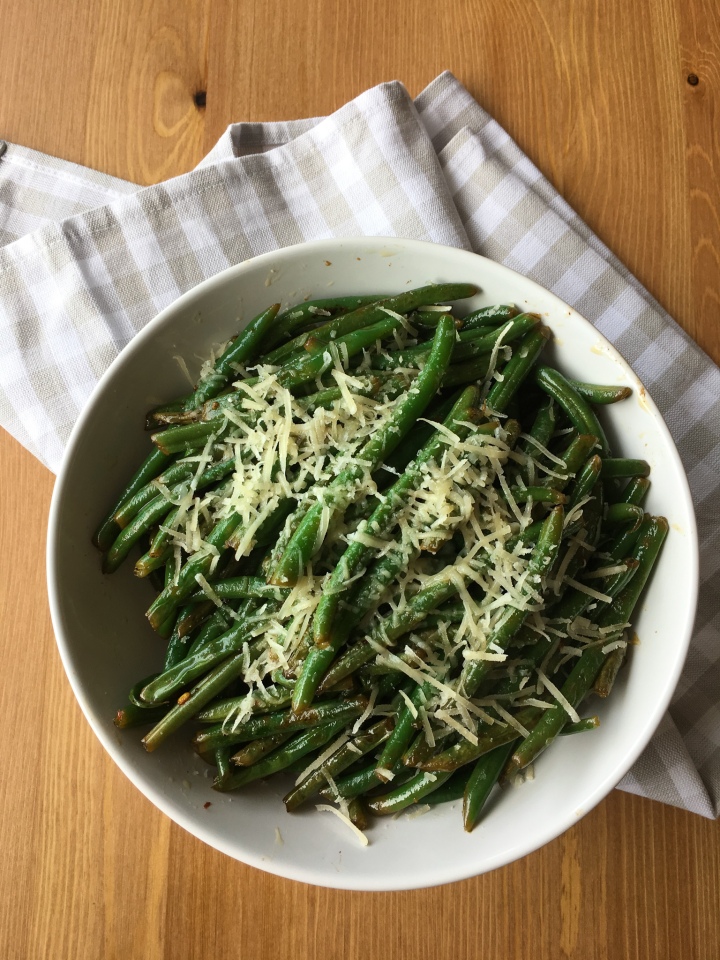
Boneless skinless chicken breasts are a staple in my house. There affordable, versatile and everyone likes them. The downside is that they can be quite bland, so I love to marinade and grill them. This recipe is for my favourite marinade, and it goes really well with these green beans.

IMG_3130.jpg

This marinade has lemon and dijon mustard as the main flavours. The marinade also has garlic and chilli flakes in it which give an extra boost of flavour.

IMG_3148.jpg

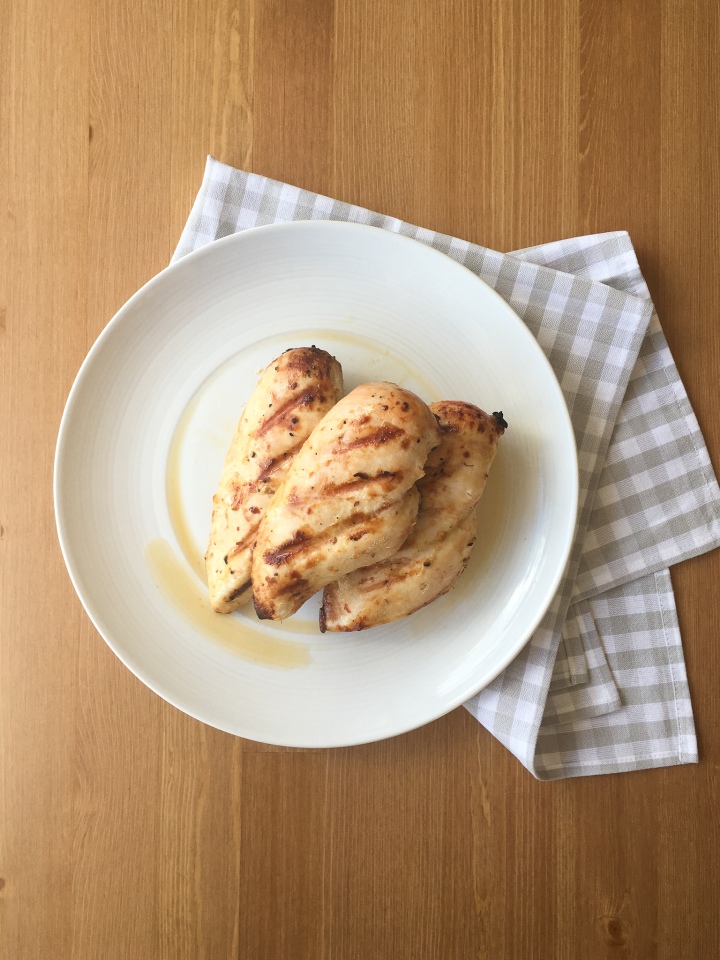
You can of course use this marinade on vegetables or another cut of meat, the flavours make it very versatile. I have also used this marinade and then baked the chicken in the oven. It is still delicious, but I love the charred smoky flavour that grilling gives.

Are chicken breasts a staple in your house?


Ingredients:

  • 1 pound boneless skinless chicken breasts

Marinade:

  • Zest of one lemon
  • Juice of one lemon
  • 2 tablespoons olive oil
  • 1 tablespoon Dijon mustard
  • 1/2 teaspoon salt
  • 1/2 teaspoon pepper
  • 3 cloves of garlic, crushed
  • Red pepper flakes to taste


Directions:

Mix marinade ingredients together. Pour over chicken and marinade for at least 1 hour, or a maximum of overnight.

Pre heat your grill to medium high heat. Grill chicken on each side for 7-10 minutes with the lid closed, or until the chicken reaches the internal temperature of 165°. Allow chicken to rest for 10 minutes before serving.

Adapted from Inspired Taste

July 19, 2018 by Danielle Leave a Comment

I am cookie obsessed! I really don’t think there is anything better than a warm cookie, well maybe pie… or pasta. Ok I’m just obsessed with food. But seriously a homemade cookie is one of the best comfort foods.

IMG_3192-2

I have tried a lot of chocolate chip cookie recipes. Soft, chewy, cakey etc. I have a few favourites, but I think this one is my favourite, at least right now. These cookies are soft, but not doughy or under baked. They also have slightly crispy edges and a slight caramel flavour.

IMG_3174

These cookies use mostly brown sugar which makes the cookies extra flavourful. I also only use egg yolks in this recipe which is why the cookies stay so soft. As for the chocolate, in my house we use a mix of milk and semi sweet chocolate chunks, but you can use your favourite. This recipe also calls for chilling the dough. Chilling the dough will stop the cookies from spreading too much and keep the cookies soft.

What kind of chocolate do you use in your cookies? Dark, milk or semi sweet?

IMG_3193

Servings: 24

Ingredients:

  • 1 Cup Unsalted Butter
  • 1 Cup Brown Sugar, lightly packed
  • 1/4 Cup White Sugar
  • 4 Egg Yolks
  • 1 Tablespoon Vanilla
  • 1 3/4 Cup All Purpose Flour
  • 1/2 Teaspoon Baking Soda
  • 1/2 Teaspoon Salt
  • 1 Cup Chocolate Chips or Chunks (Dark, milk or semi sweet)

Directions:

Melt butter in the microwave for 30 seconds, or until just starting to melt. Cream butter and sugar together until creamy. Add eggs and vanilla, beat until combined.

Whisk flour, baking soda, and salt together in a medium-sized bowl. Add the dry ingredients to the butter and sugar mixture. Beat on low until just combined. Fold in chocolate chips. Cover with plastic wrap and refrigerate dough for at least 3 hours or overnight.

Preheat the oven to 350°F. Line two baking sheets with parchment paper or silicone baking mats. Using an ice cream scoop or two spoons to scoop out the dough, space the cookies 2 inches apart. Bake cookies for about 13 – 15 minutes until golden on top.

Adapted from Amanda Frederickson

July 18, 2018 by Danielle 1 Comment

Today I’m sharing with you my favourite veggie side dish. These green beans are tender and fresh with a cheesy bite. They are also super fast to wipe up, so they are not just for dinner parties.

IMG_3125

In this recipe I use french green beans, my favourite are by Manns. I like using french style green beans because they are smaller and more tender then traditional green beans. They also cook quickly which is perfect for a week night.

I par cook the beans in boiling water before pan frying in butter and seasoning with lemon juice. At the end I top the beans with freshly grated parmesan. It really is as easy as it sounds.

IMG_3124

What is your favourite easy and delicious side?


Servings: 4-6

Ingredients:

  • 1 lbs Fresh French Cut Green Beans
  • 1 tablespoon unsalted butter
  • Juice of half a lemon
  • Freshly Grated Parmesan Cheese
  • Salt and Pepper to taste
  • Optional: Chili Flakes


Directions:

Place the beans in a wok or fry pan, cover with water. Simmer for 5 minutes, then drain. Over medium heat add butter, beans, salt, pepper and chili flakes to the pan. Sauté the beans for 2 minutes. Add lemon juice and continue to sauté for 2-3 more minute until beans are tender and begin to crisp. Transfer the beans to a serving dish and top with freshly grated parmesan.

July 17, 2018 by Danielle Leave a Comment

I really try to slow down and enjoy my weekends. Since I lead a pretty busy life this can be hard to do, but I always try to carve out one morning to relax. I love to sip coffee and cook a special breakfast with my husband. These waffles are our go to on the days we know we have time to savour the morning.

IMG_3072

Now these aren’t your typical waffles. These waffles are yeast raised. The yeast makes them light and airy, but gives them an extra depth of flavour. One other thing that is different about these waffles is that the batter is made the night before. So a little planning is involved, but I promise they are worth it!

IMG_3078

I like to top mine with butter and real Canadian maple syrup, but I bet they would be extra yummy with berries and whipped cream. I bet you’d even love them plain!

So what your family’s favourite weekend breakfast?

IMG_3074

Servings: 20 Waffles

Ingredients:

  • 1 packet active dry yeast
  • 1/2 cup warm water
  • 2 cups milk (I use 2%)
  • 1⁄2 cup unsalted butter, melted
  • 1 teaspoon salt
  • 1 teaspoon sugar
  • 2 cups All Purpose Flour
  • 2 large eggs
  • 1⁄4 teaspoon baking soda
  • Your favourite toppings (butter, syrup, Nutella, strawberries, whipped cream)
Directions:
Whisk yeast and sugar in ½ cup warm water until dissolved. Set aside for 5-10 minutes or until foamy and doubled in size. Add milk, melted butter, salt, and flour to the bowl. Whisk until smooth. Cover with plastic wrap and refrigerate over night.
Preheat your waffle iron. Whisk eggs and baking soda into the batter until smooth. Pour batter into the wells of your waffle iron (1/4 to 1/2 cup depending on the style of the iron). Allow to cook for thirty second before closing the lid. Lower the lid and cook per your waffle irons specifications until golden brown. Repeat with remaining batter.
Adapted from Marion Cunningham’s Yeast-Raised Waffles, Saveur

July 16, 2018 by Danielle Leave a Comment

It feels like just yesterday I was rolling out dough on my grandma’s sea-foam green counter tops. Laughing and making an absolute mess of her kitchen. It’s funny how food and cooking is so tied to memories and emotions. I’ll never forget her passing on all her best tips to me during our many baking sessions.

My grandma was famous for her baking, but nothing was quite as good as her pies. I first started making pies with her when I was six, and now I’ve become the head pie maker in our family.  It seemed only fitting that the first recipe I shared on this blog was the first recipe I ever made.


IMG_3093

I of course have tweaked grandmas recipe slightly over the years to make it my own, but I still follow grandma’s methods. My grandma’s recipe was based on the Crisco’s classic pie dough, it’s the same recipe her mother used. Personally I prefer to use half butter half shortening to give the dough more flavour. I also add a bit of sugar to my dough to sweeten the crust slightly (per my husbands request). After much trial and error this has become my favourite pie dough. I make my dough using an old-fashioned pastry cutter. You can of course use a food processor instead, but be careful not to over work the dough.


IMG_3094

This pie is so delicious I could eat the whole thing myself… I wish I was kidding.

My favourite way to eat this pie is cold straight out of the fridge, but my family likes it served warm with vanilla ice cream. Whats your favourite way to enjoy a slice of pie?

Serves: 8

Ingredients:

Crust:

  • 2 2/3 cups All Purpose Flour
  • 1 teaspoon salt
  • 1 teaspoon white sugar
  • 1/2 cup Vegetable Shortening, cold
  • 1/2 cup Unsalted Butter, cold
  • 8 to 12 tablespoons ice water
  • Egg
  • 2 tablespoons water
  • Sugar for dusting

Filling:

  • 6 cups fresh or frozen blackberries (if using frozen completely defrost and drain excess juices, do not rinse)
  • 1 cup white sugar
  • 1/4 cup Corn Starch
  • Juice of half a lemon

Directions:

In a large bowl mix the flour, salt and sugar together. Add the cold butter and shortening. Cut the butter and shortening into the flour mixture using a pastry cutter or two forks until the chunks of butter and shortening are the size of small peas.

Drizzle in the ice water and stir the mixture to bring the dough together. Continue to add water until the dough starts to clump and form a ball. Form the dough into a ball. Cut dough in half and form each half into discs. Wrap each disc tightly in plastic wrap, and chill in the fridge for at least 1 hour.

Preheat the oven to 400°F (204°C).

Mix together berries, lemon juice, corn starch and sugar. Set aside.

Roll out one of the discs to fit your pie tin. Gently place the dough into the pie tin. Pour the berry mixture into the tin. Discard any extra juice from the filling (it will make the pie watery). Roll out the second disc. Gently place the top crust onto the pie.

Gently fold over and seal the edges of the pie to form a crust. Mix together egg and water. Use a pastry brush to cover the pie in egg wash. Sprinkle sugar over the pie. Using a sharp knife cut vent holes into the crust.

Bake the pie for 45 – 60 minutes until golden brown. Cover the pie with foil partway through cooking if the pie browns too quickly.

Cool for at least 20 minutes before serving.

Adapted from Crisco.


« Previous Page

Primary Sidebar

Danielle at Home

Hi, I’m Danielle. I am a twenty something woman working her office job by day and blogging at night! I’m married, a new home owner and I love sharing all my favourite things on this blog. So grab a glass of wine and follow along. I’m so glad you’re here!

SUBSCRIBE & FOLLOW

Pinterest
Instagram
Facebook
Twitter

Footer

Copyright © 2025 Danielle at Home on the Foodie Pro Theme