• Skip to primary navigation
  • Skip to main content
  • Skip to primary sidebar
  • Skip to footer

DANIELLE AT HOME

  • HOME
    • About
    • Contact
  • LIFESTYLE
    • Favourites
    • Goals
    • Home
      • DIY Projects
      • Organization
    • Holidays
      • Christmas
      • Easter
      • Halloween
      • New Years
      • Thanksgiving
      • Valentine’s Day
      • Gift Guides
  • STYLE
  • WELLNESS
  • FOOD + DRINK
    • Appetizers
    • Breakfast
    • Dessert
    • Drinks
    • Side Dishes
    • Snacks
    • Holiday Recipes
      • Christmas
      • Cinco De Mayo
      • Easter
      • Father’s Day
      • Halloween
      • Mother’s Day
      • New Years
      • St. Patrick’s Day
      • Thanksgiving
      • Valentine’s Day

Danielle

Sautéed Brussels Sprouts

November 1, 2018 by Danielle 2 Comments

IMG_20181026_115931

Happy November! Do you get excited for a new month? I don’t normally, but now that we are heading into the holiday season I was very excited for this new month.

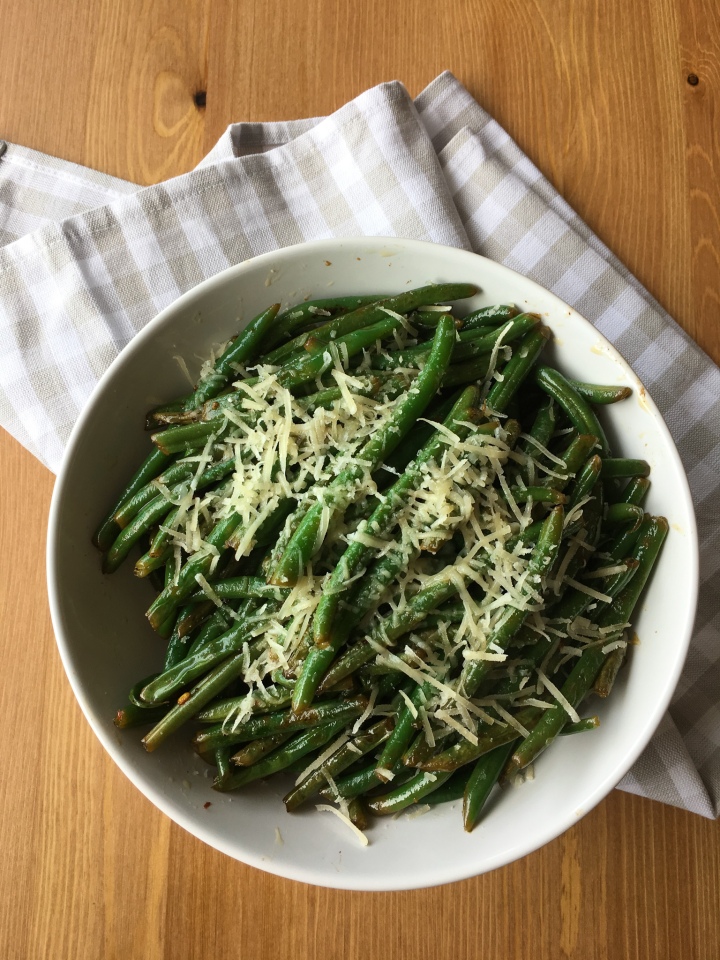
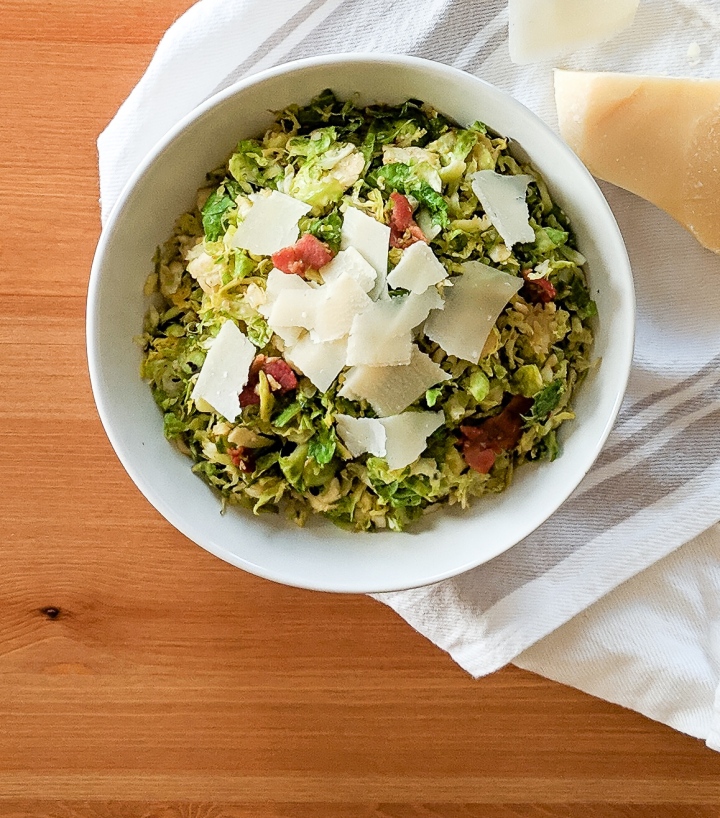
Today I will be sharing a recipe for Sautéed Brussels Sprouts. This recipe is delicious on your Thanksgiving or Christmas table, but so simple you could throw it together on a typical weeknight (we do!). Now I know that brussels sprouts are a polarizing vegetable, but I think even a brussels sprout hated would enjoy this recipe.

IMG_20181026_120223

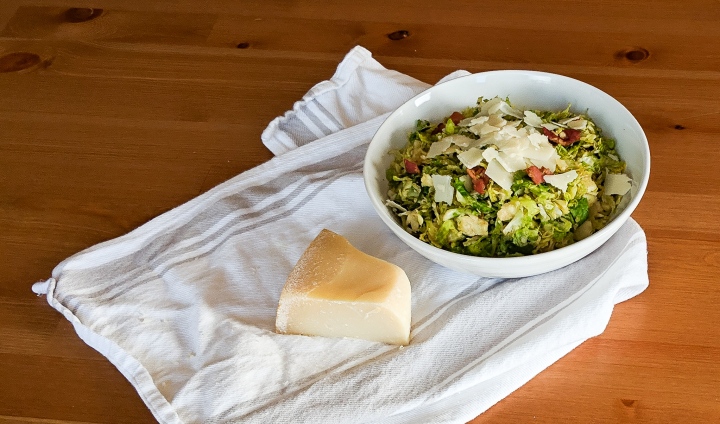
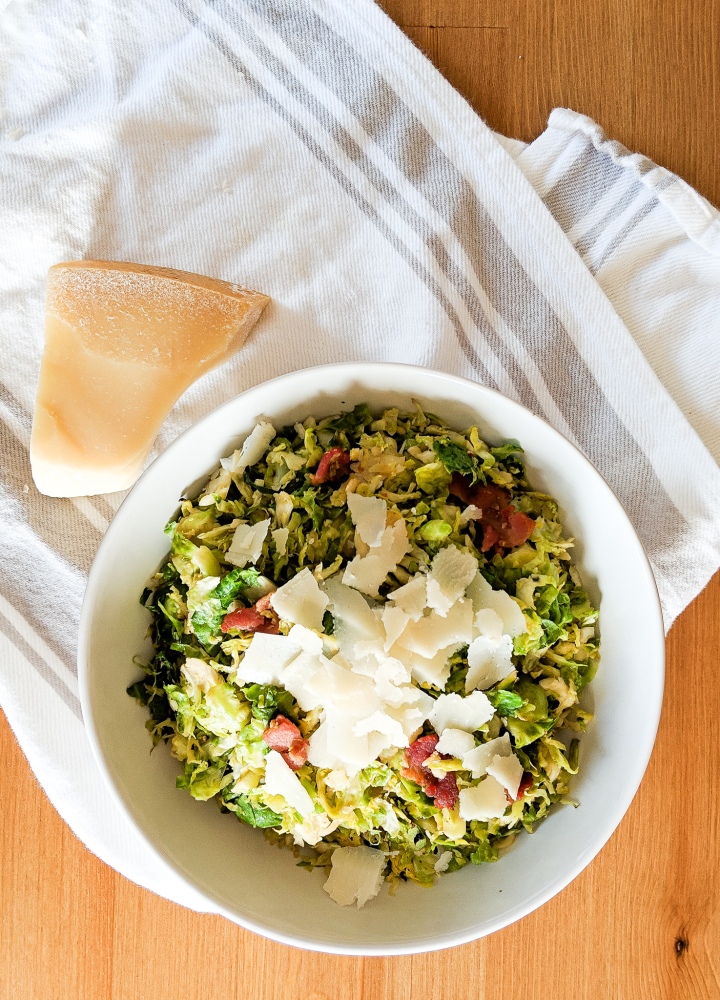
I like to sauté shaved brussel sprouts instead of cooking them whole. Not only do they cook fast but I have found that people who claim not to like brussels sprouts will like them way better if they are shaved like this. Also add bacon, garlic and cheese to anything and I’m totally sold.

IMG_20181026_120241

Sautéed Brussels Sprouts

Yields: 4-6 Servings

Ingredients:

  • 1 lbs Brussels Sprouts
  • 2 Sliced Bacon, diced
  • 1 Garlic Clove, minced
  • 2 Teaspoon Worcestershire Sauce (soy sauce can be substituted)
  • Fresh Parmesan Cheese
  • Salt and Pepper, to taste

Directions:

Trim the end off the brussels sprouts and remove outer leaves. Use a food processors grater attachment of a knife to shave brussels sprouts. Alternatively you can buy a bag of pre cut brussels sprouts. Set aside.

In a frying pan cook diced bacon over medium heat until starting to crisp, about 3-5 minutes. Drain off excess fat. I leave just enough bacon fat in the pan to coat and discard the rest. Add brussels sprouts to the pan. Sauté over medium heat for 2 minutes. Add minced garlic and sauté for 4 minutes. Add Worcestershire sauce and salt and pepper to the pan. Sauté for another minute.

Transfer to a serving dish and top with freshly grated or shaved parmesan. Serve immediately.


You may also like…

IMG_3124

Lemon Parmesan Green Beans


Homemade Caramel Corn

October 30, 2018 by Danielle 2 Comments

IMG_20181012_142119

BOO! I have one more Halloween post before the big day tomorrow! I hope you all enjoy the fun and spooky day, and if you have kids I hope they have the best time trick or treating! Like I said in this post, I wish I could go! Anyway I hope you are all doing something festive (I love festive!).

Today I thought I’d share one of my favourite fall recipes that I think is the perfect treat for Halloween night! I think this is a great recipe if you’re staying in watching a scary movie, or if you’re having people over for a Halloween party. I know I get sick of these mini chocolate bar and prefer to have festive fall treats at Halloween parties.

Tomorrow we will be snacking on Caramel Corn, drinking a beer and watching a scary movie. Oh and by scary movie I mean Hocus Pocus….it’s the scariest movie I can handle (Pathetic I know!).

IMG_20181012_142314_1

I always found caramel intimidating, so I never tried making my own caramel corn until recently. Once I did I felt really silly for waiting so long since it is incredibly easy! It’s perfect for halloween or really and day ending in Y! We’re addicted! So please give this a try it’s really easy and really delicious!

IMG_20181012_142115

Homemade Caramel Corn

Yields: 12 Cups

Ingredients:

  •  12 Cups Popped Popcorn (1 cup kernels, approx.)
  •  1 Cup Unsalted Butter
  •  1 1/2 Cup Brown Sugar, packed
  •  1/3 Cup Light Corn Syrup
  •  1/2 Teaspoon Vanilla Extract
  •  1 Teaspoon Salt
  •  1 Teaspoon Baking Soda

Directions:

Preheat oven to 225 degrees F. Line a large baking sheet (you may need two) with parchment paper. Spread popcorn evenly on baking sheet, and set aside.


In a medium saucepan on medium heat add butter, brown sugar and corn syrup. Whisk together until butter has melted and ingredient combine into a smooth sauce. This will take 3-5 minutes. Add vanilla, salt and baking soda to the sauce. Whisk constantly. Sauce will lighten in colour and increase in volume. Continue to cook for 2-4 minutes to thicken, whisking constantly. Remove from the heat.

Pour sauce over the trays of popcorn. Use a spatula (silicone is best) to toss popcorn and coat. This does not need to be perfect.

Bake popcorn for 30 minutes. Check on the popcorn every 10 minutes. Remove the baking sheet from the oven and toss the popcorn again to continue coating and breaking up chunks. Repeat this process 2-3 times over the 30 minute baking time.

Remove baking sheet from the oven set aside and allow to cool for at least an hour. Check on your popcorn after 30 minutes to break up any large clumps that are forming. Once fully cool serve immediately or store in an airtight contained for up to 5 days.


Adapted from Homemade Hooplah, Homemade Caramel Popcorn.

Poisoned Apple Cocktail

October 25, 2018 by Danielle Leave a Comment

IMG_20181012_124425-3

I feel like people either love or hate Halloween. My husband, Calvin falls into the later camp. Always has and always will (even as a kid!). There are some aspects of the holiday he does enjoy… carving pumpkins, watching scary movies and of course the candy.

I grew up loving Halloween. I loved dressing up and trick or treating with my friends. As an adult I am not as big of a fan. Maybe because I’m not into crazy parties? I am more into pumpkins, candy and corn mazes. Also is 25 too old to go trick or treating? Asking for a friend.

One thing we both love regardless of the holiday is a festive cocktail!

IMG_20181012_124827-2

So today I’m sharing the perfect cocktail for your Halloween celebrations. This cocktail is right up my ally because it sweet, but not too sweet and has a nice warming spice for fall. It is also a deep red colour which looks spooky for Halloween. If you really want to up the spook factor add a drop or two of black food colouring to really deepen the colour of your drink!

This recipe is really simple, but I like it because it’s not fussy like some cocktails. You can make a big pitcher in advance of your guests arrival. As always I have the measurements for one drink and a full pitcher listed below.

IMG_20181012_124416-2

Poison Apple Cocktail

Yields: 1 Serving or Pitcher

Ingredients:

Single Serving:

  • 2 Ounces Spiced Apple Cider
  • 1 Ounce Pomegranate Juice
  • 2 Ounces Vodka or Apple Vodka

Pitcher (12 Servings):

  • 3 Cups Spiced Apple Cider
  • 1 1/2 Cups Pomegranate Juice
  • 3 Cups Vodka or Apple Vodka

Directions:

For a single serving fill a cocktail shaker with ice. Pour apple cider, pomegranate juice and vodka into shaker. Shake cocktail until cold. Pour into stemware of choice.

For pitcher add apple cider, pomegranate juice and vodka into a large pitcher. Chill in your fridge until ready to serve. Pour into stemware of your choice.

Adapted from Julep.

You may also like…

IMG_3955

Hot Apple Cider


IMG_20181020_120841

Whole Wheat Banana Pancakes with Brûlée Bananas

Whole Wheat Banana Pancakes with Brûlée Bananas

October 23, 2018 by Danielle 4 Comments

IMG_20181020_120841

I have had that Jack Johnson song Banana Pancakes stuck in my head all week, so on Saturday when I woke up early and had nothing on the agenda for the day I thought I’d make a special breakfast of Banana Pancakes. I decided to switch things up a bit and add brûlée bananas to the top…. Yum!

IMG_20181020_120608

I like to use whole wheat four whenever I can since it has added fibre. I also love the nutty flavour which compliments banana really well. The problem with whole wheat flour is that it can create tough pancakes that sit in your belly like a rock! So I’ve added extra moisture to keep these pancakes light and fluffy!

IMG_20181020_120819

Now the brûlée bananas are an extra special touch that really doesn’t take much effort at all. The banana caramelize and sweeten which is a nice addition to the soft fluffy pancakes. I like to top my pancakes with butter and a little maple syrup, but next time I’m adding walnuts for some extra crunch!

These were so good, I hope you give them a try!

IMG_20181020_120537

Whole Wheat Bananas with Brûlée Bananas

Yields: 8-10 Pancakes (depending on size)

Ingredients:

Pancakes:

  • 1 1/3 Cup Whole Wheat Flour
  • 1/4 Teaspoon Salt
  • 2 Teaspoons Baking Powder
  • 1/2 Teaspoon Cinnamon
  • 1 Egg
  • 1 1/4 cup Milk (any kind)
  • 2 Tablespoons Butter, melted
  • 1 Ripe Banana, mashed
  • 1 Tablespoon Brown Sugar
  • 1 Teaspoon Vanilla Extract

Brûlée Bananas

  • 2 Tablespoons Turbinado Sugar (raw brown sugar) or White Sugar
  • 1 Large Banana, Sliced

Directions:

Move the rack in your oven to the top position closest to the element. Preheat your oven to broil (500°F). Place Turbinado or white sugar in a small bowl. Dip one side of the banana slices into sugar and place on cookie sheet. Broil bananas until sugar crystallizes and starts to brown. This will take 2-5 minutes depending on your oven. DO NOT walk away from oven, check on bananas every 30 seconds to 1 minute. Do not let bananas burn.

Once caramelized set bananas aside to cool.

In a large bowl mix together flour, salt, baking powder and cinnamon. Set aside. In a small bowl whisk banana, butter and egg together. Add milk, brown sugar and vanilla extract to wet ingredients. Whisk until smooth. Pour wet ingredients into dry and fold together using a spatula or wooden spoon. Mix until just combined. Set aside until ready to use.

Preheat a skillet or grilled over medium heat. Once warm grease pan with a small amount of butter or oil. Pour 1/3 cup of batter onto skillet. Cook until bubbles form on surface of the pancake, about 2-3 minutes. Flip and cook the second side until golden brown, about 1-2 minutes.

Serve pancakes with butter, broiled bananas and maple syrup.

Adapted from Sally’s Baking Addiction and Entertaining with Beth.


You may also like…

IMG_3074

Yeast Raised Waffles

Apple Cinnamon Scones with Maple Glaze

October 18, 2018 by Danielle Leave a Comment

IMG_20180928_123811

I remember when I was a little girl helping my Grandma prepare for her Y’s Menette meeting’s. We would make tea sandwiches and treats together and prep the living room for the meeting. She would let me hang around the meetings for a few minutes to have a snack and then I would go off to help Grandpa in the garden or play some cards. I thought she was so fancy making her afternoon tea.

IMG_20180928_123759

Afternoon tea is never complete without scones. I have been making scones with my Grandma almost as long as I have been making pies. My Grandma used a recipe passed down to her from her mother. My mom uses the same recipe and at my bridal shower my Grandma gave me a copy of the recipe. Now the original recipe has gotten rave reviews from family and friends for years, they really are the best, but I’m not sure if I’m ready to share the family secret just yet.

Today I am sharing a variation of the original recipe, Apple Cinnamon Scones with Maple Glaze. Perfect for fall and I think Grandma would approve. I made these scones with some whole wheat flour because I like the nutty flavour it has which compliments the cinnamon and apple. I also added the glaze to the scones, because everything is better with maple glaze.

IMG_20180928_123759-2

Whole Wheat Apple Cinnamon Scones with Maple Glaze

Yields: 8 Scones

Ingredients:

Scones:

  • 1 1/4 Cup All Purpose Flour
  • 3/4 Cup Whole Wheat Flour
  • 2 Teaspoons Baking Powder
  • 1 Teaspoon Cinnamon
  • 1/4 Teaspoon Salt
  • 1/4 Cup Granulated Sugar
  • 1/3 Cup Unsalted Butter, cold and cubed
  • 1 Apple, diced
  • 1 Large Egg
  • 3/4 Cup Milk ( I use 2%, but any dairy milk will work)

Glaze

  • 2 Cups Confectioner (Icing) Sugar
  • 1/4 Cup Pure Maple Syrup
  • 3 Tablespoons Half and Half

Directions:

Preheat the oven to 400° F. Line a baking sheet with parchment paper, set aside. Sift together flour, baking powder, cinnamon, salt and sugar. Using two forks or a pastry cutter cut butter into flour. Stir in the diced apple.

In a liquid measuring cup whisk together milk and egg. Pour 3/4 of a cup of the mixture into the dry ingredients, set the remaining mixture aside. Using your hands or a wooden spoon gently mix the wet and dry ingredients until just combined (some flour may still show).

Turn the dough onto a floured surface and form into a disk. Flatten the dough with your hands until it is 2 inches tall (do not use a rolling pin). Cut the dough into 8 wedges. Lay the scones on the baking sheet. Brush the scones with the reserved milk and egg mixture. Bake scones for 20-30 minutes until golden brown. Allow to cool completely.

In a small bowl whisk confectioner sugar, maple syrup and half and half together. Glaze should be opaque, thick and pourable.

Drizzle glaze onto cooled scones. Allow glaze to set before serving.

Adapted from, Granny Robinson’s Scones

Pressed Italian Sandwich

October 16, 2018 by Danielle Leave a Comment

IMG_20181012_153239-3

Italian and salami subs are my absolute favourite kind of sandwich. So last week when I discovered the most amazing asiago ciabatta bread I knew I have to combine this amazing bread with the fillings of my favourite sub. While looking for a little inspiration I came across Italian pressed sandwiches. I immediately wanted to try one.

So the recipe I have for you today is my version of an Italian pressed sandwich. It has salami, ham, provolone, roasted red peppers and arugula on it. I even whipped up a little basil mayo for it. This is insanely simple and quite frankly is barely a recipe.

These are the perfect replacement for tea sandwiches at a party. You can whip them up in advance and since ciabatta is such a hearty bread they don’t get soggy! These would also be perfect for packing in a lunch box for work or school, so yummy!

IMG_20181012_153242-2

Italian Pressed Sandwiches

Yields: 8 Sandwiches

Ingredients:

  • 1 loaf Ciabatta Bread (I used asiago ciabatta, but any will work)
  • 1/3 Cup Mayonnaise
  • 1/4 Cup Fresh Basil, chopped
  • 300 Grams Italian Cold Cuts (I used 200 grams salami and 100 grams ham)
  • 6-8 Slices of Provolone Cheese
  • 6 Roasted Red Peppers
  • 3 Cups Arugula
  • Salt and Pepper to taste

Directions:

In a small bowl mix together mayonnaise and basil, set aside. Slice the ciabatta loaf horizontally separating the top half from the bottom half. Spread the both sides of the bread with a thin layer of basil mayonnaise. Season both halves of the bread with salt and pepper if desired. Layer meat on the bottom half of the bread, layer the cheese next. Pat the roasted red peppers dry to remove excess oil (the dryer the better). Layer the peppers on the sandwich. Top with arugula and the the top half of the loaf.

Wrap the sandwich tightly in plastic wrap. Place the sandwich in the fridge. To get the pressed effect and weight to the top of your sandwich. I placed a cast iron skillet and some canned goods on top of my sandwich. Allow to sit in the refrigerator for at least 3 hours, but up to 12 hours. The flavours get better the longer they sit.

Remove sandwich from the fridge and cut into 8 pieces, trim the edges if desired. Serve immediately.

Adapted from Seasons and Suppers 


You may also like…

IMG_4081

Apple Cheddar Pecan Salad


« Previous Page
Next Page »

Primary Sidebar

Danielle at Home

Hi, I’m Danielle. I am a twenty something woman working her office job by day and blogging at night! I’m married, a new home owner and I love sharing all my favourite things on this blog. So grab a glass of wine and follow along. I’m so glad you’re here!

SUBSCRIBE & FOLLOW

Pinterest
Instagram
Facebook
Twitter

Footer

Copyright © 2025 Danielle at Home on the Foodie Pro Theme