Disclosure: This post contains affiliate links. As an Amazon Associate I earn from qualifying purchases. I only share products that I love! Thank you for your support.
Ok guys we are talking gifts for the baker today. This is the second post in my gift guide series for 2018. I can’t believe we’re getting so close to Christmas, but there is still time to finish your shopping! So let’s jump right into the gift guide!
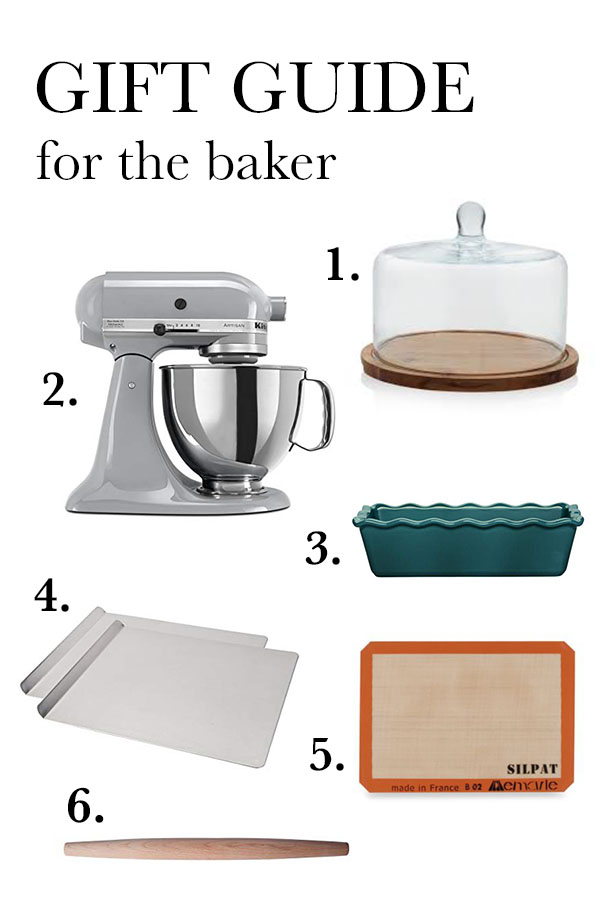
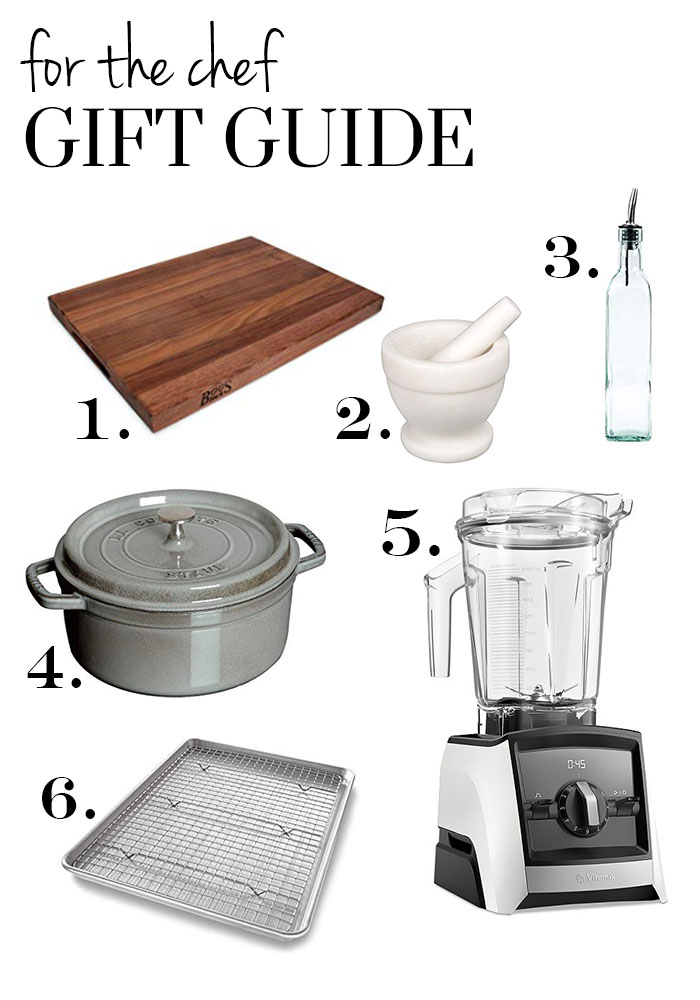
one / two / three / four / five / six
Just like the last gift guide everything on this list is either something I own and love or something on my own wish list!
- I love cake stands! I think they are so fun and this one with the wood and glass dome would be perfect to leave out on your counter full of muffins or treats! Libby Wood Cake Stand
- A Kitchen Aid mixer is a must for any baker! I think this is the perfect model for a home baker. For our first Christmas my husband (then boyfriend) bought me a Kitchen Aid Classic mixer. I cried on Christmas morning I was so happy! I had wanted one since I was a kid watching Martha and Ina! (totally normal right?) Since mines a Classic model I have taken to upgrading its attachments over the years, but if I ever have to replace it I will buy this one! KitchenAid Artisan Series
- I love decorative bakeware and Emile Henry makes beautiful pieces. I can’t wait to add to my collection. Fluted Loaf Pan
- These cookie sheets are perfection. My Grandma always used AirBake cookie sheets, so I use AirBake cookie sheets. I swear it’s impossible to burn your cookies. AirBake Cookie Sheets
- So this one has been on my list for a while… since I saw Martha use them when I was 8. Why didn’t I watch cartoons? Anyway, I would like to be a bit more green in 2019 and one easy way to do that is cut down on the amount of parchment paper I use. So I will be switching to Silpat, and fulfilling my life long dream to be more like Martha. Silpat Baking Mat
- I got this french rolling pin as a bridal shower gift and I love it! It’s so easy to use, it’s light, super affordable and it’s chic. I think Ina would approve (ok this is turning into TV chefs I admire). French Rolling Pin
- This USA sheet pan with cooling rack is probably one of my most used kitchen items. I use it for many recipes from making bacon in the oven to crisping up leftover pizza and it’s a must in my BBQ-less BBQ Chicken! I am slowly but surely getting all my friends and family to buy this awesome sheet pan combo! It’s easily my most used wedding gift! USA Sheet Pan and Rack
Ok everyone that’s it for the Bakers Gift Guide! Come back next Wednesday for my cookbook gift guide!
Disclosure: This post contains affiliate links. As an Amazon Associate I earn from qualifying purchases. I only share products that I love. Thank you for your support!