• Skip to primary navigation
  • Skip to main content
  • Skip to primary sidebar
  • Skip to footer

DANIELLE AT HOME

  • HOME
    • About
    • Contact
  • LIFESTYLE
    • Favourites
    • Goals
    • Home
      • DIY Projects
      • Organization
    • Holidays
      • Christmas
      • Easter
      • Halloween
      • New Years
      • Thanksgiving
      • Valentine’s Day
      • Gift Guides
  • STYLE
  • WELLNESS
  • FOOD + DRINK
    • Appetizers
    • Breakfast
    • Dessert
    • Drinks
    • Side Dishes
    • Snacks
    • Holiday Recipes
      • Christmas
      • Cinco De Mayo
      • Easter
      • Father’s Day
      • Halloween
      • Mother’s Day
      • New Years
      • St. Patrick’s Day
      • Thanksgiving
      • Valentine’s Day

Danielle

Homemade Salted Caramel Sauce

August 23, 2018 by Danielle 1 Comment

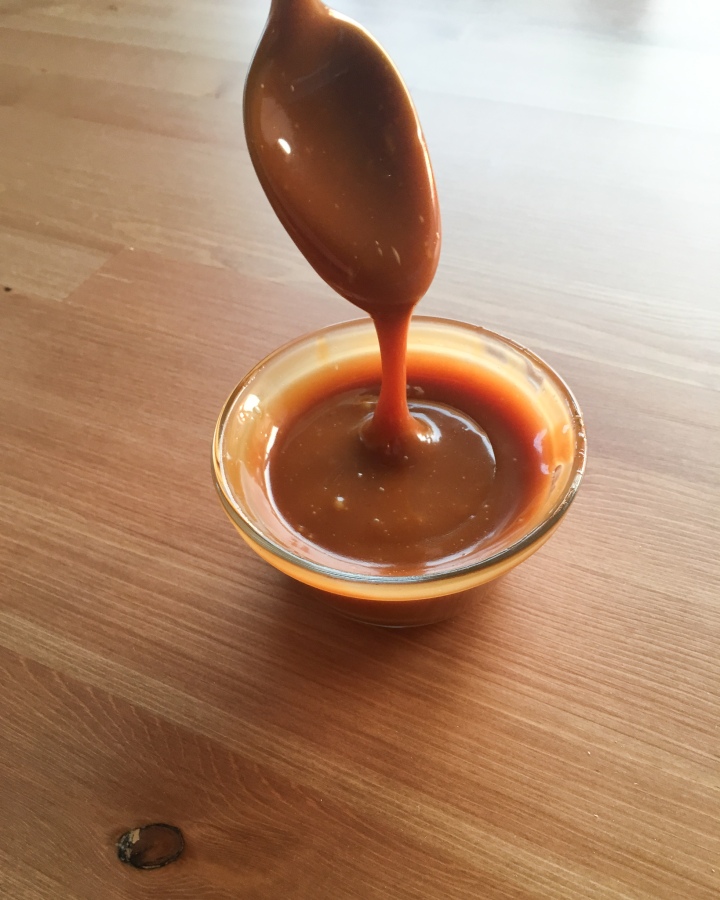
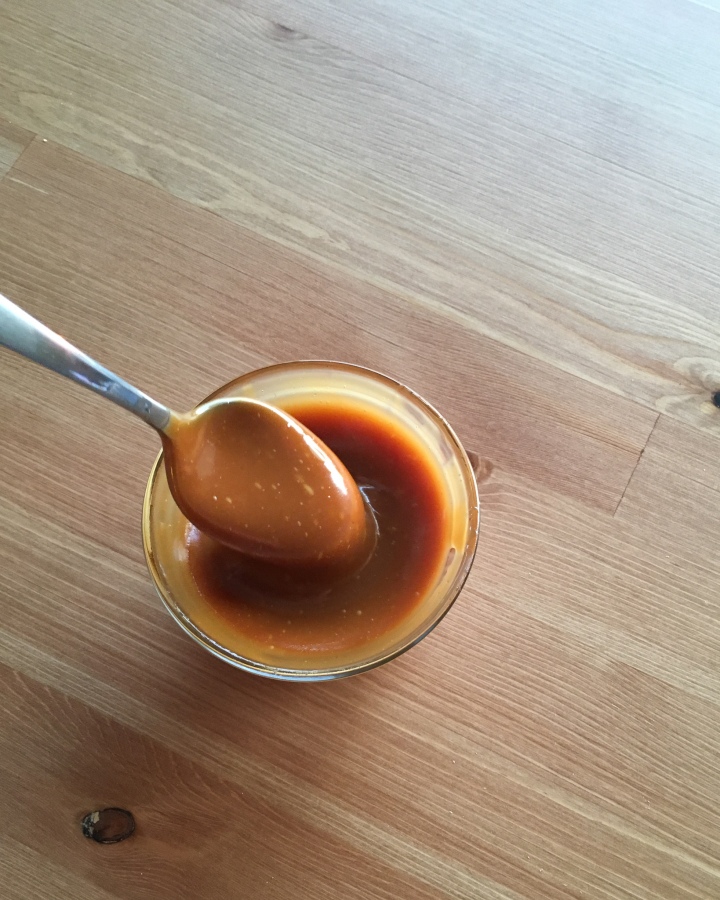
For caramel lovers this recipe is heaven on earth. This recipe has a deep caramel flavour, it’s sweet but balanced and has a finish of salt that rounds out the flavour.

IMG_3757

Now I know making caramel can be intimidating, but with a few tips you can conquer the caramel. Fist things first choose your pot. You want to use a medium or large-sized pot with high sides. This will ensure that your caramel wont boil over. Secondly choose your utensils. I like to use a silicone spatula for melting the sugar and a whisk for mixing in the butter and cream.

IMG_3770

Now the ingredients. Pre measure everything out before starting to cook. With caramel you have to work fast and you will burn your sugar if your other ingredients aren’t ready. I also like to leave my butter and heavy cream out on the counter for an hour or more before I start cooking. This helps bring the ingredients up to room temperature and will make mixing them into the caramel easier.

IMG_3769

This sauce is great on ice cream, brownies, pies, bars, a spoon… seriously addicting.

Have you ever made caramel before?

Yields: 1 cup

Ingredients:

  • 1 Cup White Sugar
  • 6 Tablespoons Salted Butter, room temperature cut into small pieces
  • 1/2 Cup Heavy Cream (30-40% milk fat, sometimes called whipping cream, double cream can also be substituted)
  • 1 Teaspoon Salt

Directions:

In a medium or large sauce pan melt sugar over medium heat, stirring constantly with a silicone spatula or a wooden spoon.

The sugar will start to clump, but will eventually melt and thicken slightly. Once the sugar fully melts and becomes amber in colour you can add the other ingredients.

Add the butter to the pan, the caramel will bubble rapidly, so be very careful. Using a whisk mix the butter into the caramel completely, this can take 2-3 minutes.

Very slowly drizzly in the heavy cream while whisking. Again be extremely careful as the mixture will bubble up again.

Allow to boil for 1 minute, the mixture will bubble up the pan slightly.

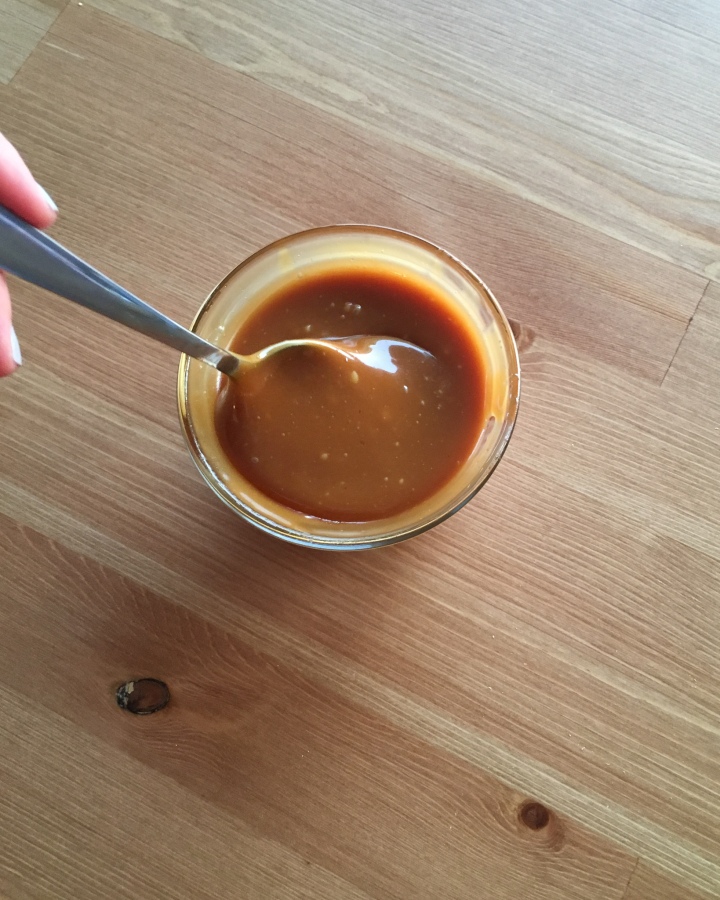
Remove the mixture from the heat and whisk in the salt. Pour caramel into a storage container and allow to cool before using.

The salted caramel sauce can be stored in the fridge for up to 2 weeks.

Adapted from Sally’s Baking Addiction

You might also like…

IMG_3193

Chocolate Chunk Cookies


BBQ-less BBQ Chicken

August 21, 2018 by Danielle 2 Comments

IMG_3581

This is the best BBQ chicken I have ever had. They are tender and flavourful and you don’t even need a barbecue.

I use chicken thighs in this recipe since I’m convinced they are impossible to overcook. I also use a sheet pan with a baking sheet on it to crisp the outside of the thighs. This also renders off the excess fat in the thighs.

IMG_3592

You could also of course use your barbecue for this recipe, but I like the convenience of using the oven. Plus you can enjoy it year round!

So are you team barbecue or oven?

Servings: 4

Ingredients:

  • 1 Pound Boneless Skinless Chicken Thighs
  • 2 Teaspoons Garlic Powder
  • 2 Teaspoons Onion Powder
  • 1 Teaspoon Chilli Powder
  • 1/2 Teaspoon Salt
  • 1/4 Teaspoon Fresh Ground Black Pepper
  • 1 Cup BBQ Sauce (my favourite)

Directions:

Preheat the oven to 400°F. Place a cooling rack on a sheet pan and grease the cooling rack with non stick spray.

Mix together garlic powder, onion powder, chilli powder, salt and pepper. Season the chicken thighs on both sides. Place chicken thighs on the cooling rack. Bake the the chicken thighs for 2o minutes, flipping half way through.

Remove chicken from the oven and baste the chicken thighs on one side with BBQ sauce. Bake for 5 minutes. Flip the chicken and baste the other side of the chicken with BBQ sauce. Repeat the process two more times.

Allow chicken to rest for 10 minutes before serving.


You might also like…

IMG_3578

Kale Caesar Salad

IMG_3130

The BEST Chicken Marinade

IMG_3126

Lemon Parmesan Green Beans


Pineapple Margarita

August 16, 2018 by Danielle Leave a Comment

IMG_3520

I love a good cocktail, and margaritas are at the top of my list! I like my margaritas fresh, unsweetened, shaken over ice in a short glass with a half salt rim. Can you tell I’m a bartenders dream… kidding.

The thing I love of this particular margarita is the twist of adding pineapple juice. It’s delicious and totally customizable to your taste. I love to sip on this with my favourite Mexican food. Chips, salsa, guacamole, tacos, enchiladas and fajitas.

IMG_3515

Now I’m so thirsty, is it 5 o’clock? So whats your favourite margarita?

Servings: 1

Ingredients:

  • 1 Ounce Tequila (silver or reposado are best)
  • 1/2 Ounce Cointreau
  • 1 Ounce 100% Pineapple Juice (no added sugar)
  • 1 Lime, juiced
  • Optional: Salt or sugar for rim, and agave syrup

Directions:

Fill a cocktail shaker with ice, and tequila, cointreau, pineapple juice, lime juice and agave if using. Shake until the cocktail shaker becomes very cold.

Rub the inside of the lime along the rim of your glass. Dip the glass into salt or sugar. Fill the glass with ice, and pour drink over the ice.


You might also like…

IMG_3475

Homemade Guacamole

IMG_3416

Steak Fajitas

Banana Nut Muffins

August 15, 2018 by Danielle 2 Comments

These are by far my favourite healthy muffins. They are moist and flavourful without any refined sugar. I love having snacks like this on hand during the week.

IMG_3425

My grandma taught me to always make my muffin batter by hand so that the muffins don’t get tough. This is especially important since whole wheat flour  has a tendency to make dry and tough baked goods. If you do decide to use a mixed be careful to mix just until combined.

IMG_3442

Sometimes I will make these with chocolate chips instead of nuts or a combination of both. I also just use whatever nuts I have in the house, walnuts, pecans, almonds and cashews are all great options.

Whats your favourite type of muffin?


Servings: 15 muffins

Ingredients:

  • 1 and 1/2 Cups Whole Wheat Flour
  • 1 Cup Old-Fashioned Oats
  • 2 Teaspoons Ground Cinnamon
  • 1 and 1/2 Teaspoons Baking Soda
  • 1/2 Teaspoon Salt
  • 3 Bananas, mashed
  • 3 Large Eggs
  • 1/3 Cup Coconut Oil, melted (or your favourite baking oil)
  • 1/3 Cup Honey (maple syrup can also be used)
  • 1/4 Cup Greek Yogurt (plain, vanilla or honey are best)
  • 1/4 Cup Almond Milk (or your preferred milk)
  • 1 Teaspoon Vanilla Extract
  • 1 Cup Chopped Nuts (any kind)
  • optional: Additional chopped nuts for topping

Directions:

Preheat oven to 350°F. Spray muffin pan with non stick spray or line with cupcake liners.

Whisk the flour, oats, cinnamon, baking soda, and salt together in a large bowl until combined. Set aside. In a medium bowl, mash the bananas. Then whisk in the eggs, oil, honey, yogurt, milk, and vanilla together until combined. Pour the wet ingredients into the dry ingredients, stir a few times, then add the nuts. Fold everything together gently just until combined and no flour pockets remain.

Spoon the batter into pan, filling them 3/4 of the way full. Top with chopped nuts, if desired. Bake for 20-25 minutes until a tooth pick comes out clean. Allow to cool in the muffin pan for 5 minutes. Then remove from the pan and allow to fully cool in a cooling rack.

Adapted from Sally’s Baking Addiction

Guacamole

August 9, 2018 by Danielle 1 Comment

Today I’m sharing with you my favourite recipe for guacamole. There has been a lot of trial and error to get here. On this mission I once dumped about a tablespoon of salt into a bowl of guac 5 minutes before party guests were to arrive. Everyone politely told me they liked salty guac, but it was barley eaten so I know they were a bunch of liars! But I have finally nailed it and we have been enjoying this recipe along side of our favourite Mexican dishes all summer.

IMG_3470

I like my guacamole to be fresh and cooling with a hint of heat, but feel free to add extra jalapeños if you like yours extra spicy. I also don’t add cilantro to my guacamole since I am in the percentage of people who hate cilantro and think it tastes like soap. It actually makes me sick. When I was in high school I was a cashier at a grocery store and whenever I would ring through cilantro I would hold my breath because even the smell made me feel sick, crazy right. Of course if you are a cilantro lover go for it! I wish I could join you!

IMG_3475

This recipes is the perfect amount for 2-4 people, I like to serve it with chips, hot salsa, fajitas and a margarita.

So do you love or hate cilantro?

Servings: 2-4 people

Ingredients:

  • 2 Medium Avocados
  • 1 Jalapeño, stem and seeds removed, minced (more or less to taste)
  • 2 Tablespoons Red Onion, minced
  • Juice of 1 Lime
  • 1/2 Teaspoon Salt
  • Dash of Cumin
  • Optional: 1/4 Cup Cilantro, chopped

Directions:

In a bowl mash together avocados, minced onion, minced jalapeño, lime juice, salt, cumin and cilantro if using. Mix together until well combined and reaches your desired consistency. Serve with tortilla chips or alongside your Mexican favourites.

Adapted from, Saveur

Greek Turkey Burgers

August 7, 2018 by Danielle Leave a Comment

These burgers are amazing! They are based on a burger served at a local gourmet burger restaurant. These have feta cheese, red onion and oregano. They are flavourful and juicy.

IMG_3482

I serve these burgers on a wheat bun with arugula, cucumbers and tzatziki. I love the mix of a warm juicy burgers with the fresh crunch of the cucumber and the cool creamy tzatziki.

These are delicious on there own or served with lemony greek potatoes and greek salad.

IMG_3497

So do you like a traditional burger or a twist on a classic?

Servings: 4

Ingredients:

  • 1 Pound Lean Ground Turkey
  • 1/4 cup Breadcrumbs
  • 1 Egg, beaten
  • 1/4 cup Feta Cheese, crumbled
  • 2 Tablespoons Olive Oil
  • 1/2 Teaspoon Oregano
  • 1/2 Teaspoon Salt
  • 1/4 Teaspoon Pepper
  • 4 Whole Wheat Hamburger Buns
  • Sliced Cucumber
  • Arugula
  • Tzatziki

Directions:

Mix together turkey, breadcrumbs, egg, feta cheese, oil, oregano, salt and pepper. Form mixture into 4 patties. Heat a fry pan or grill over medium heat. Cook the burgers 7 minutes per side until the centre of the patty reaches 165°

Place the burgers on the buns and top as desired.

« Previous Page
Next Page »

Primary Sidebar

Danielle at Home

Hi, I’m Danielle. I am a twenty something woman working her office job by day and blogging at night! I’m married, a new home owner and I love sharing all my favourite things on this blog. So grab a glass of wine and follow along. I’m so glad you’re here!

SUBSCRIBE & FOLLOW

Pinterest
Instagram
Facebook
Twitter

Footer

Copyright © 2025 Danielle at Home on the Foodie Pro Theme